Sashes, Leaves & False Mullion
7.1 Build the frame as per the install guide.
7.2 Place the frame into the aperture making sure it is level and square. Secure the top and bottom but leave the jamb floating. (You may pack the side that you are starting with).
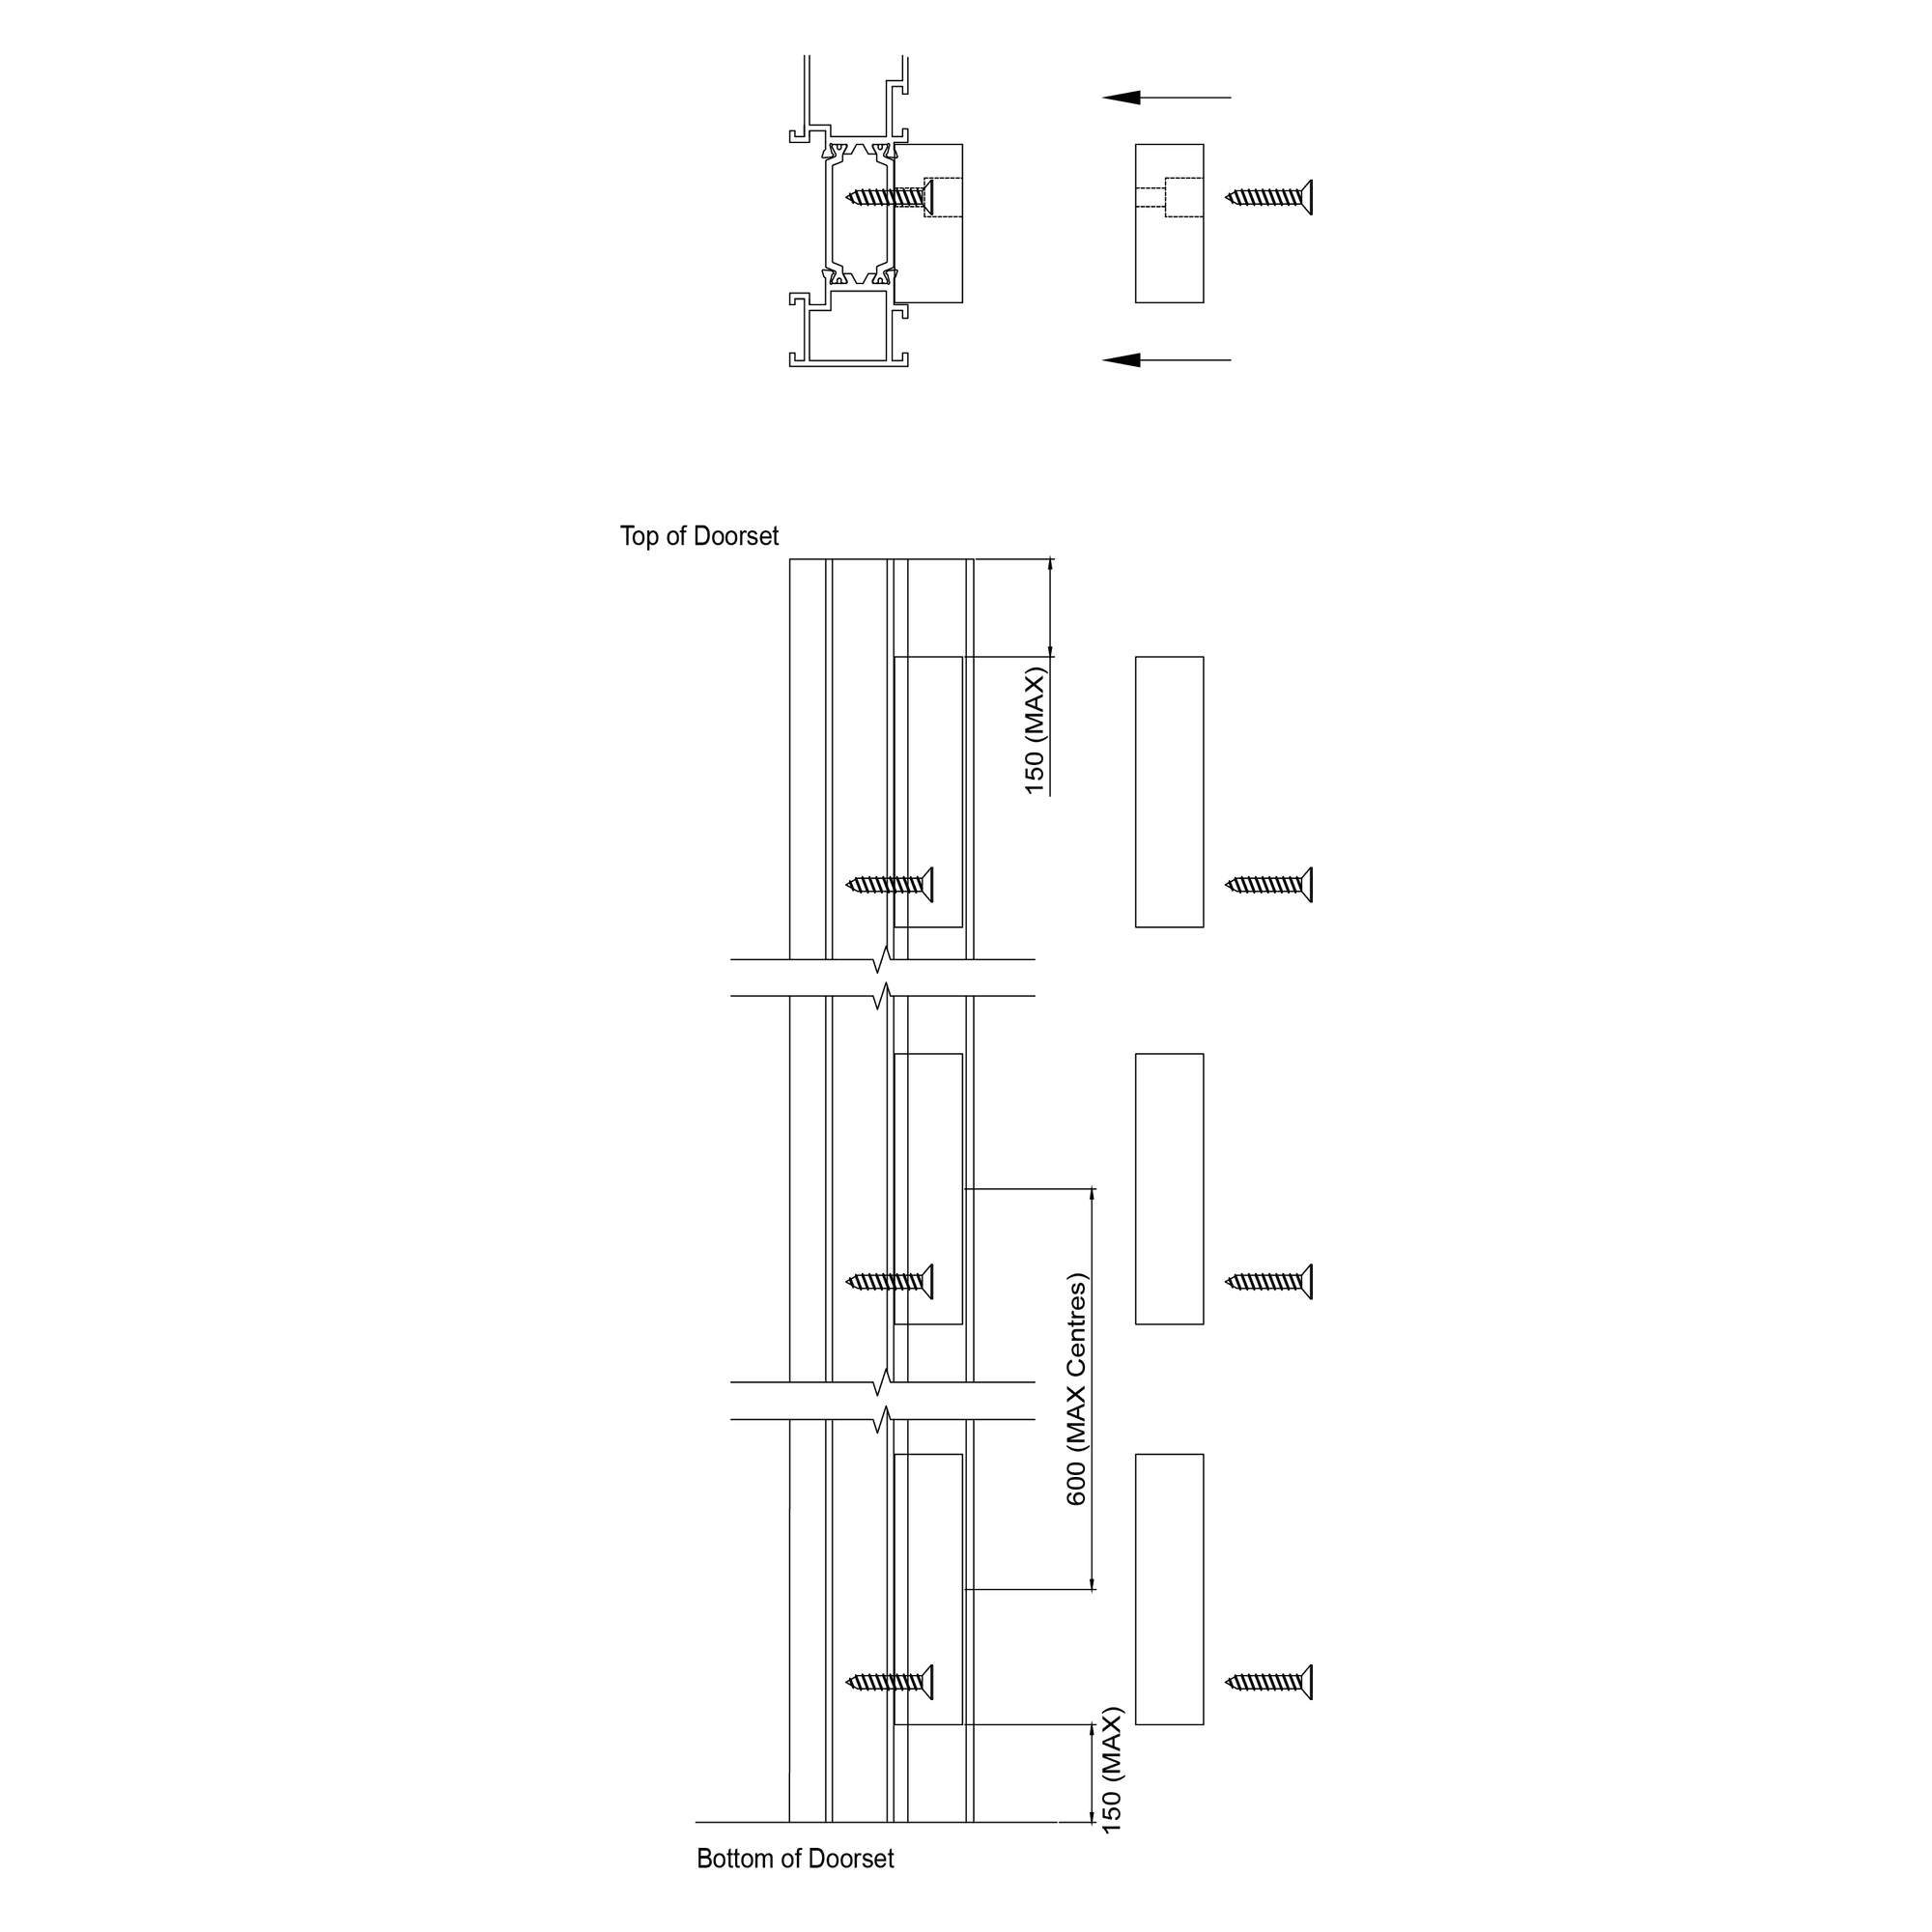
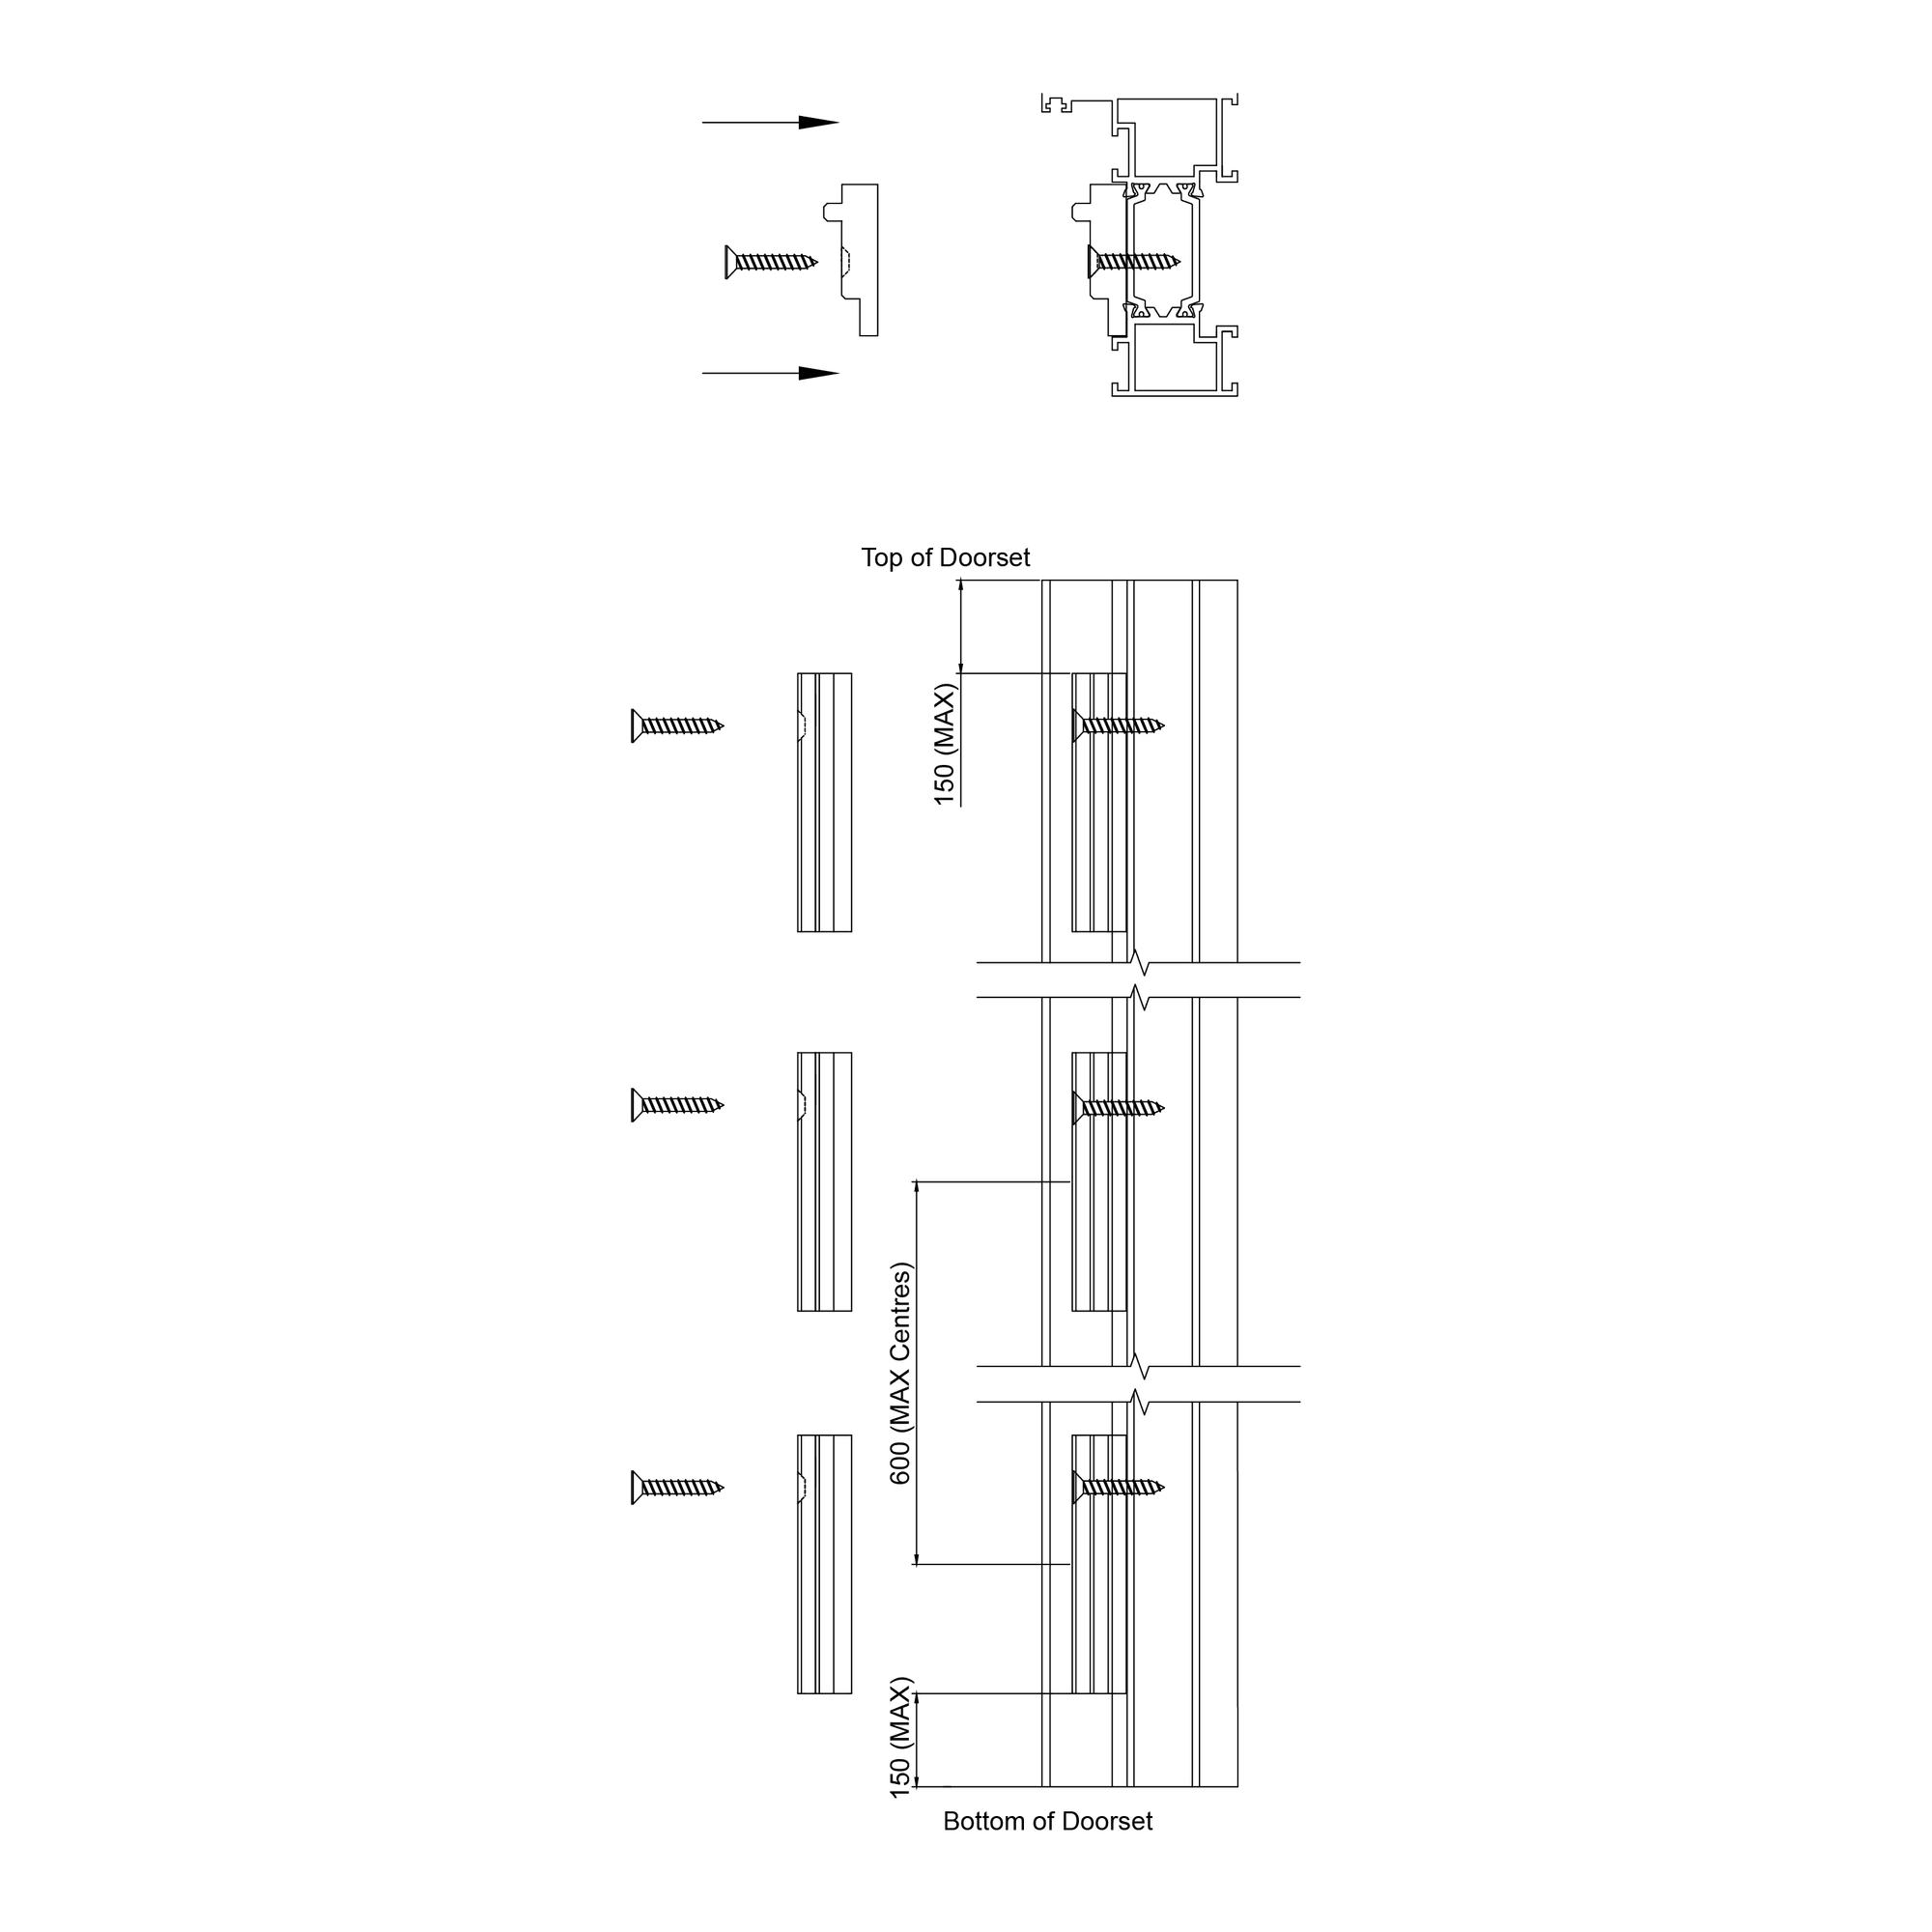
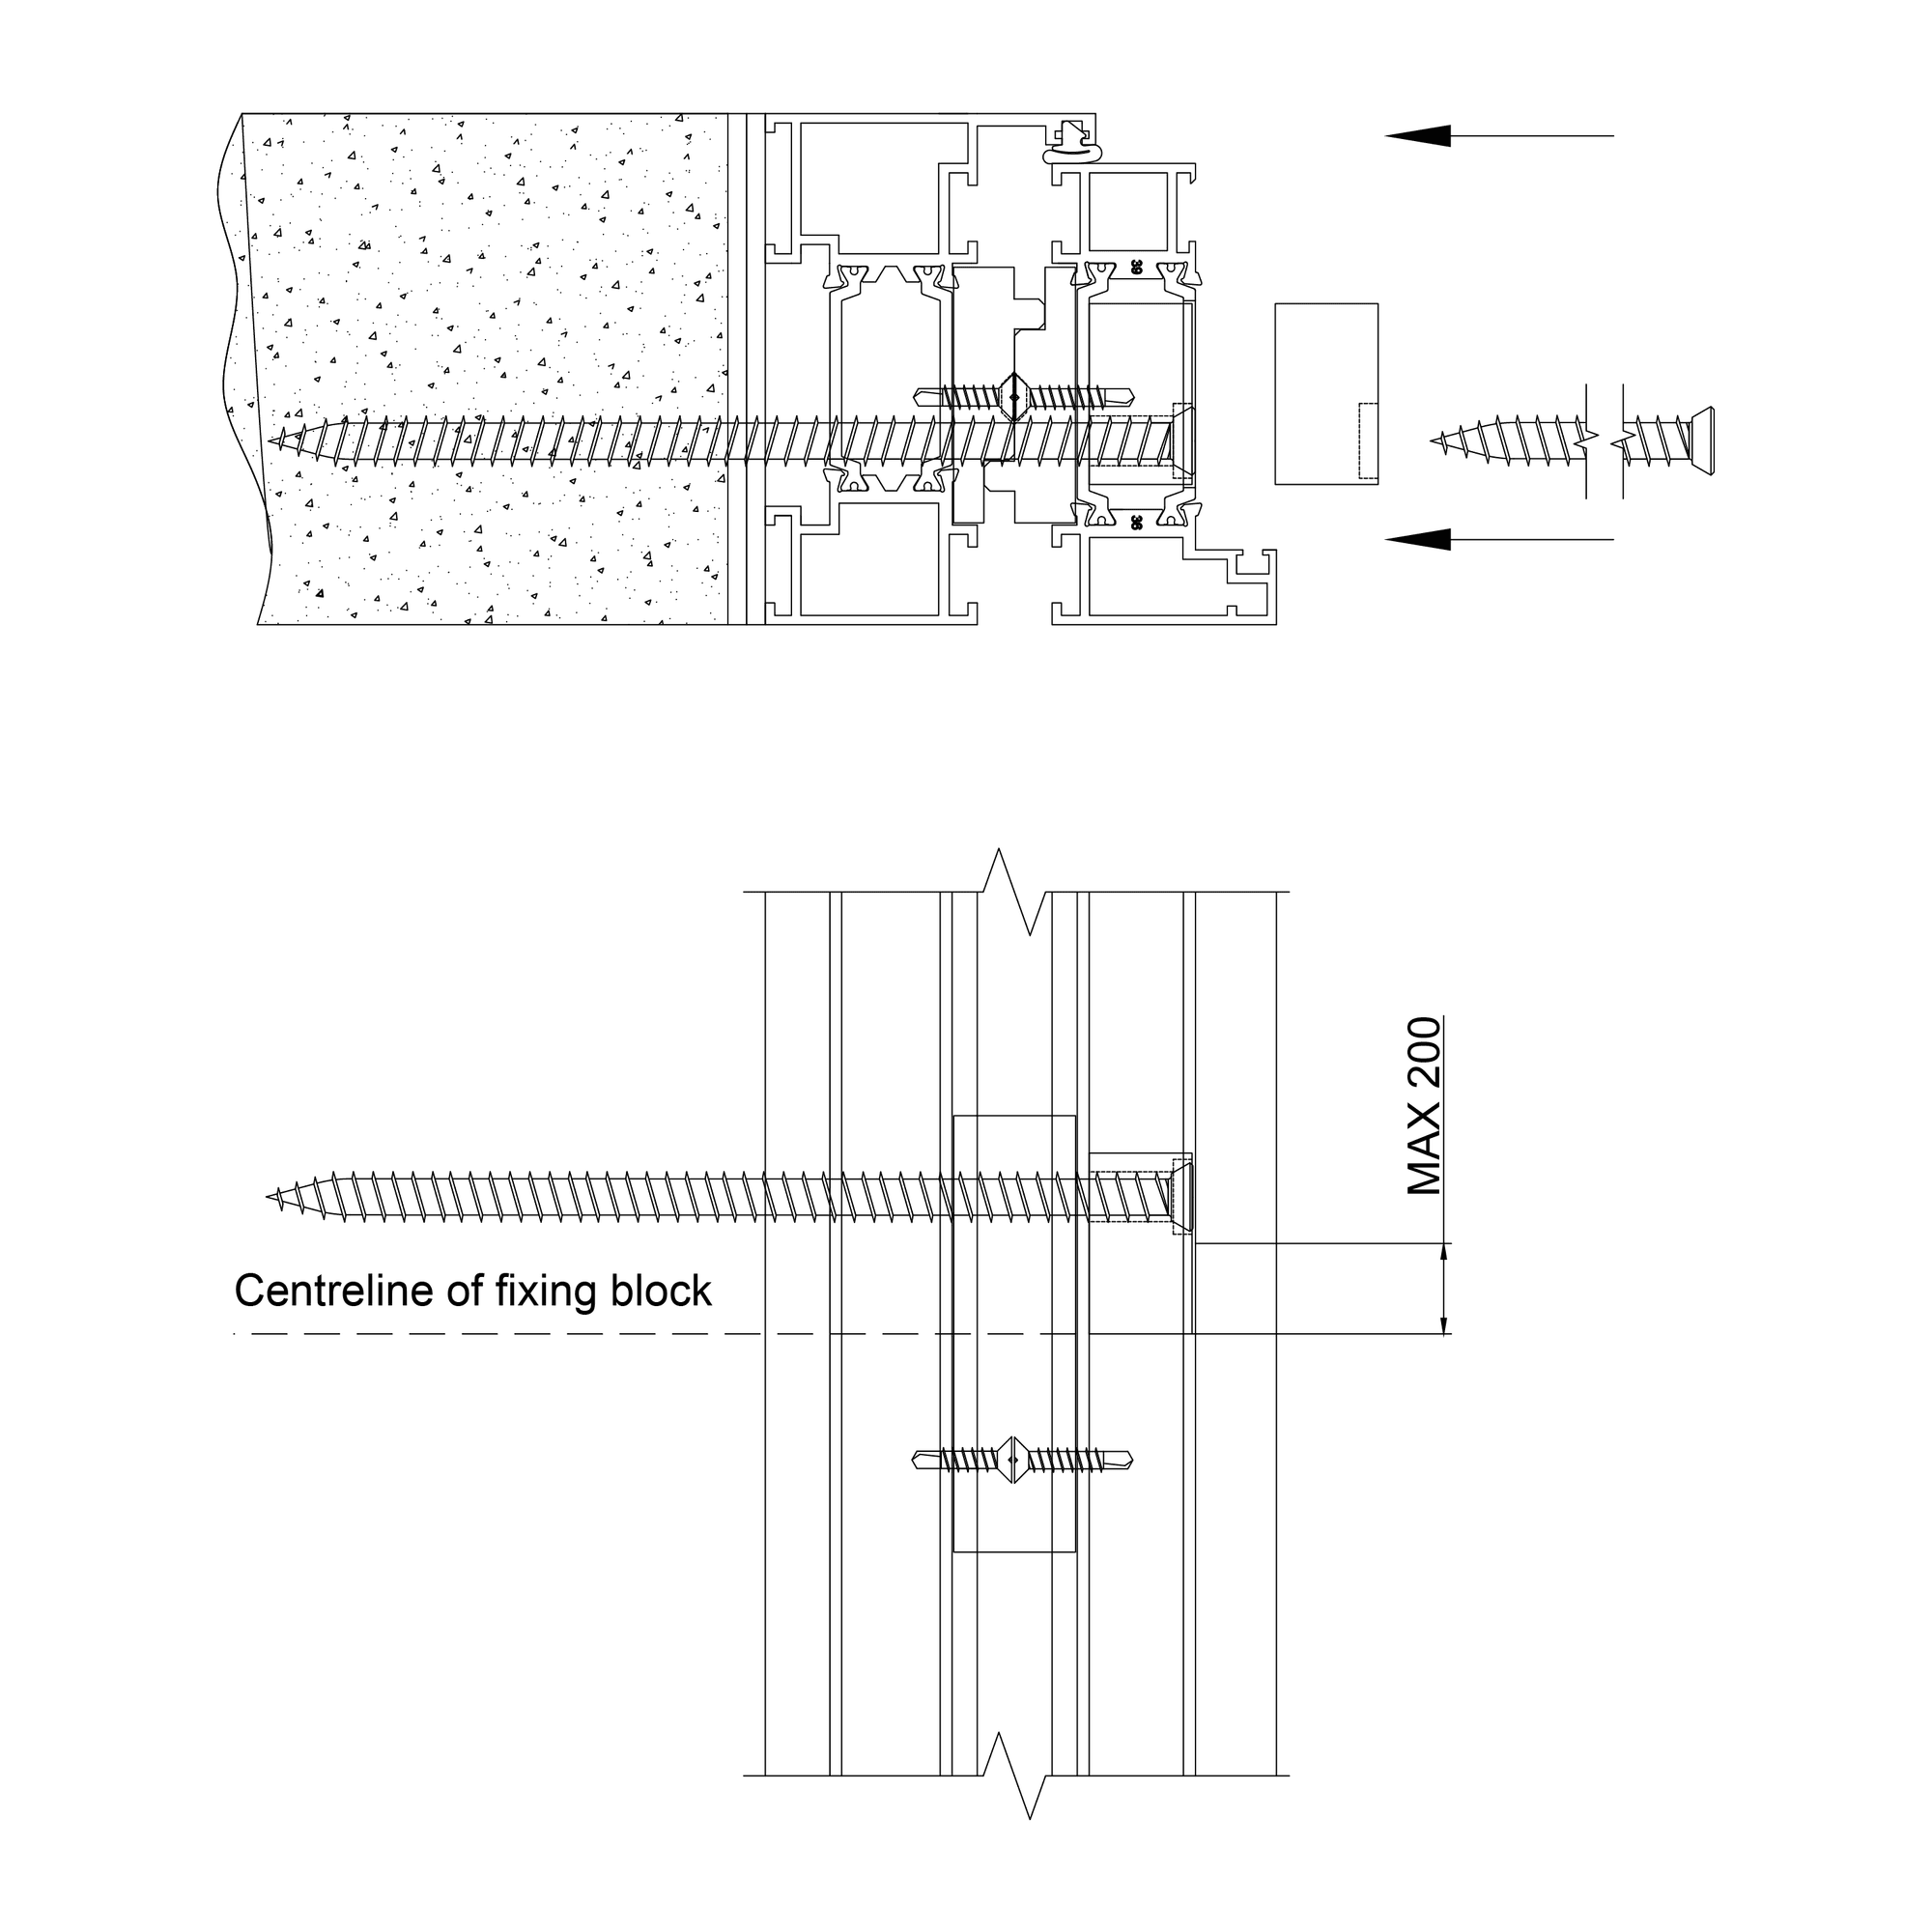
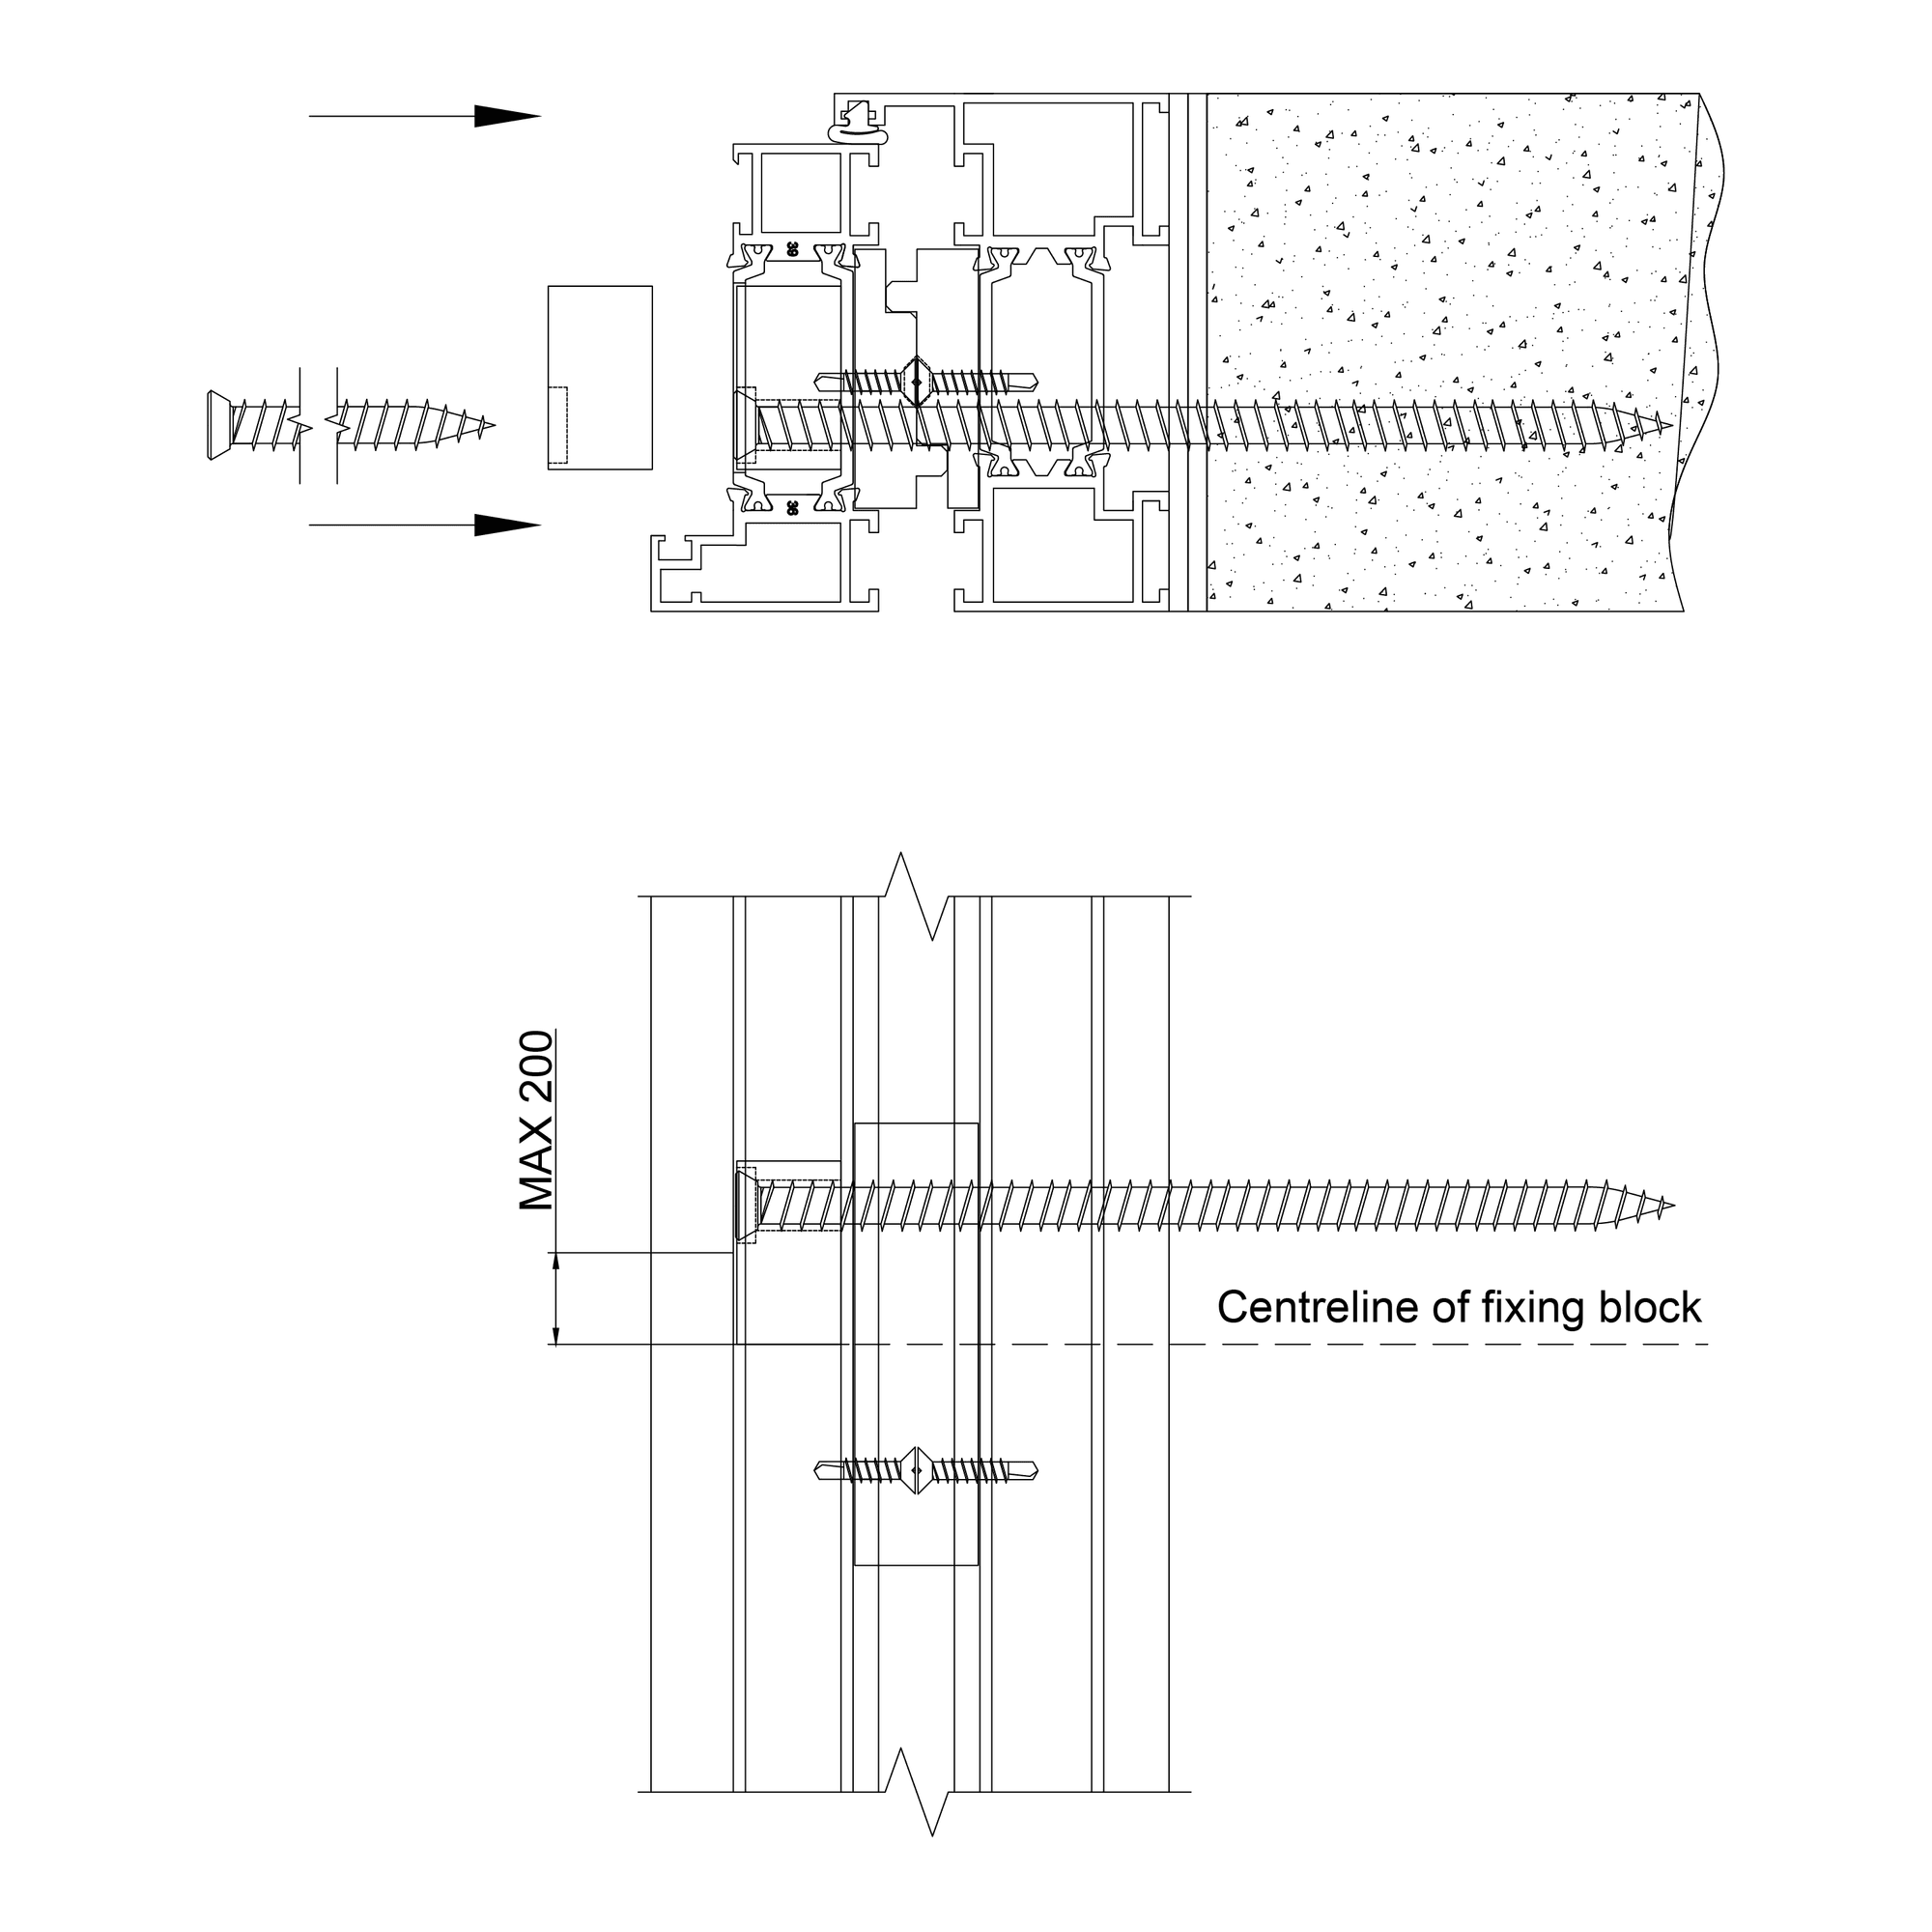
7.3 Start from the left to the right. Fix the jamb to sash blocks (solid blocks) on the left jamb through the hole in the block into the polyamide, using the self-tapping screws provided. Line these up with the jamb packers that you have fixed in the frame to meet building regulations and to get a good fixing (FIG A). It is a good idea to mark the blocks on the jambs for when fixing the sides.
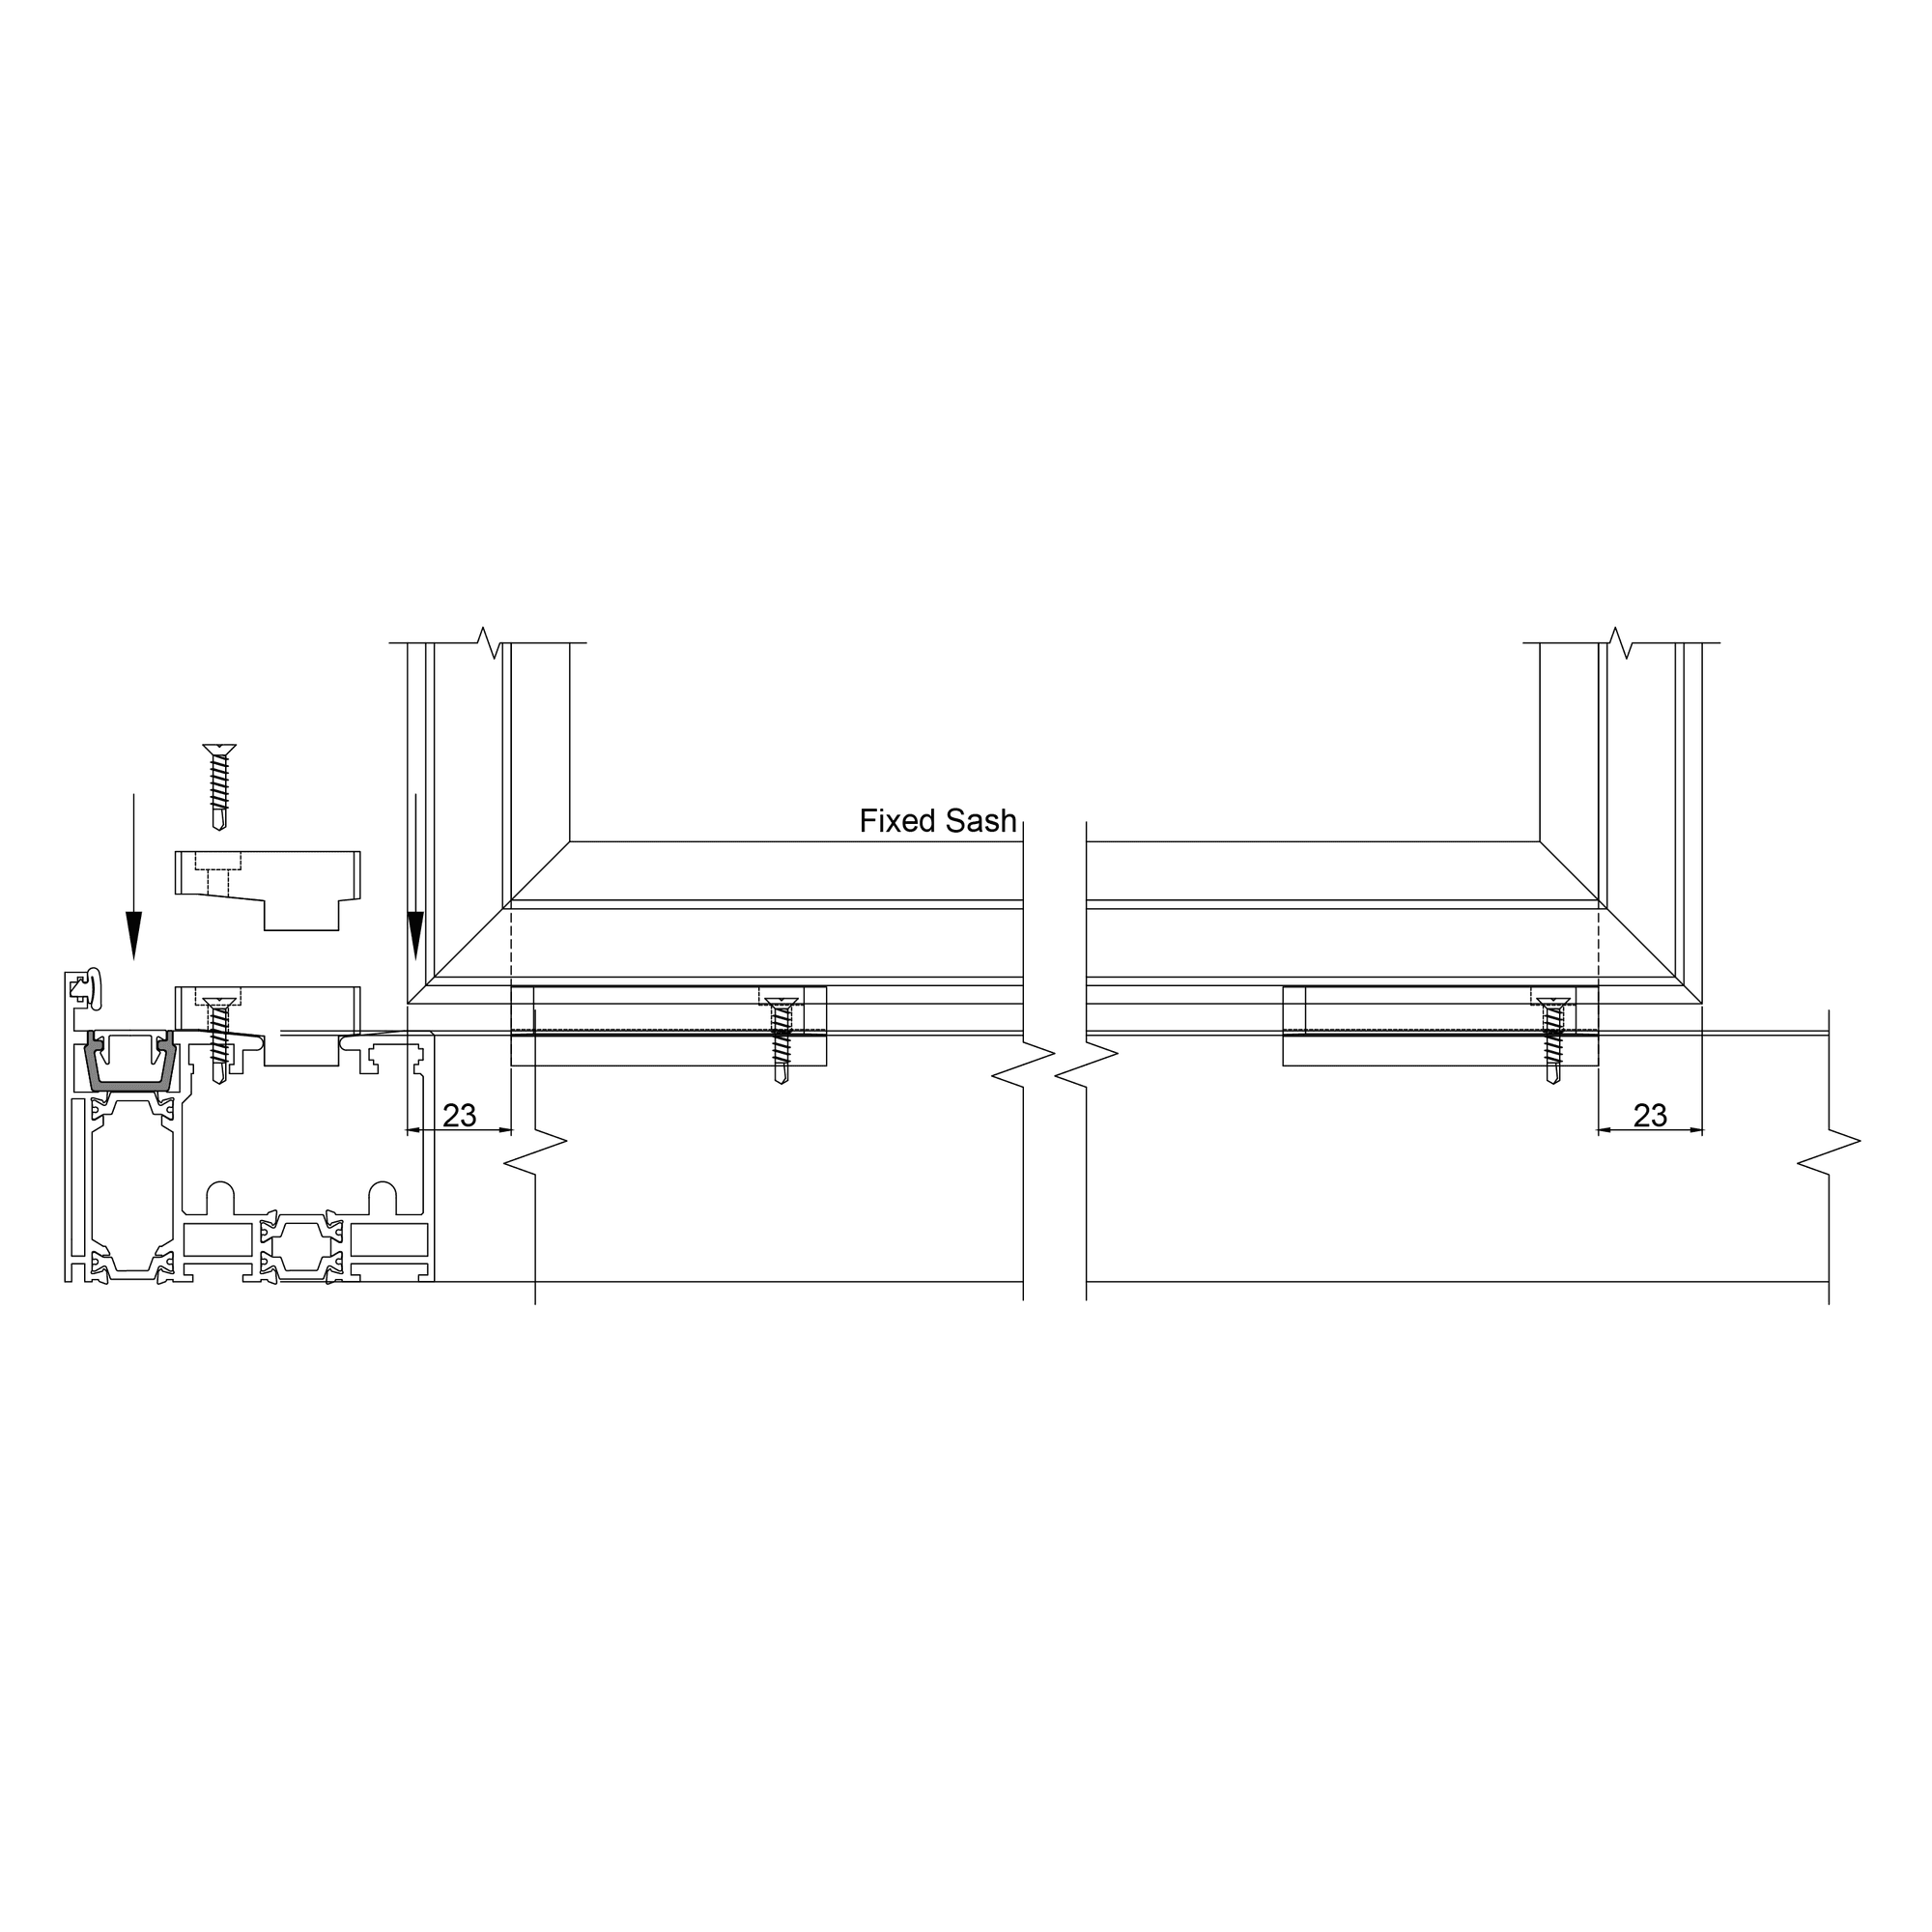
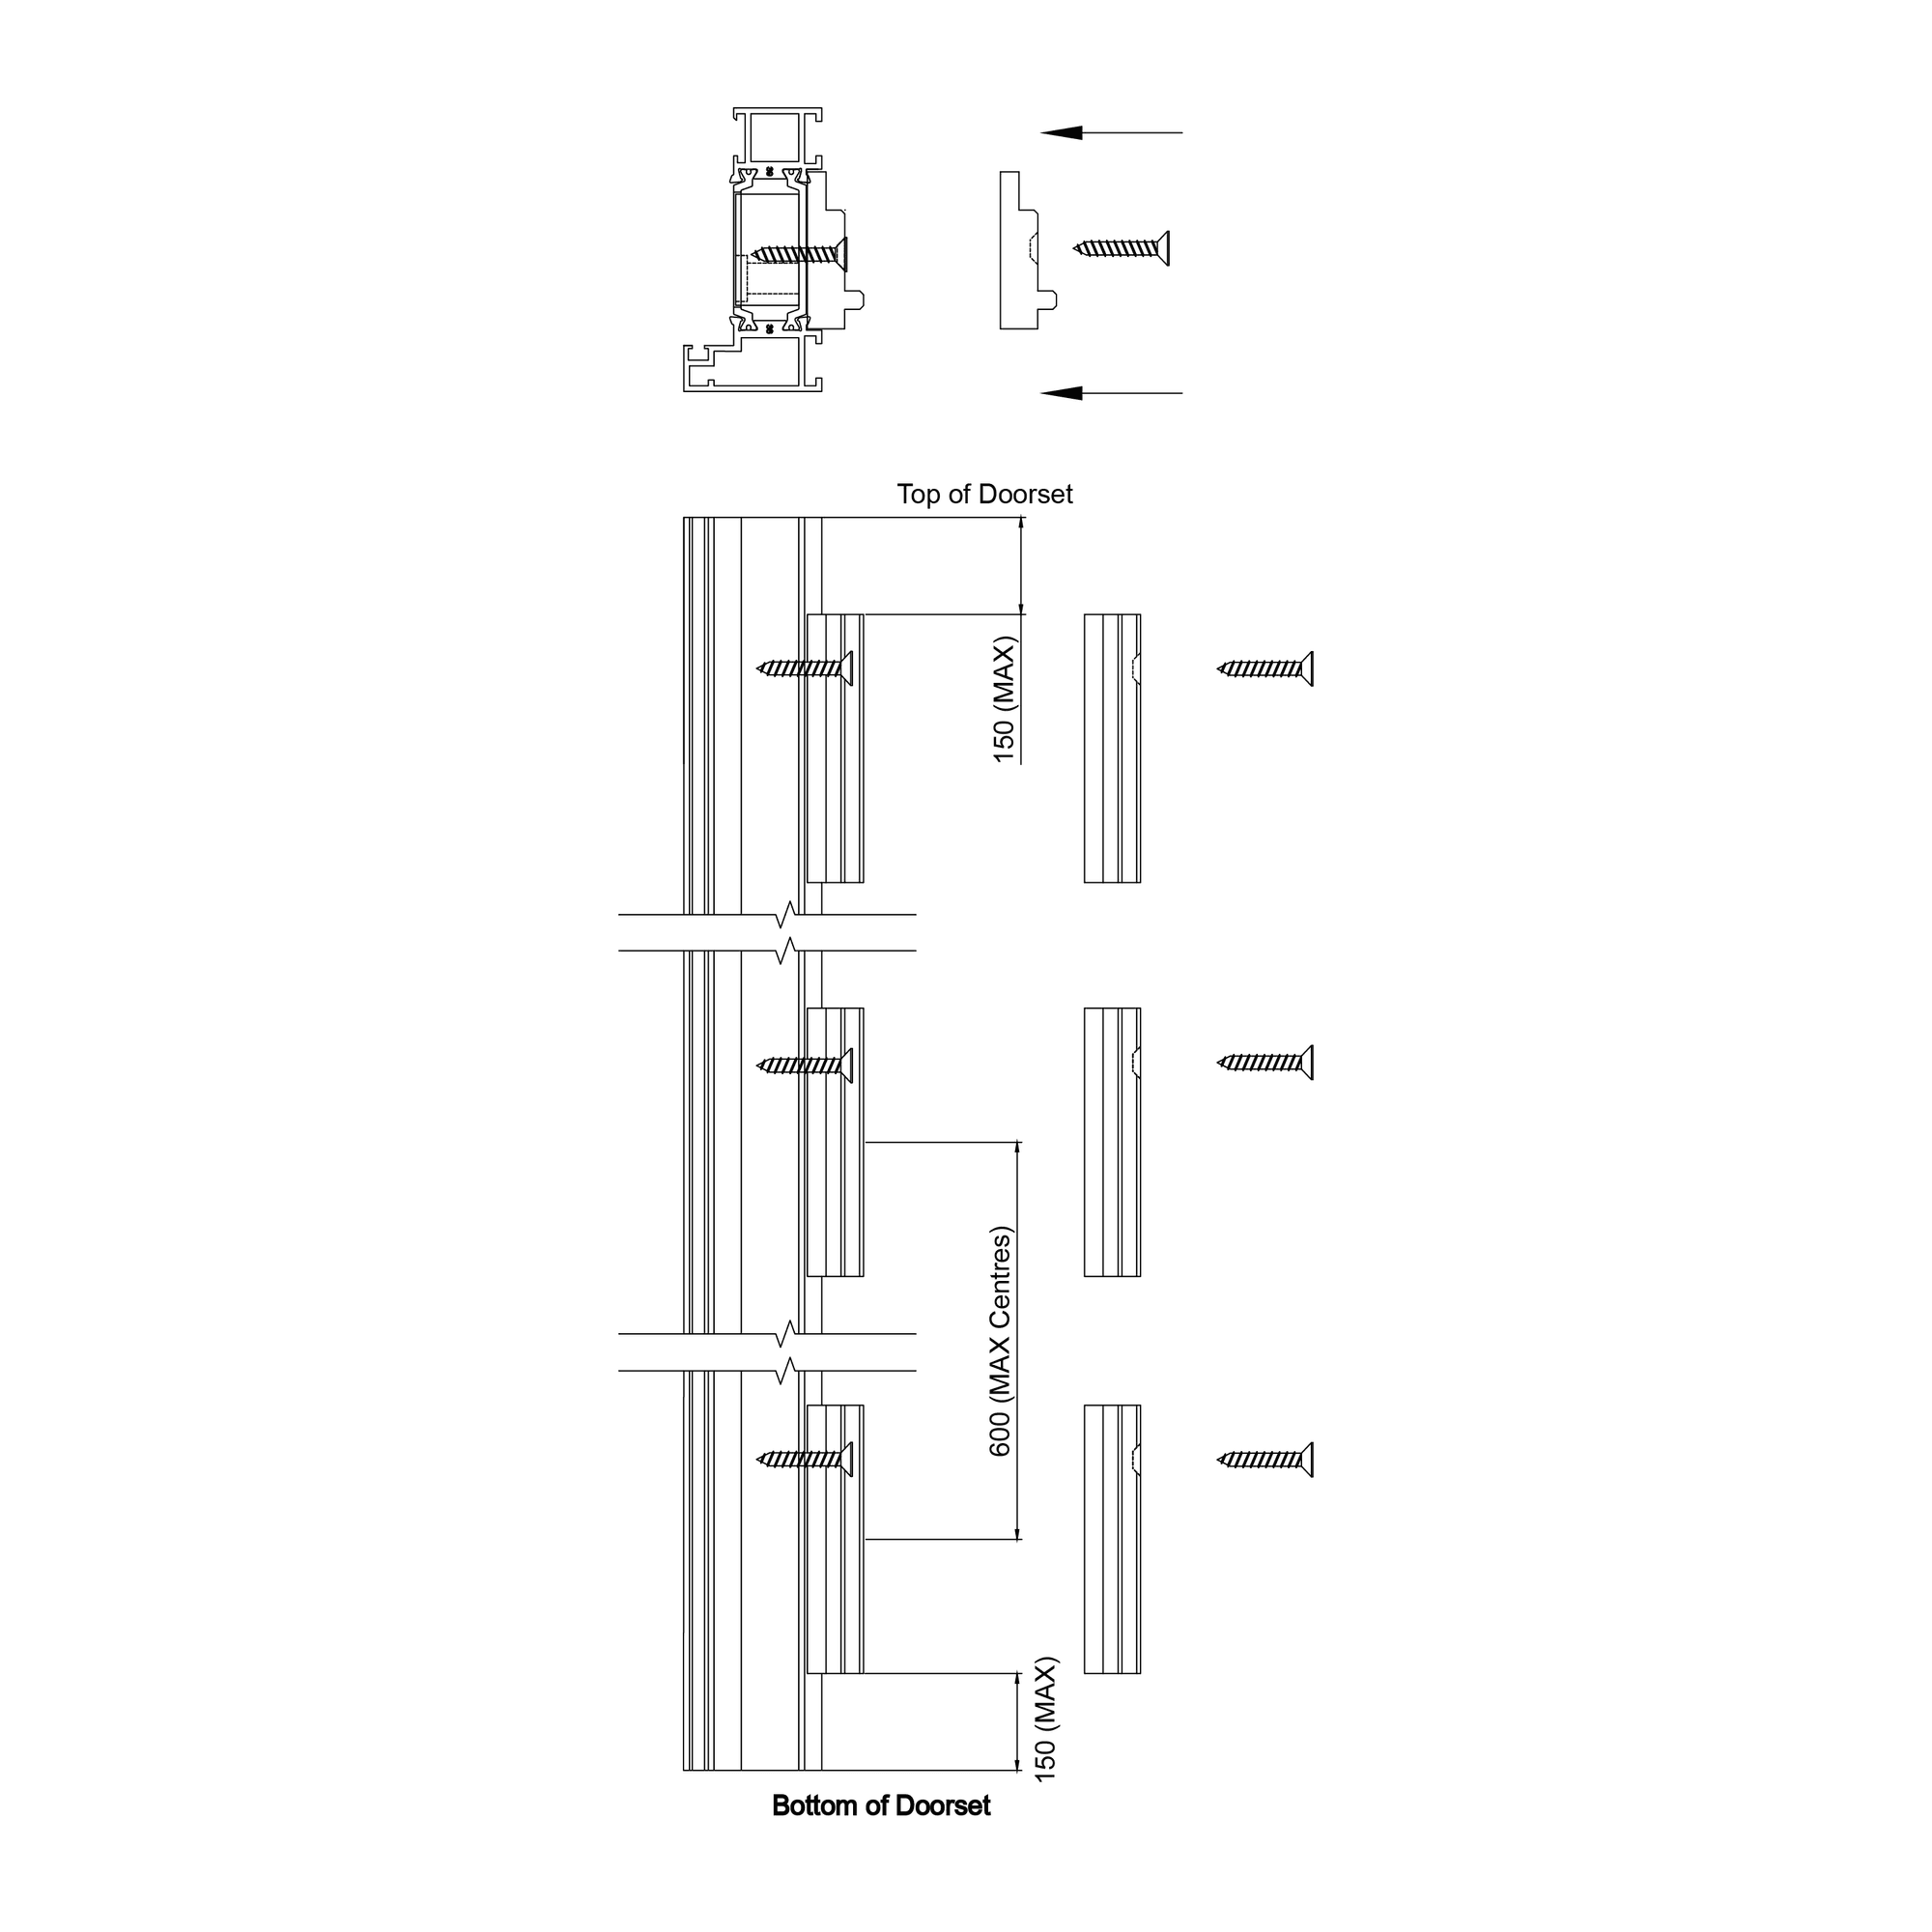
7.4 On the top and bottom of the frame fix the track to sash blocks for the first sash using the self-drilling screws provided. These should be set approximately 23mm in from the end of each sash (FIG B). Only fit the blocks on the bottom if there is one sash and then follow step 7.9.
7.5 Lift the sash with the gasket on the left side, with the drainage in the bottom, into the frame. Then slide the sash over the track blocks and fully locate it up against the jamb blocks (FIG C). Middle sashes will not have any gaskets on the sides, just the top and bottom.
7.6 Fix the universal coupler to the sash with the screws provided through the pre-drilled holes (FIG D).
7.7 Fix the top and bottom track blocks as previous (FIG B). Then slide the sash in and fix into the coupler (FIG E).
7.8 Repeat the previous steps with the fixing blocks, sashes, and couplers (FIG B, C,D and E) until you get to the final sash
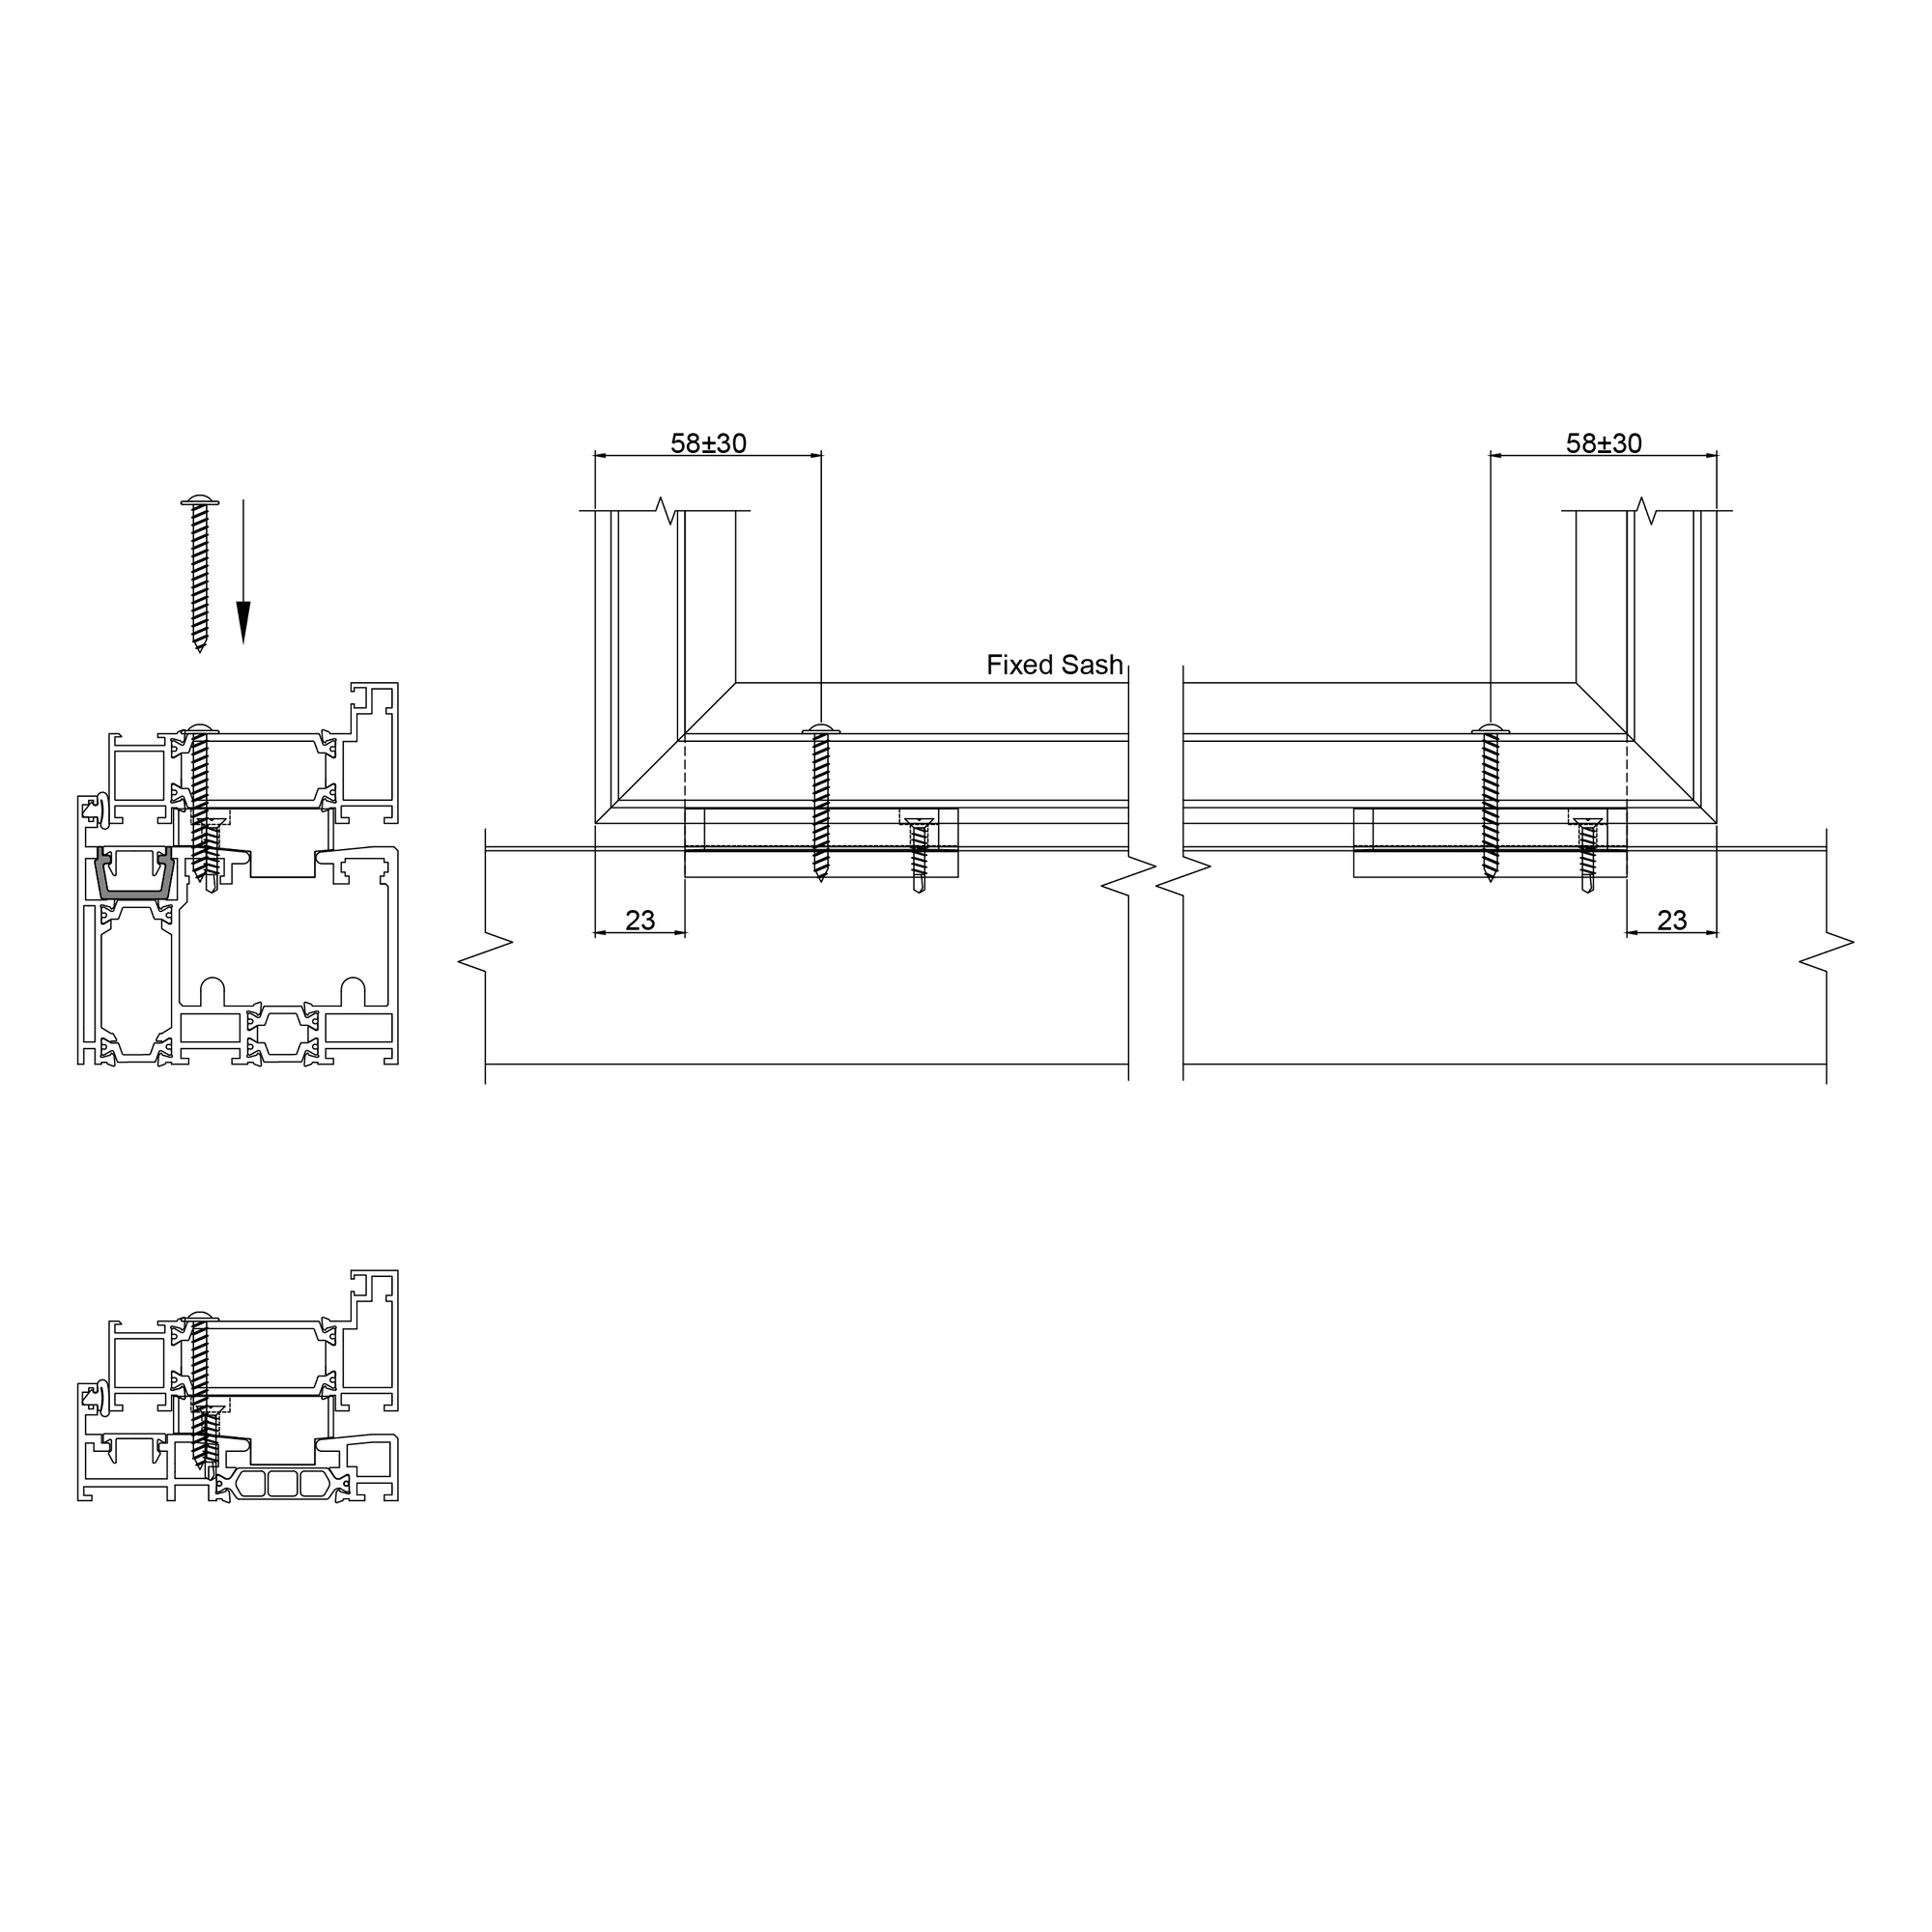
7.9 When fitting the final fixed sash, you will need to fit the jamb to sash finishing block and leave out the top track blocks. One half screws onto the sash, the other half onto the jamb in line with the jamb frame packers (FIG F and G). Fix the sash into the couplers (FIG E). Pry over the jamb and pack tightly.
If this is a single sash you will need to use the fixing pucks on both sides of the sash into the brick work (FIG K and L). You will need to drill a 30mm hole in the first skin of polyamide in the sash to insert the puck. Then fix through puck, sash, and frame in line with the finishing blocks and jamb packers.
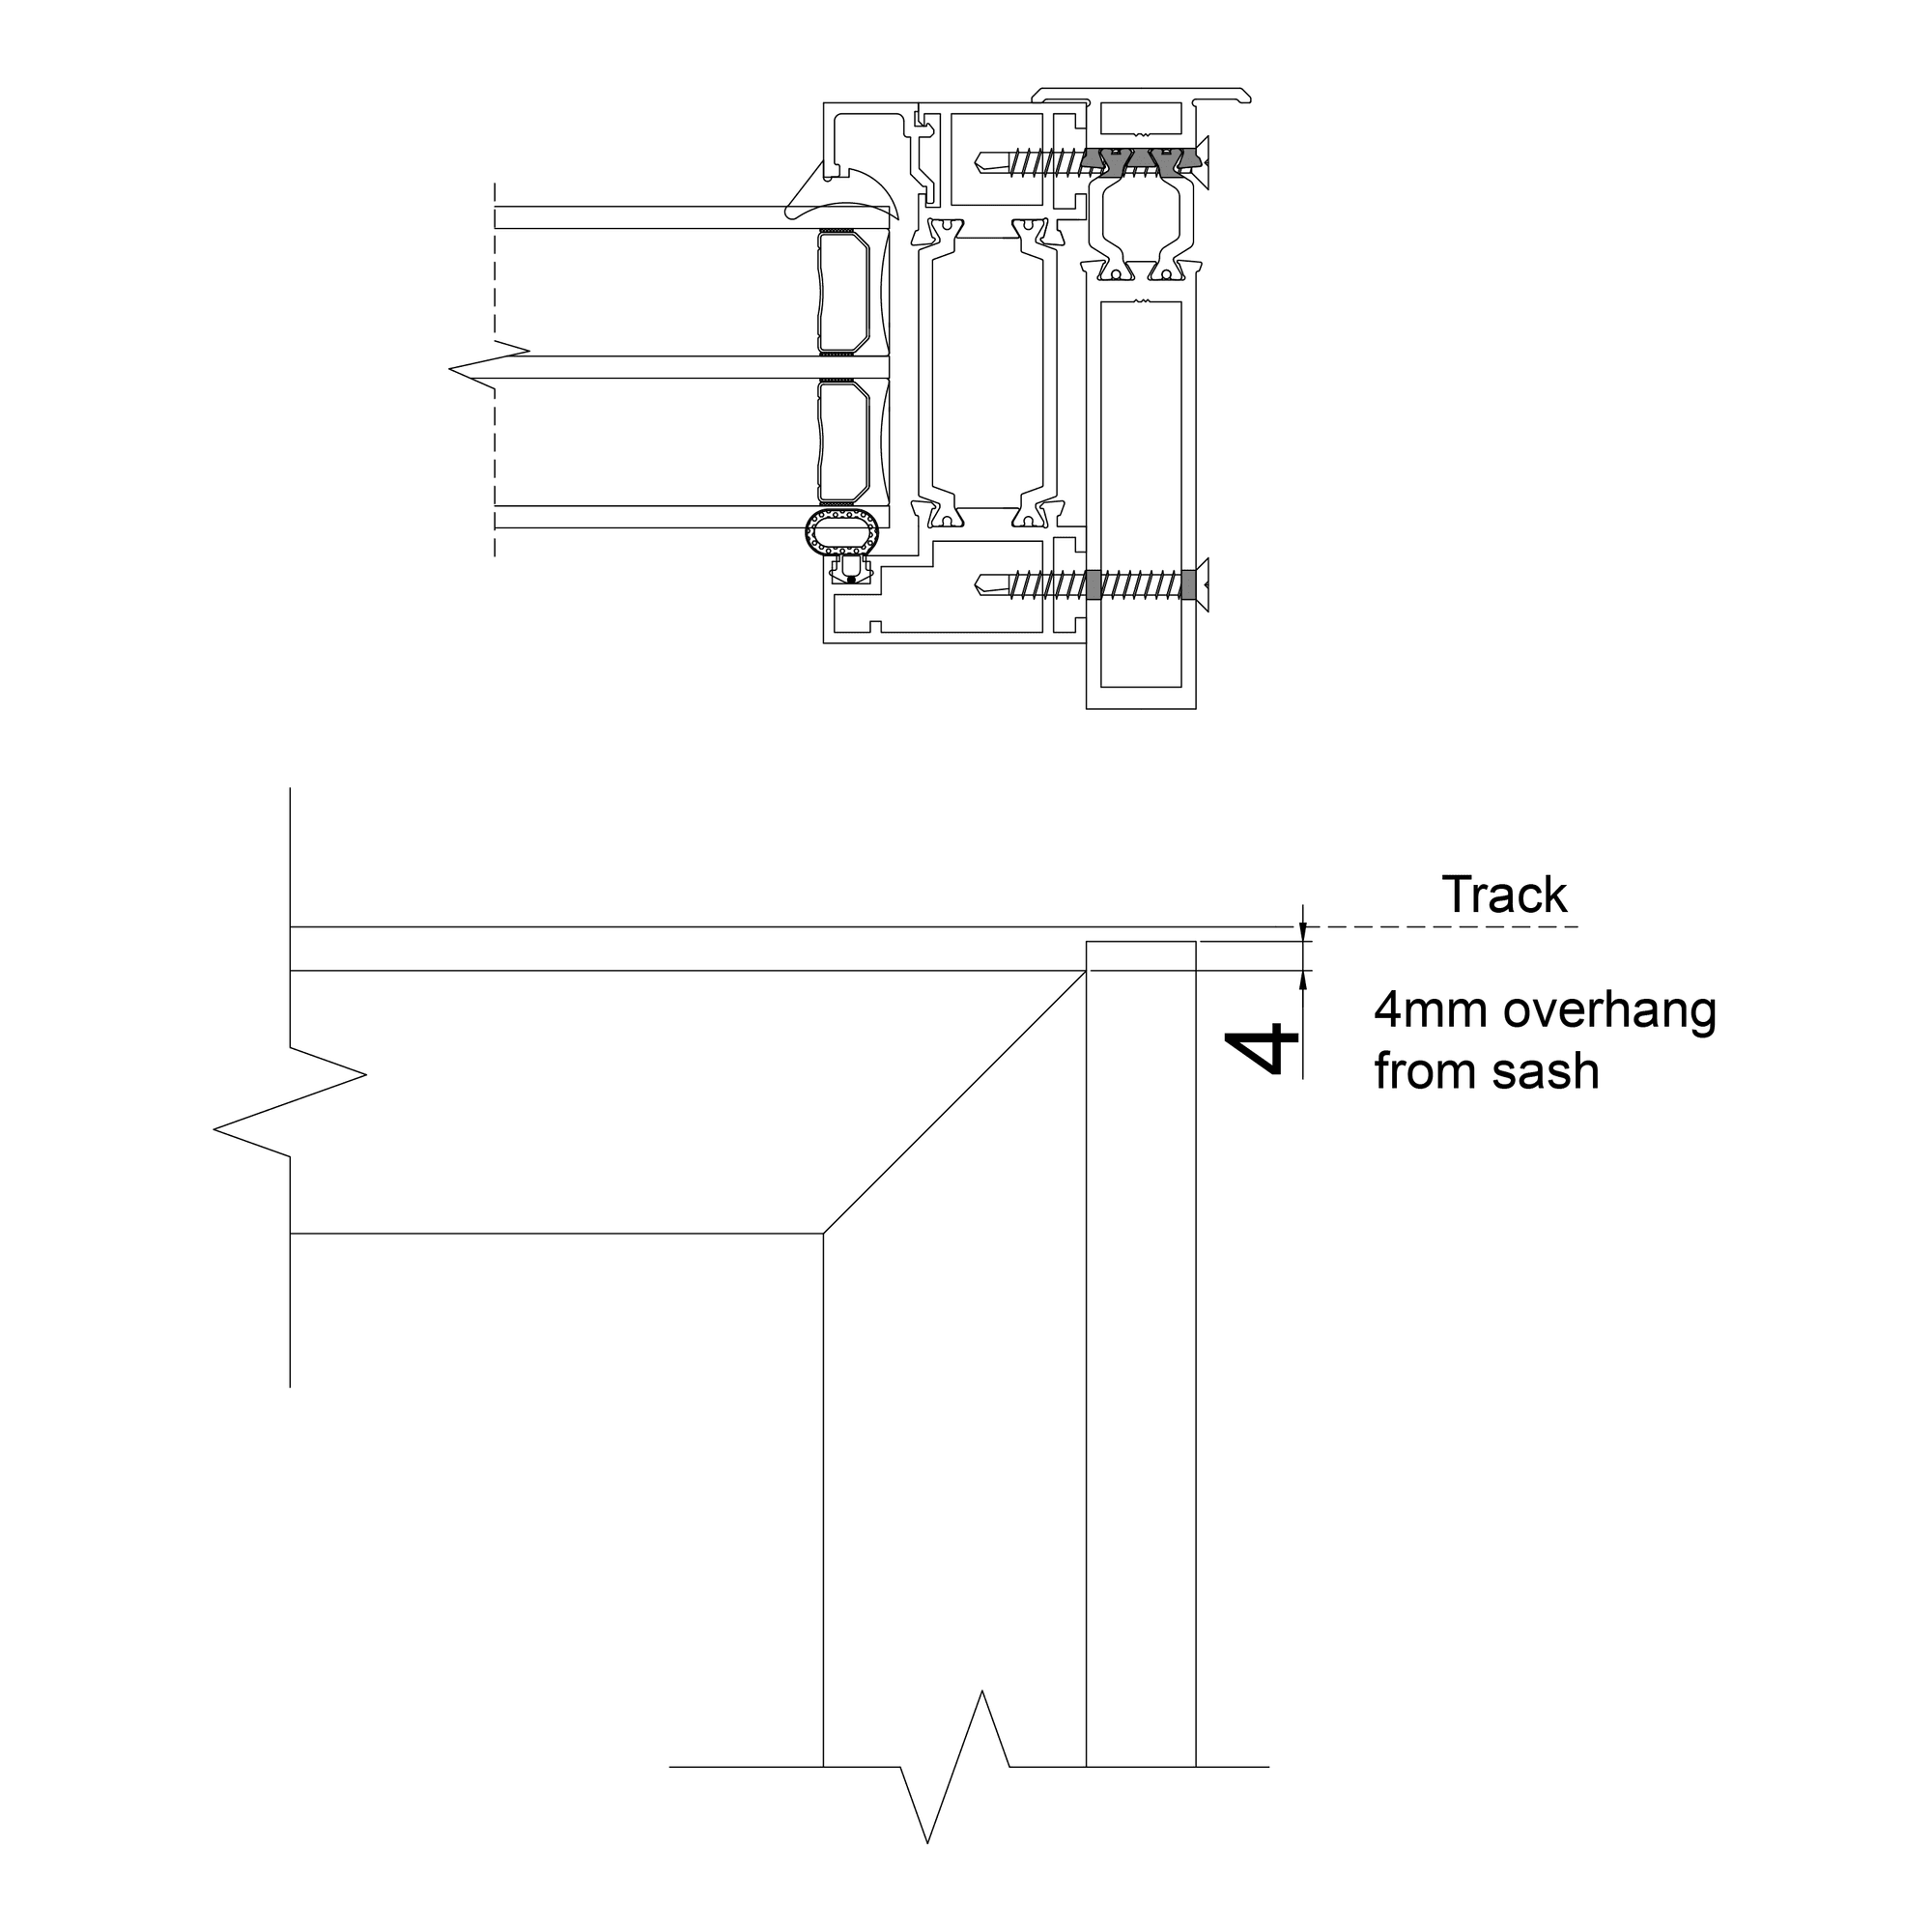
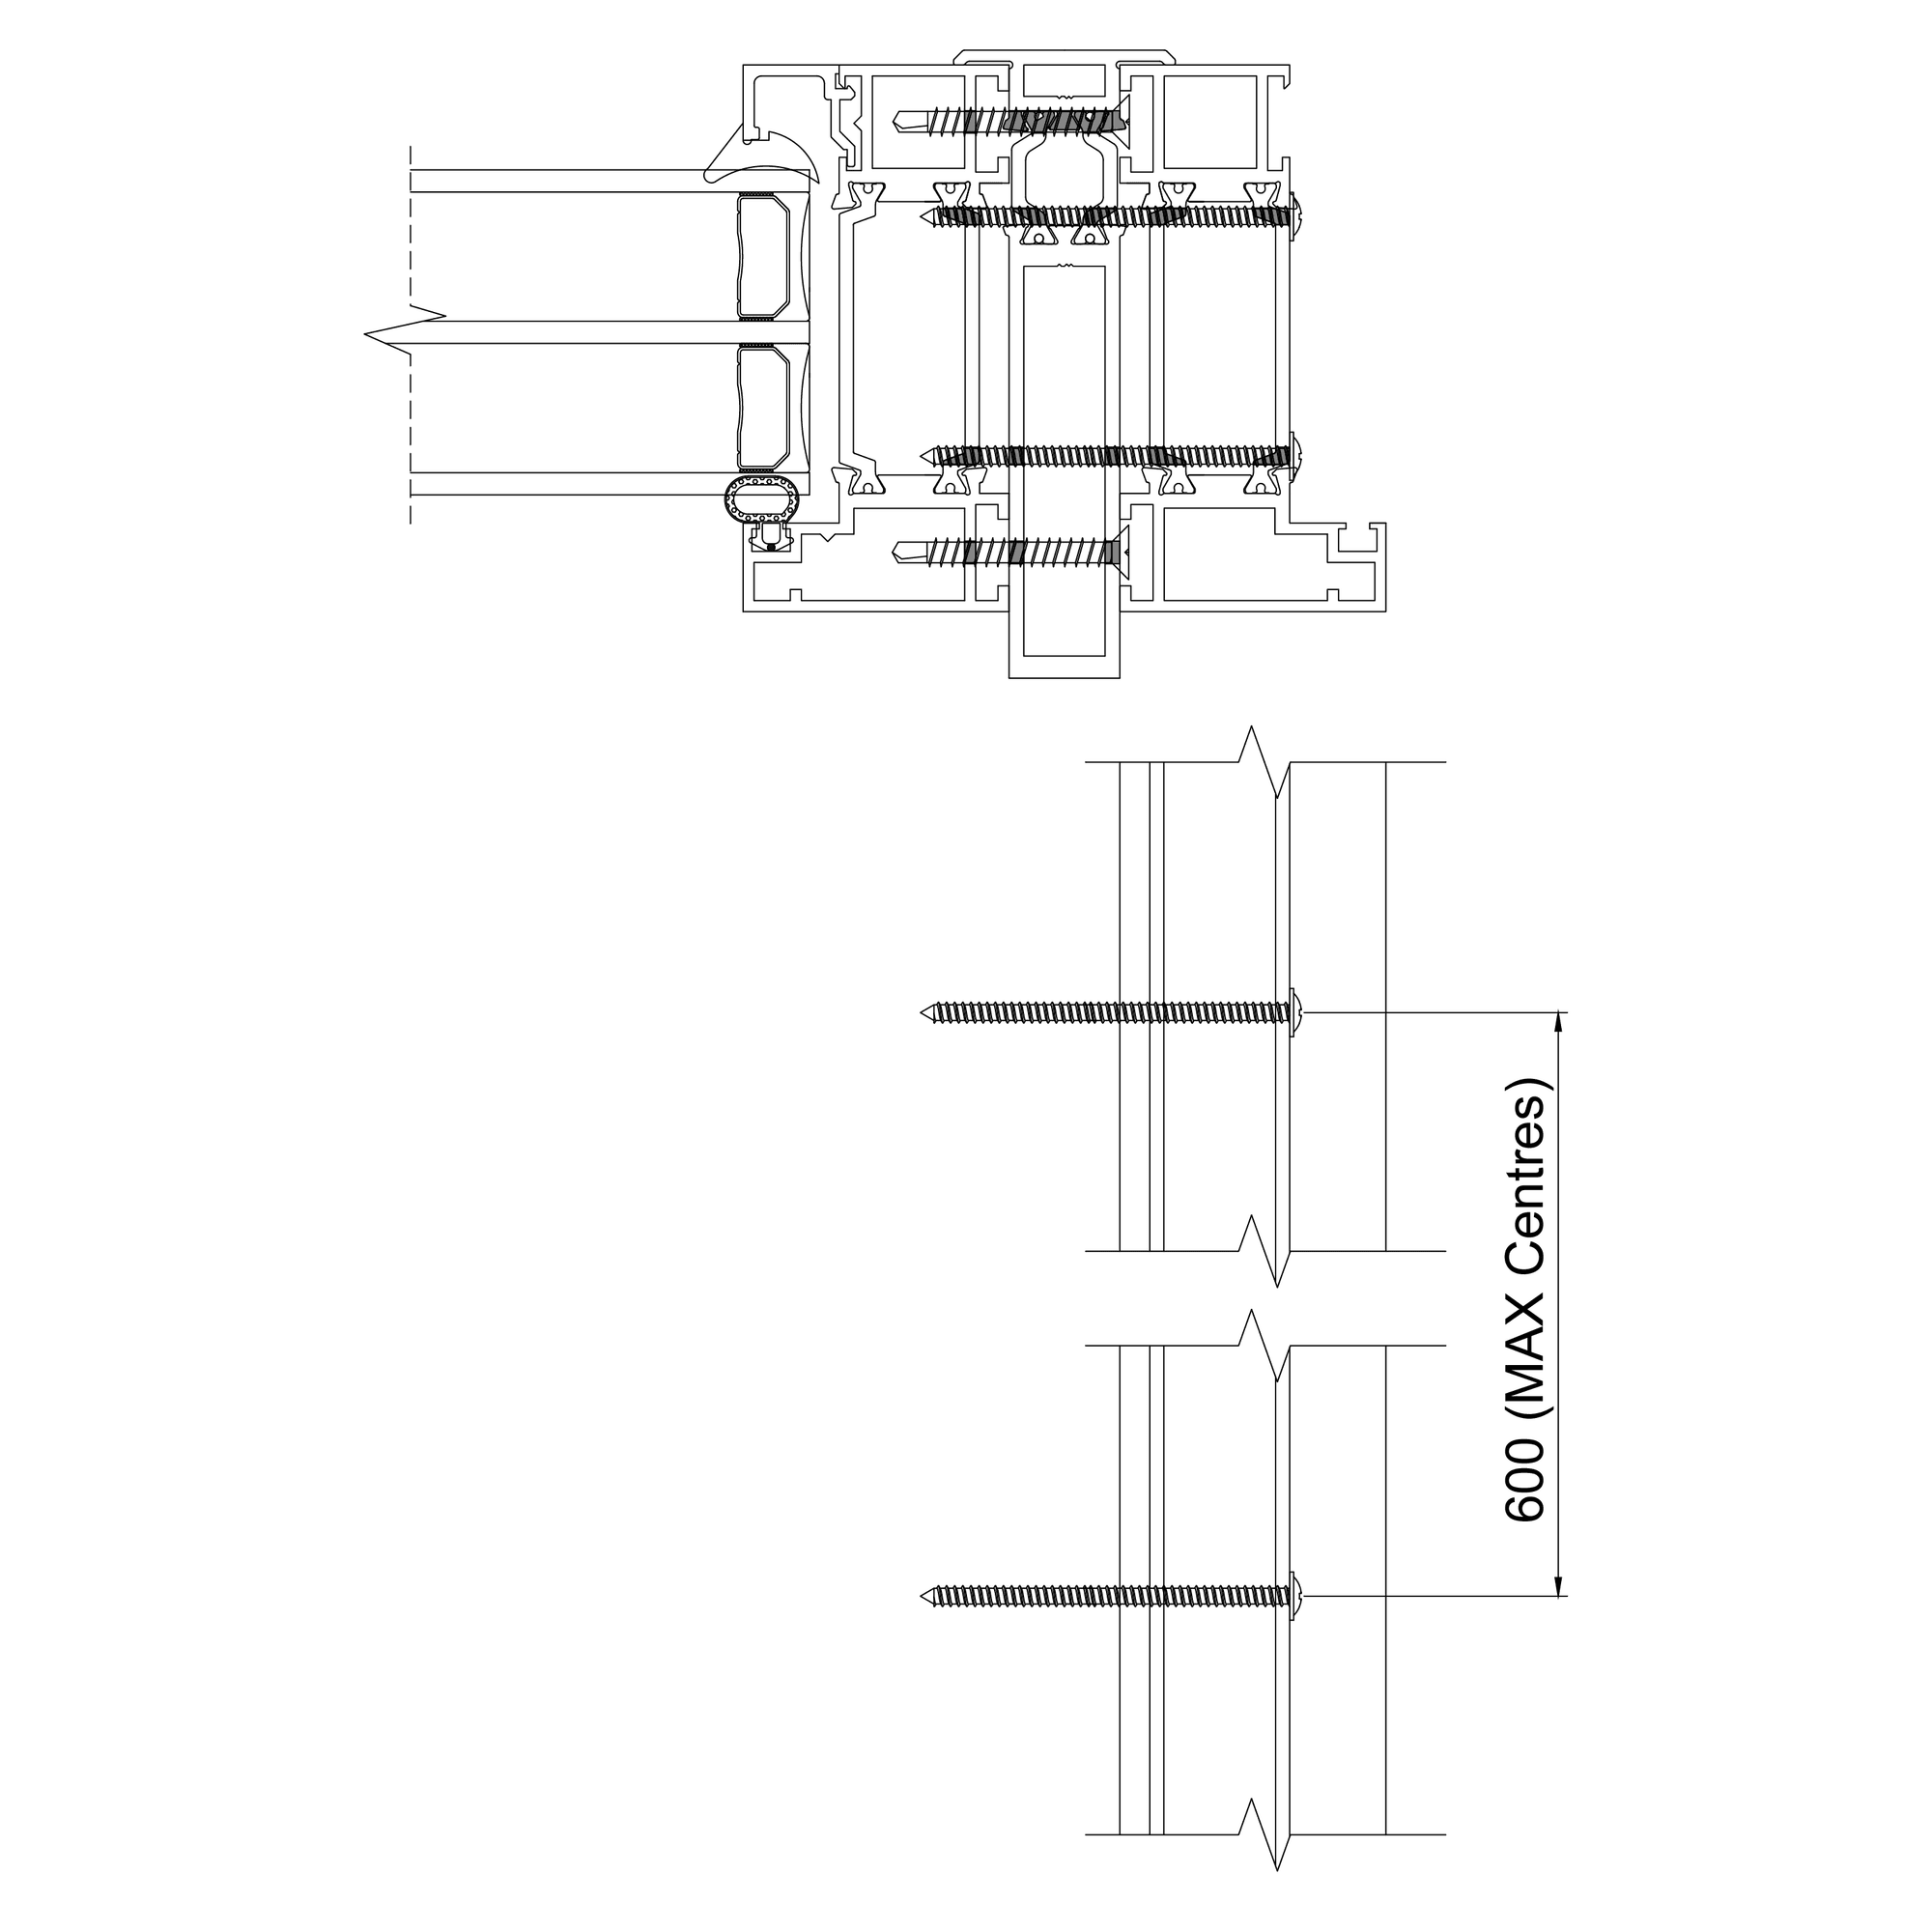
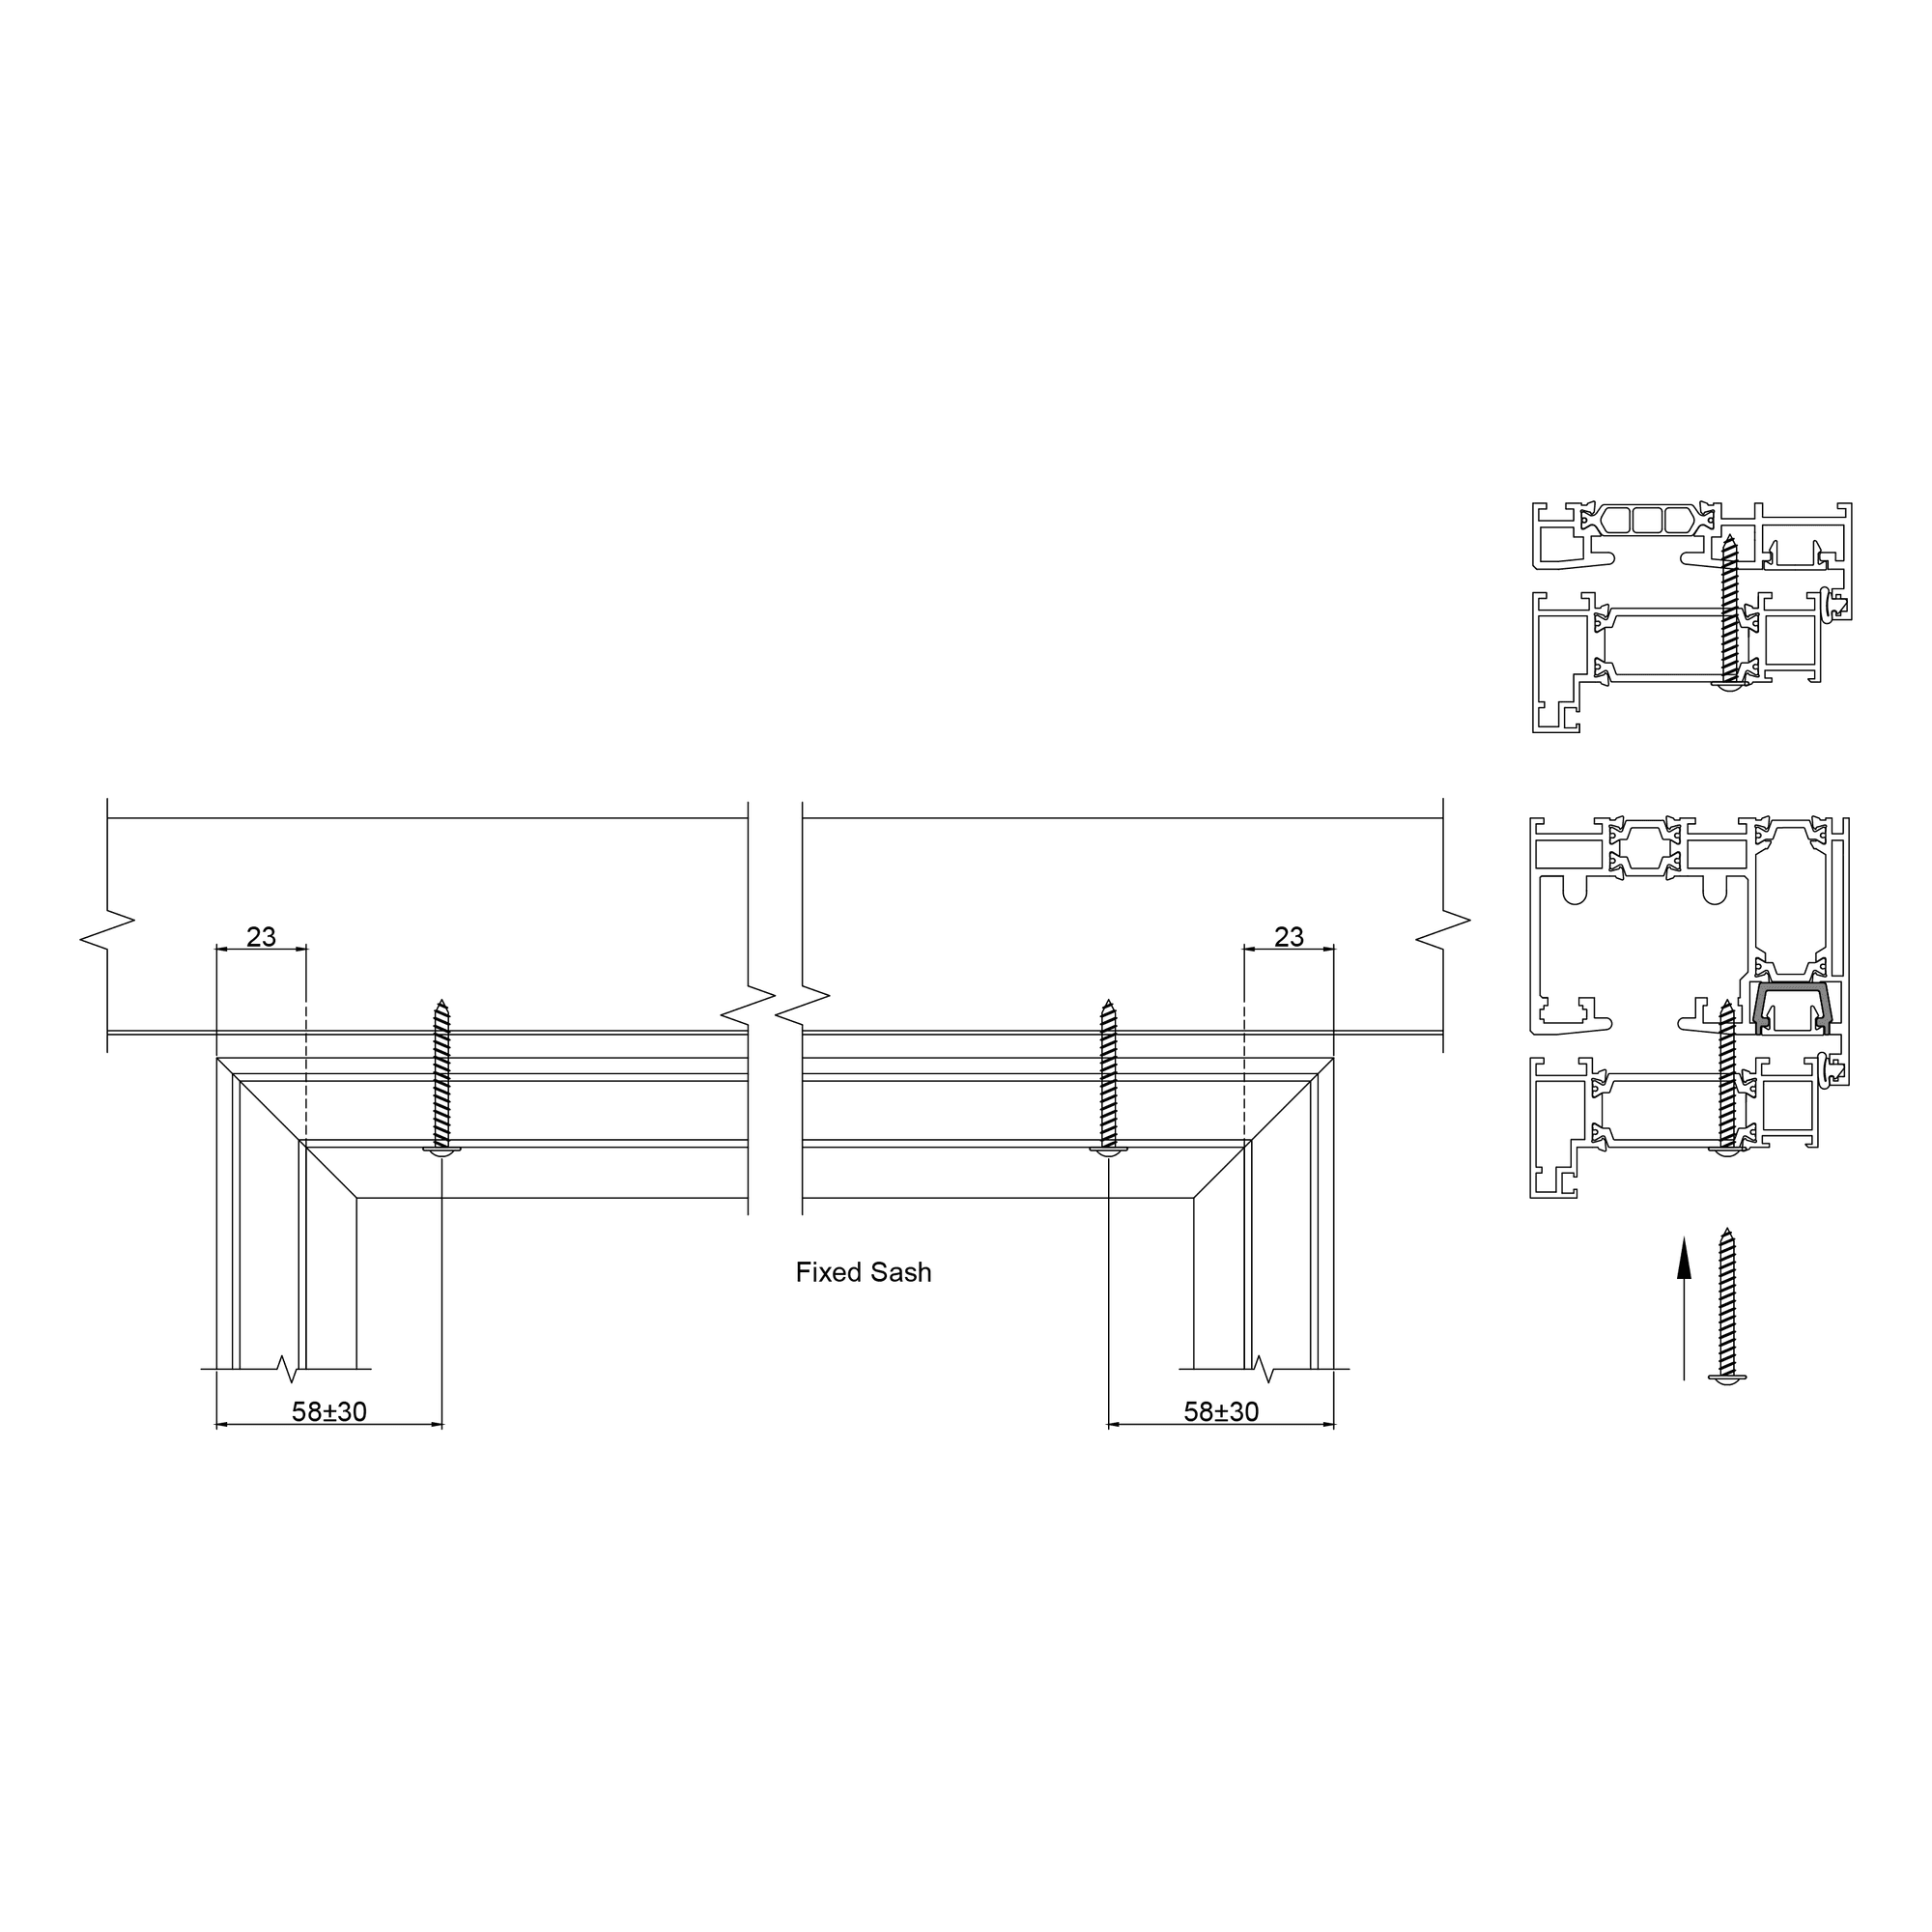
7.10 Using the correct size HSS bit for your preferred fixing, drill through sash, blocks, and jamb. (Do not use a hammer SDS drill). To protect your drill bit place putty knife or similar before the brick. Using the suitable fixing and the 3mm aluminium fixing plate fasten through the sash, blocks, and jamb packer into the brickwork (FIG H). Double check that the sash is sitting tight up to the jamb as you tighten the screw.
7.11 Using the provided flange headed screws fasten through the sash polyamide into the top and bottom track, going through the centre of the blocks and into the aluminium. This will need to be predrilled using 3.5mm HSS drill bit (FIG I and J), due to the last sash having no block in the top. Do not over tighten the screws.
Note: If a single sash is over 1,200mm in width, it is recommended that a fixing is put in the centre, through the sash polyamide, into the top and bottom track, and into the aluminium.
8.1 Locate the fork pins and bolts from the components bag
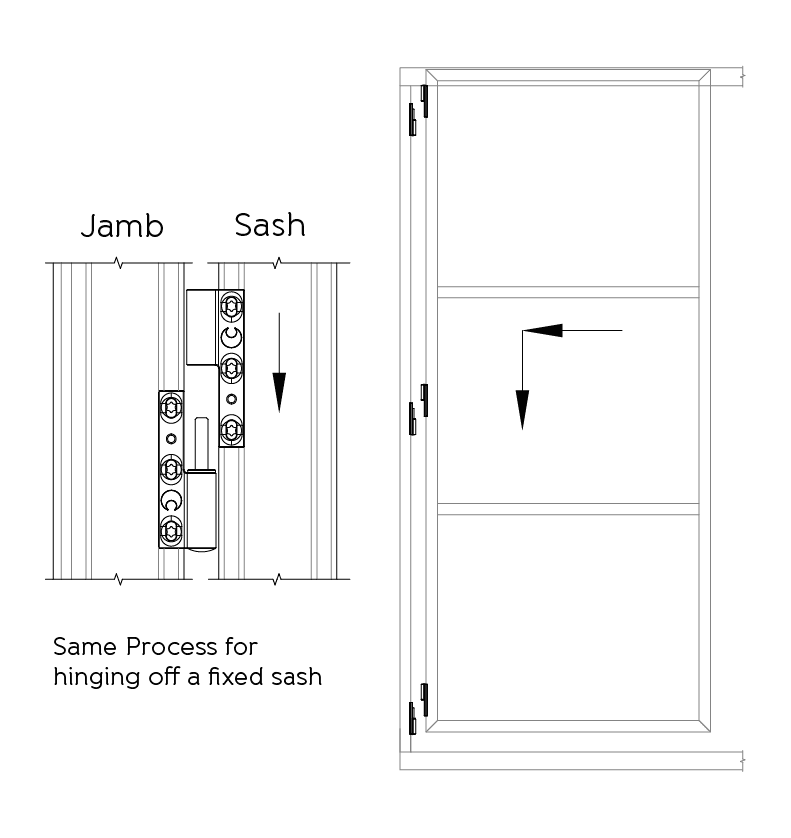
8.2 Hang the first door on the hinge jamb as shown (FIG 8A) with the label at the top and facing out
8.3 Hang the second door onto the hinges of the first door, again with the label at the top and facing out as shown (FIG 8B)
NOTE: When closing the master / lead door for the first time, ensure that contact with the locking jamb or stile does not occur (if contact occurs, adjust the doors - see Section 14)
8.4 Close the two doors across the track and lock into place with the slave handle, being careful not to scratch the track as the doors cross it
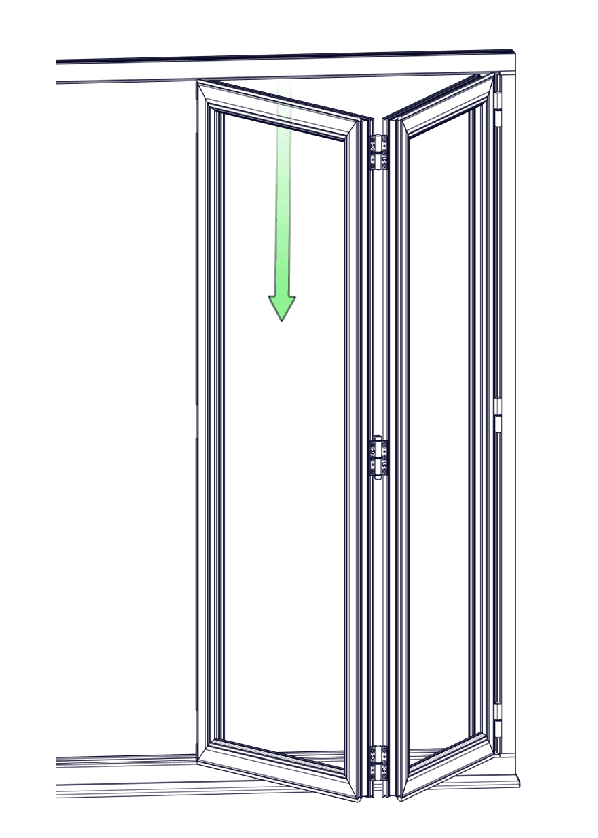
8.5 Hang the third door onto the centre hinge and insert a screwdriver through the top hinge; this will support the door whilst the forks are located as shown (FIG 8C)
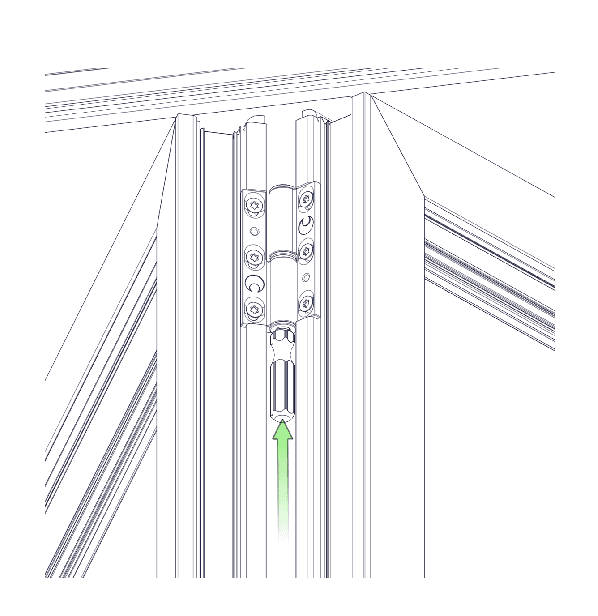
8.6 With the third door completely open, locate the bottom fork around the bottom hinge between the second and third doors
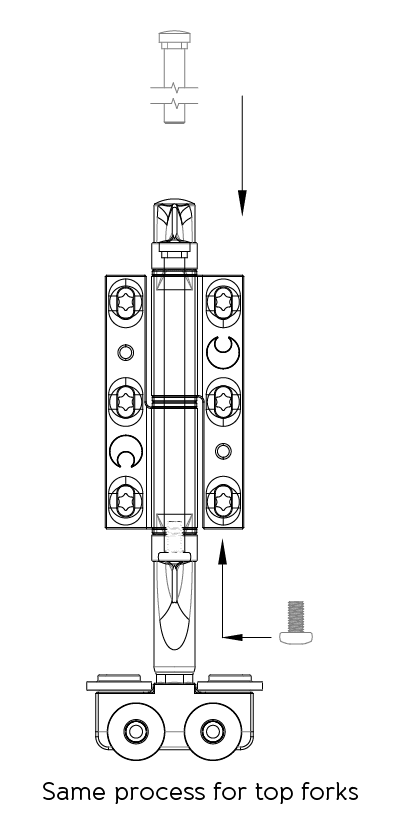
8.7 Remove the screw and insert the fork pin into the bottom fork and hinge using a plastic hammer to gently tap the pin in fully - aligning the flat spots (FIG 8D)
8.8 Reinstall the screw and tighten using a T30 Torx key
8.9 Remove the screwdriver from the top hinge and locate the top fork around the hinge
8.10 Insert the second fork pin bolt as described in points above
8.11. Repeat steps until all door leaves are hung correctly
NOTE: For even number of doors moving in the same direction only)
9.1 Remove the centre hinge from the mullion
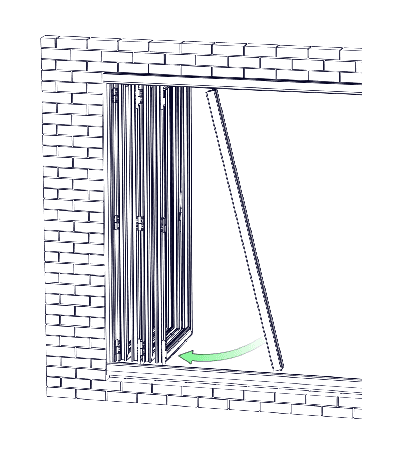
9.2 With the last door at 90° to the tracks, locate the top and bottom forks around the hinges
9.3 Position the mullion into the tracks and slide along to mate with the hinges and forks as shown (FIG 9A)
9.4 Insert top and bottom fork pins as described in the previous section
9.5 Replace the centre hinge and screws being careful not to cross thread the screws or over tighten