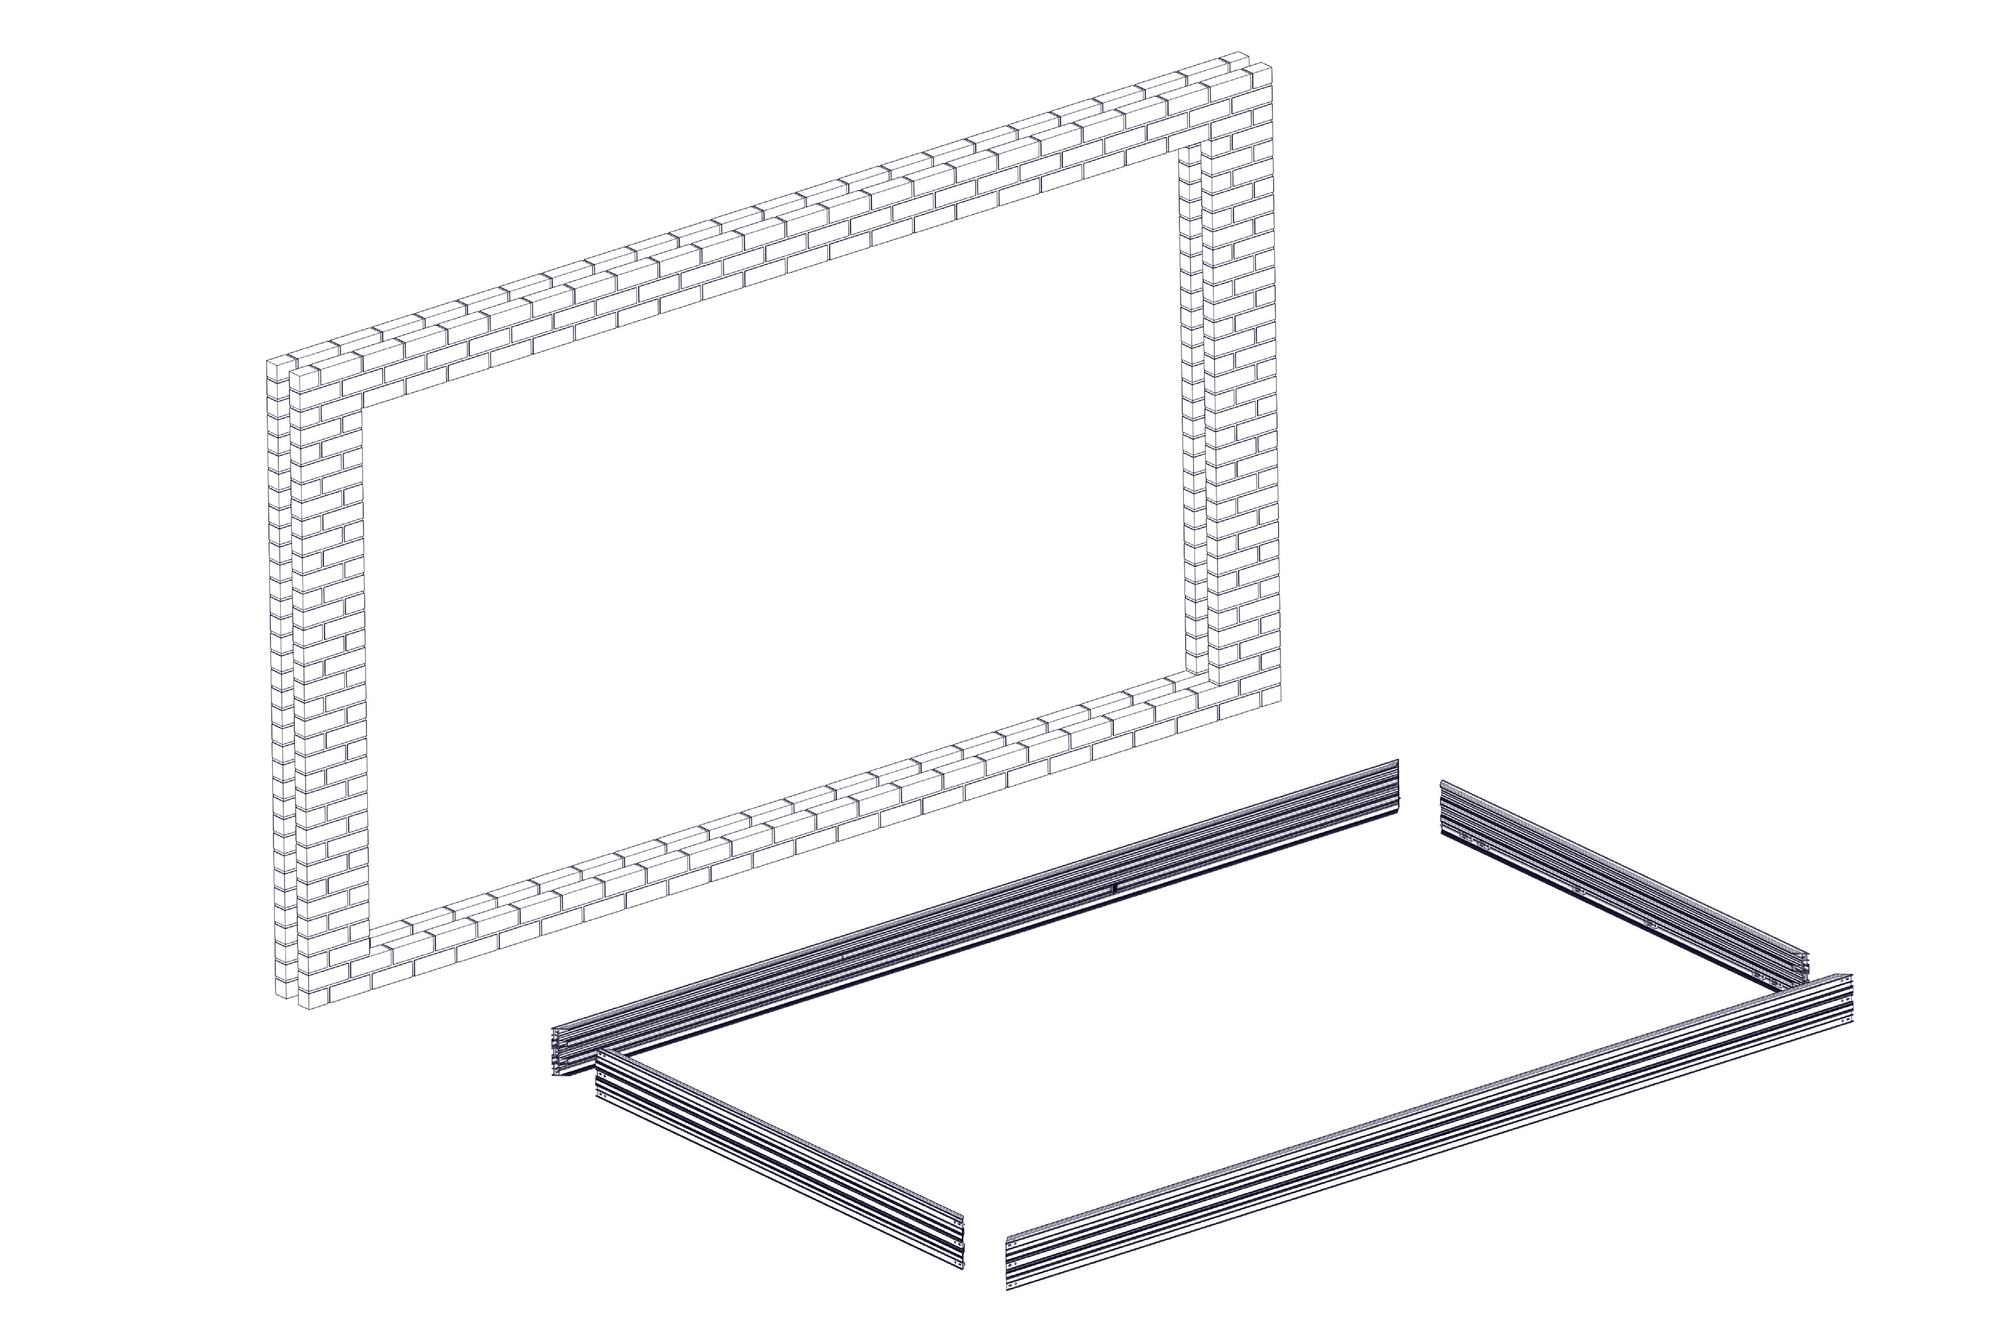
Frames
3.1 Lay out the frame components in front of your apperture, being careful not to scratch the profile (FIG 3A)
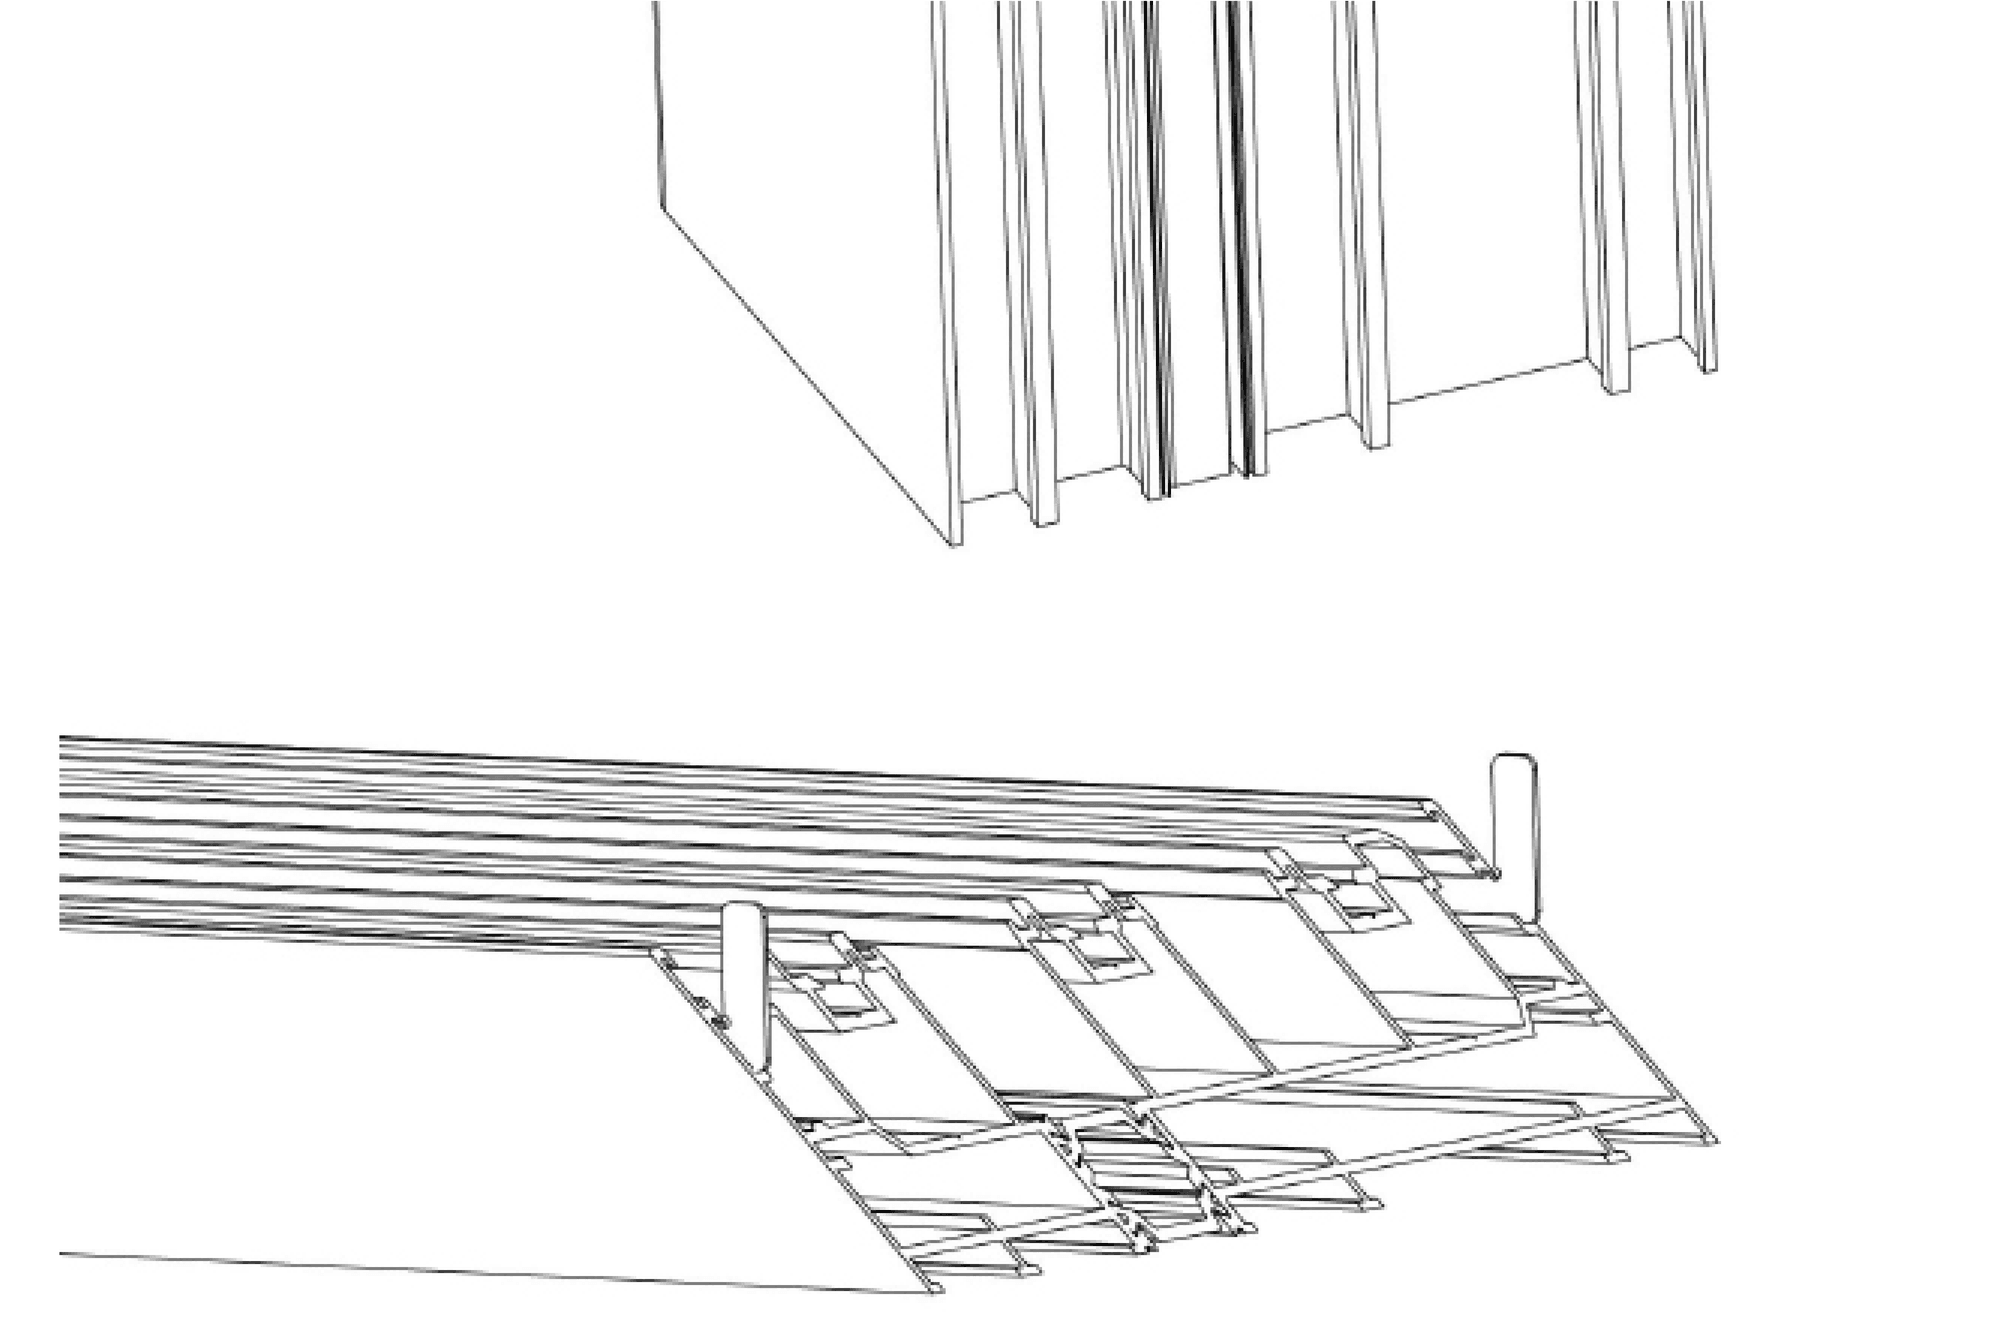
3.2 Insert the alignment chevrons, locate directly beneath brush gasket position (FIG 3B)
3.3 Apply sealant to the ends of the bottom track and attach the jambs (FIG 3B)
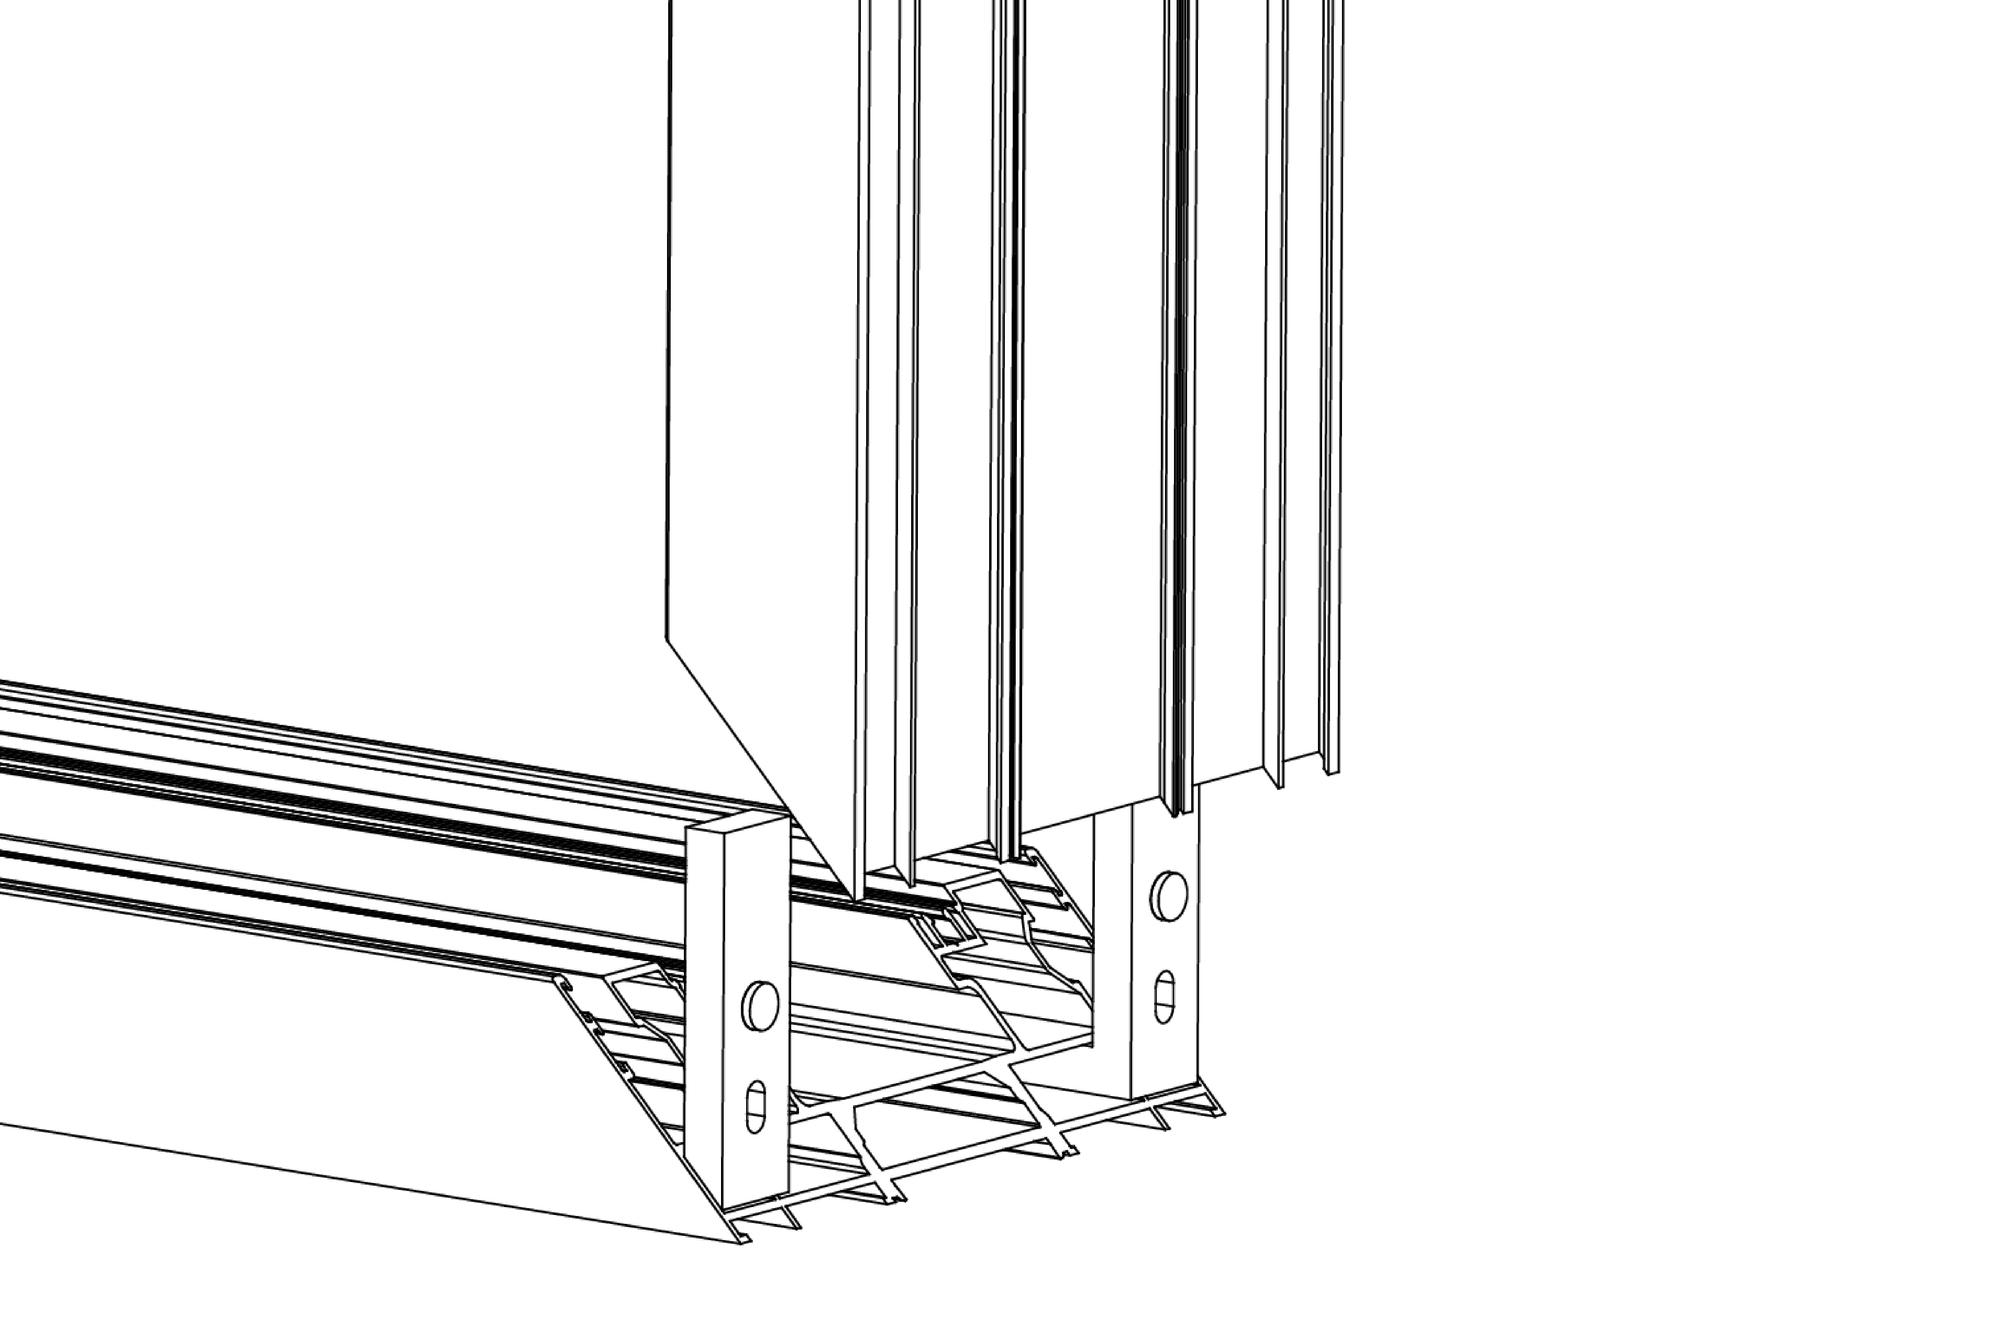
3.4 Align corners using the chevrons and then screw the mechanical cleats loosely using a 4mm allen key, once the screws have all engaged with the threads tighten evenly until joint is fully together and mitres are tight. Once the corners are fully attached, fill the cleat locating holes and screw holes with silicone - this is essential on the bottom track (FIG 3B & 3C)
3.5 Wipe off excess sealant
3.6 Attach the head to the jambs using the same process as described above
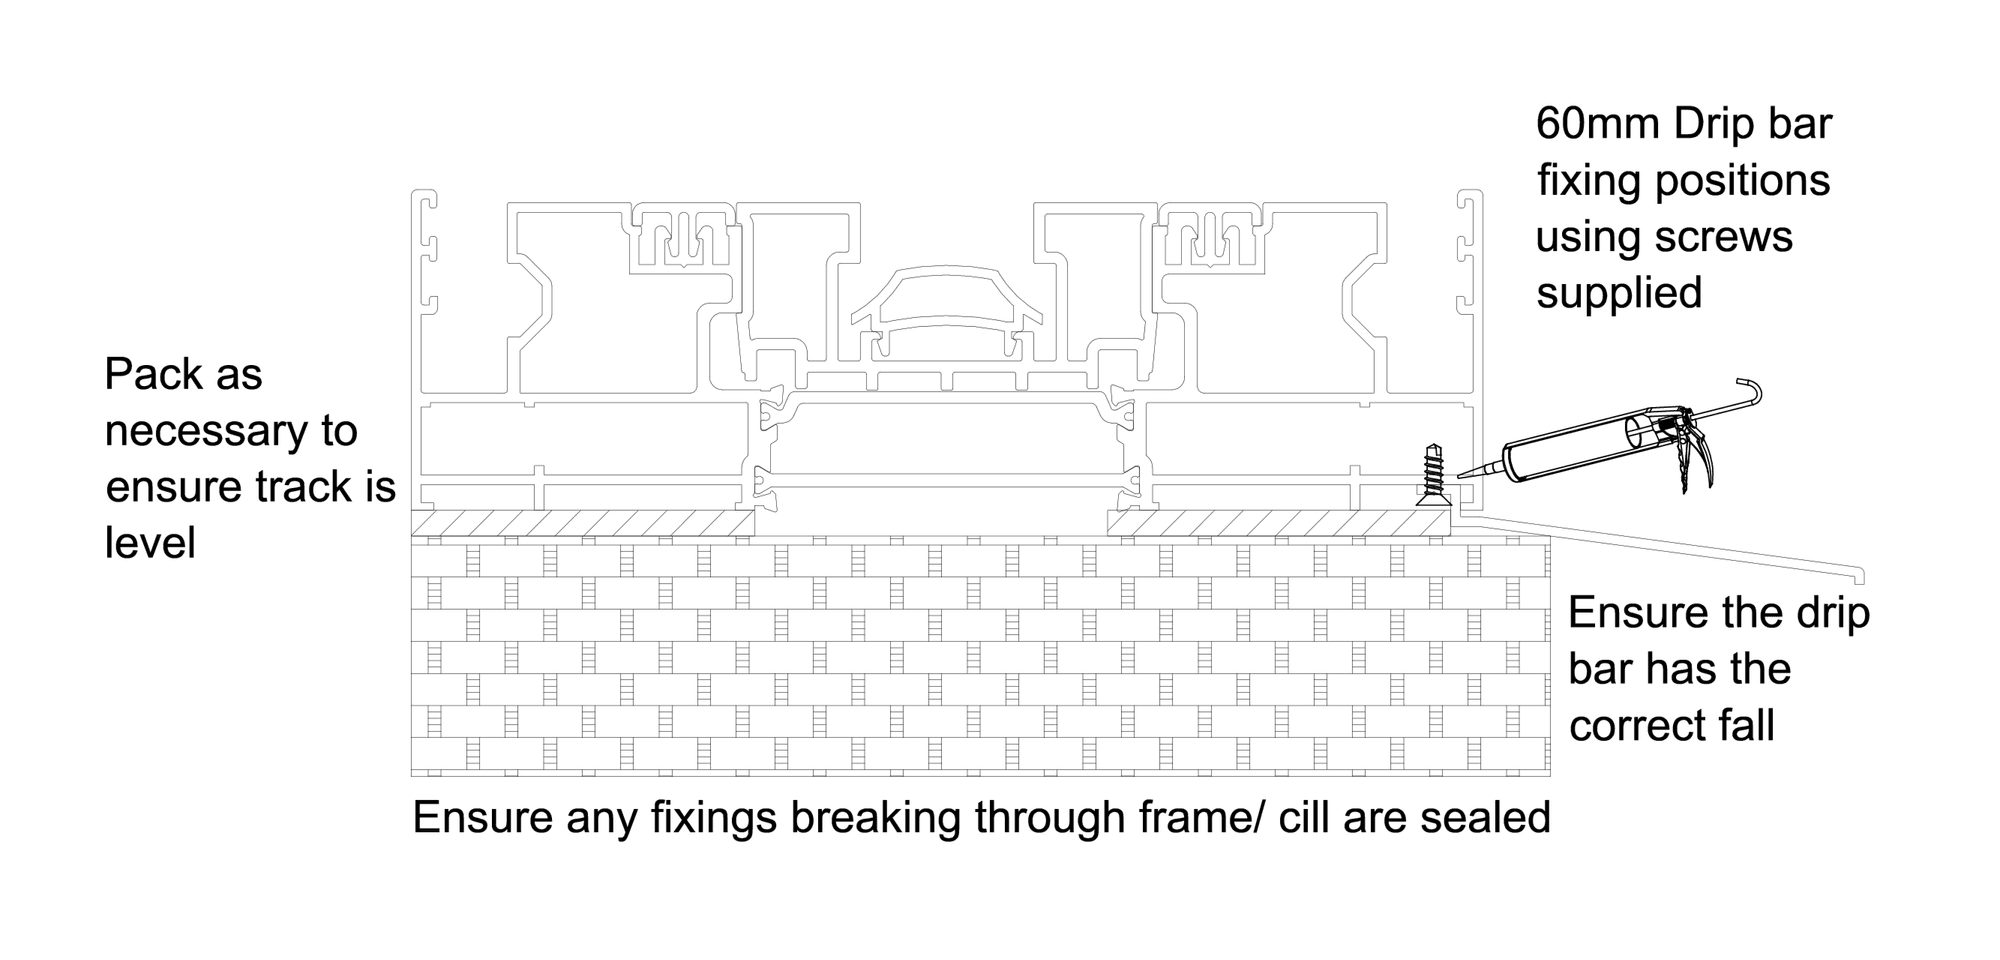
3.7 Ensure that the bottom track or cill is set flat and level and is supported along the whole length, making sure that the packing points are no less than 500mm apart
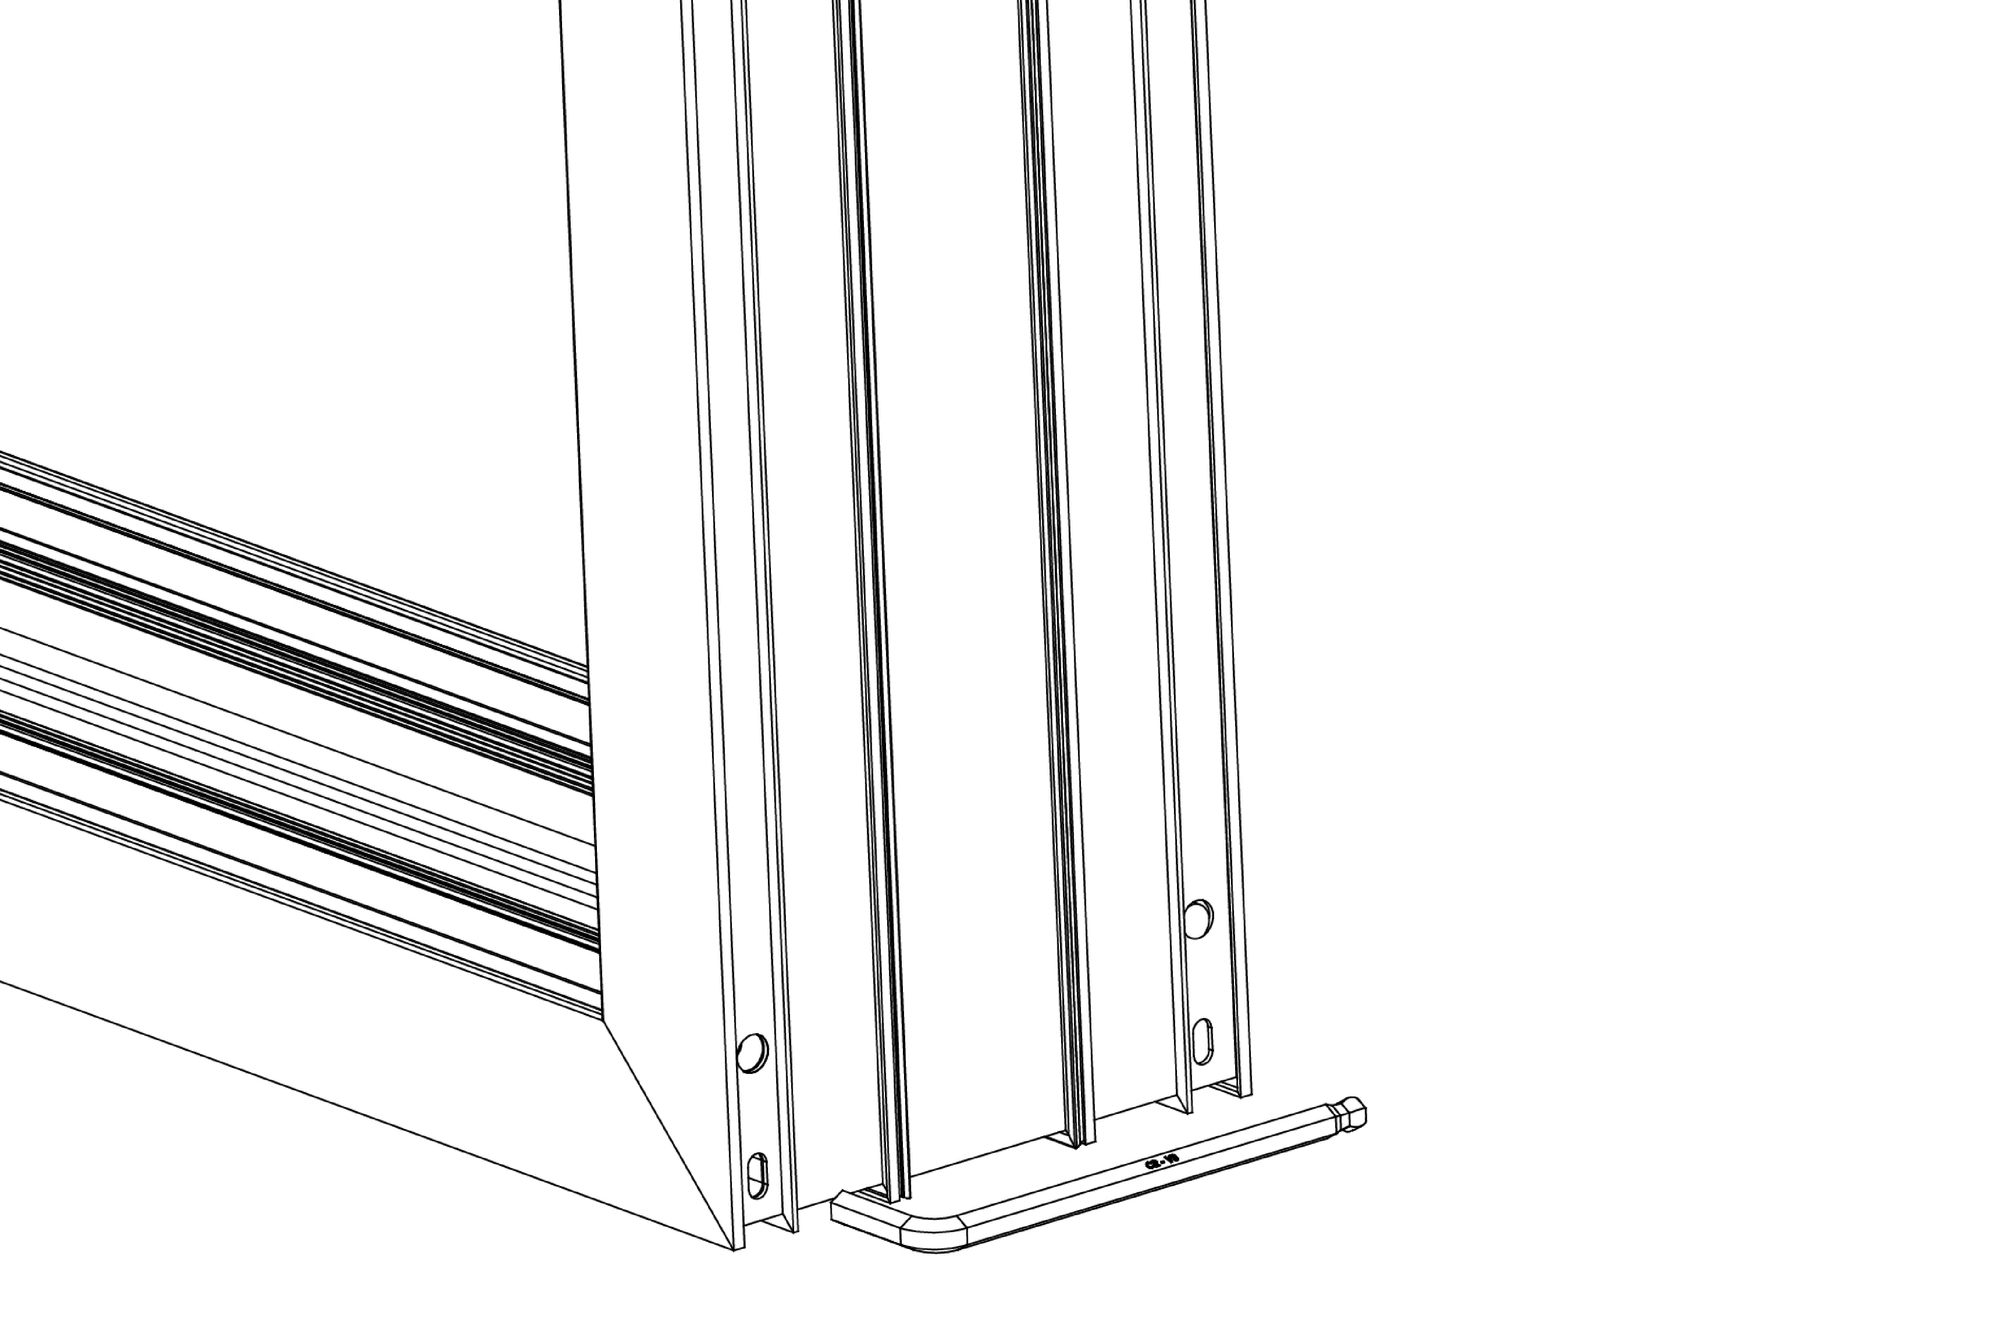
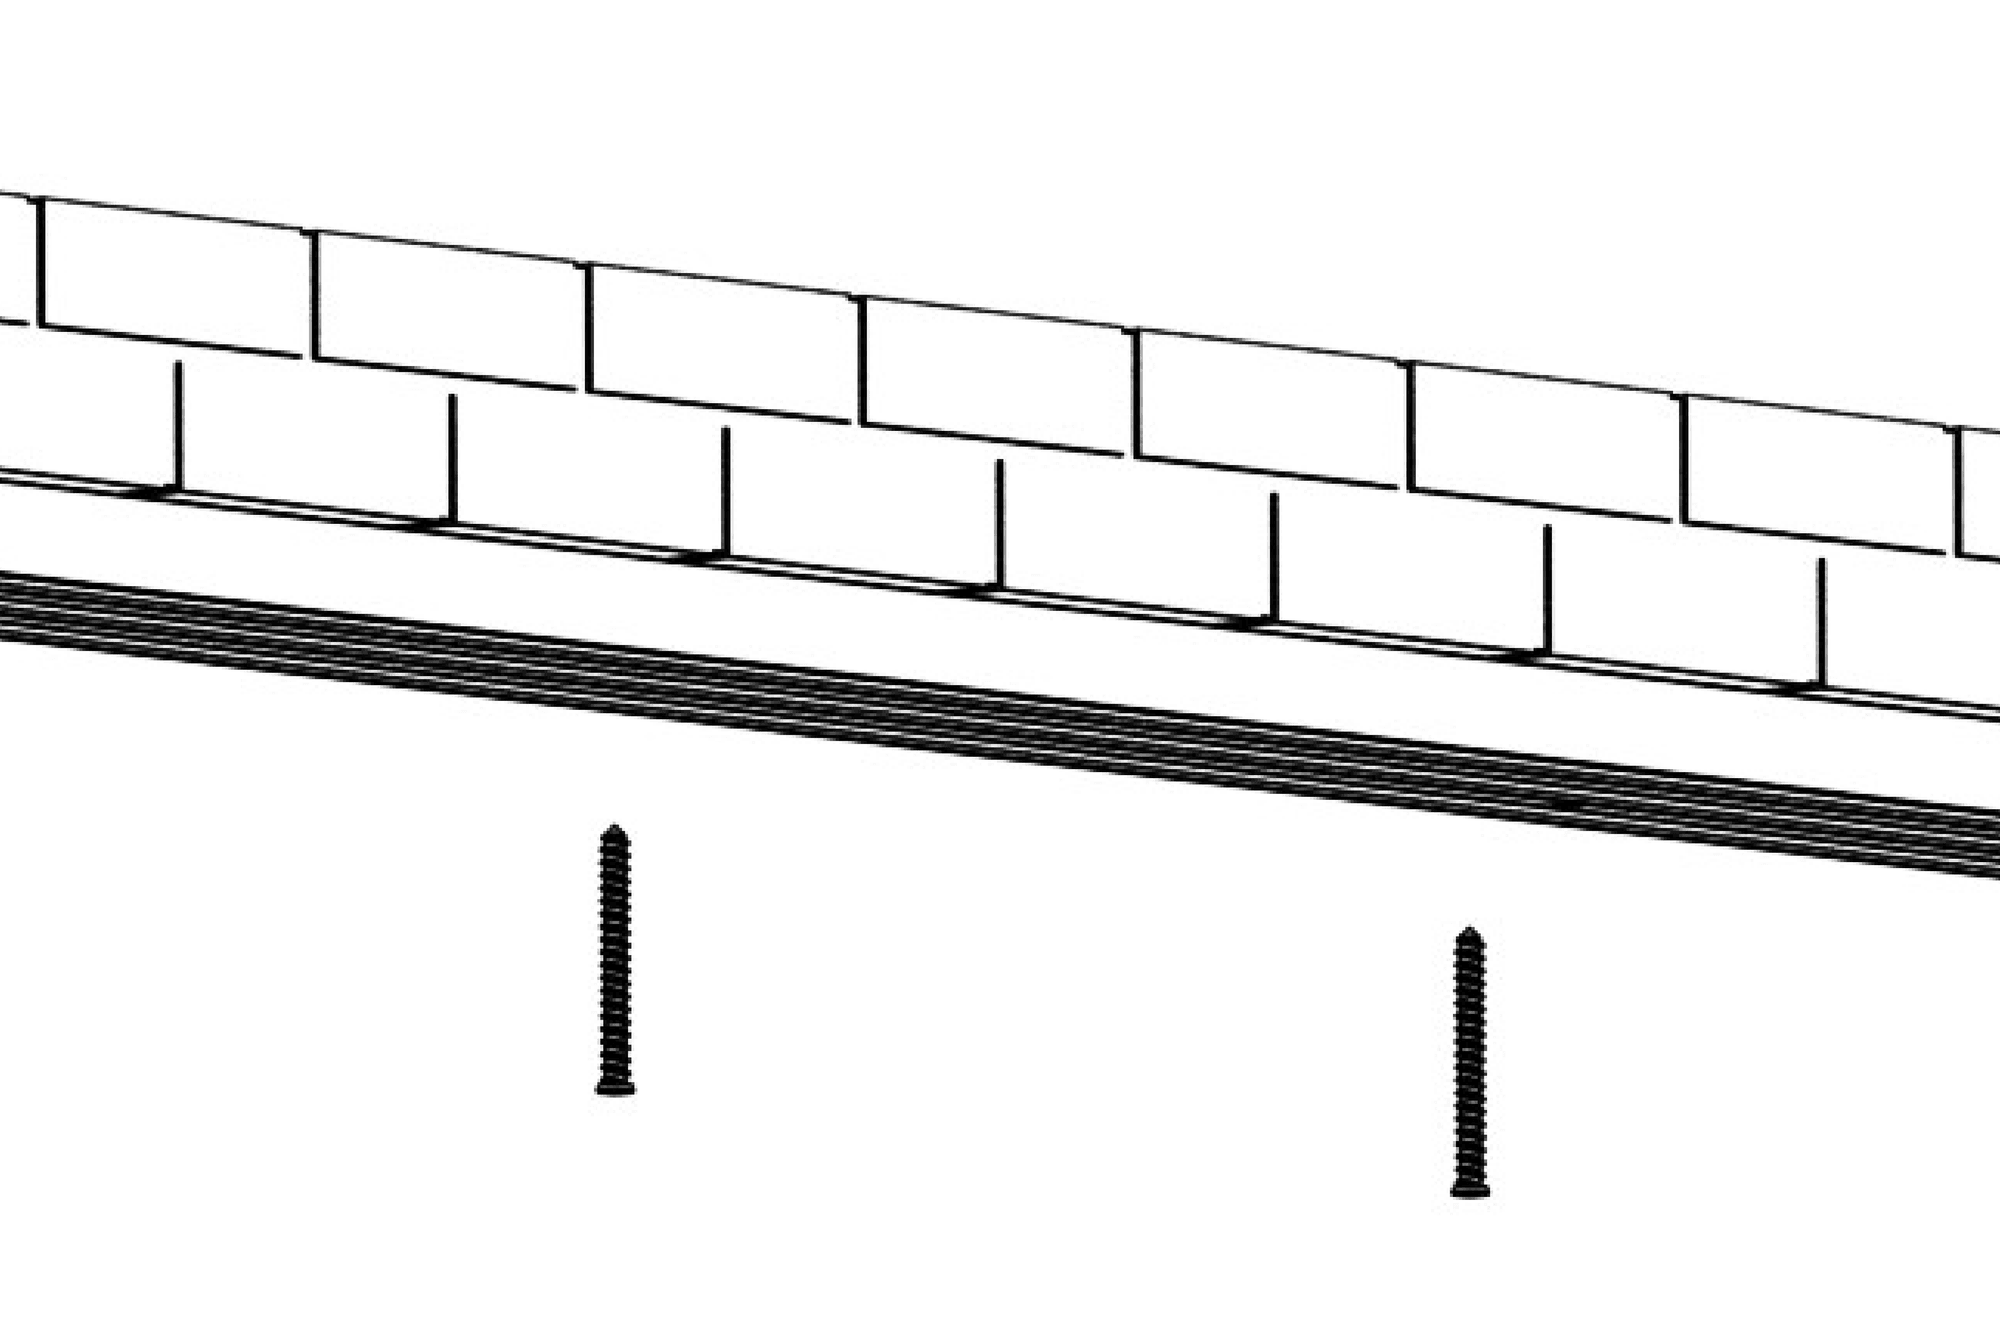
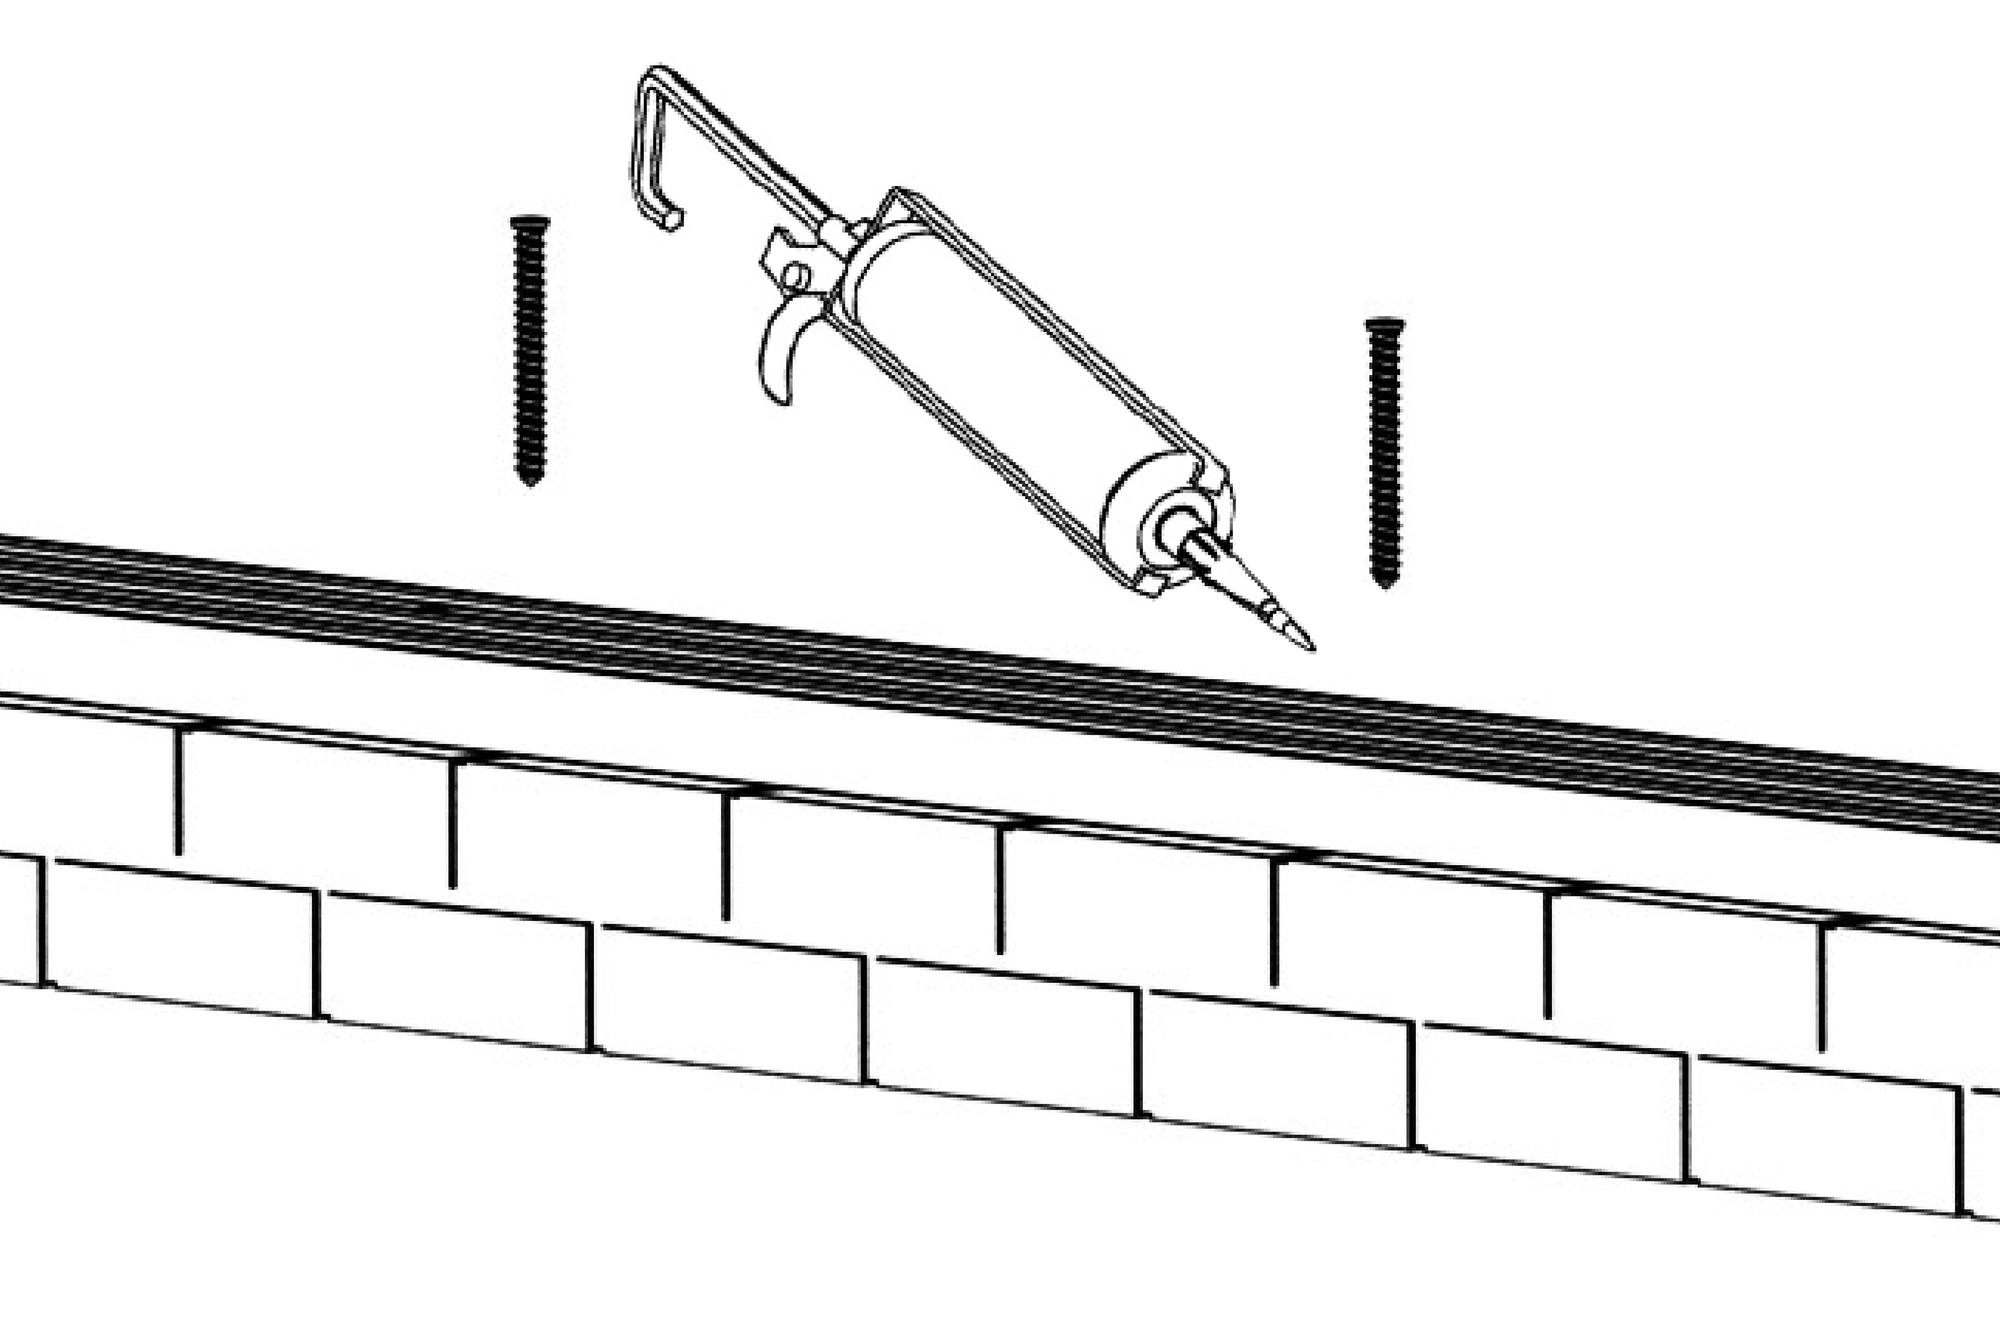
3.8 If using a drip bar, ensure that when fitted, all pre-drilled holes are filled with silicone before being fixed into position with the supplied screws - a consistent bead of silicone is required between the drip bar and the track to ensure a complete seal (FIG 3E & 3F)
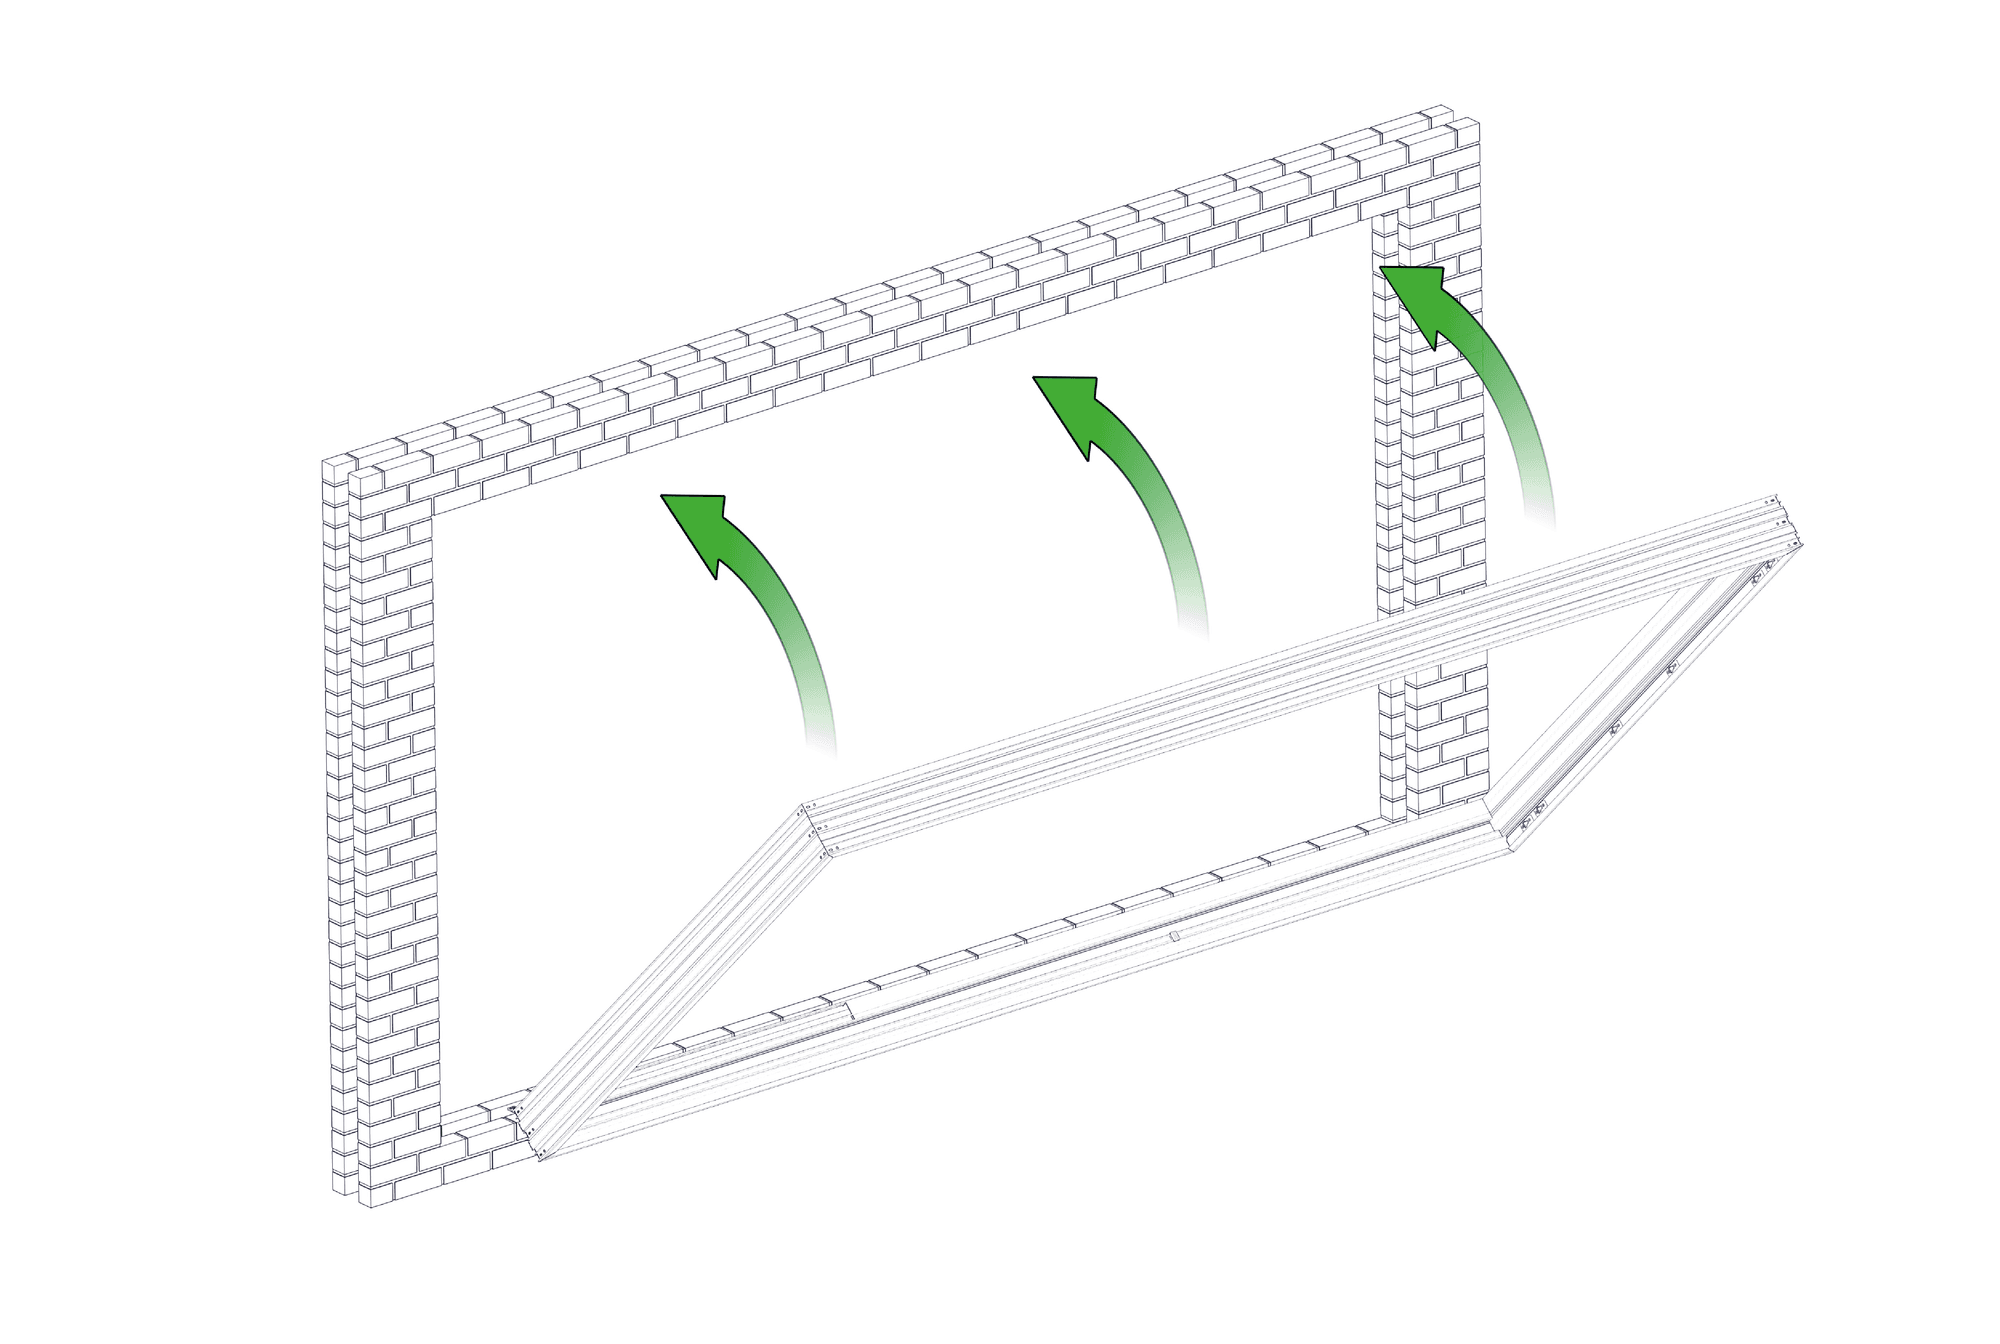
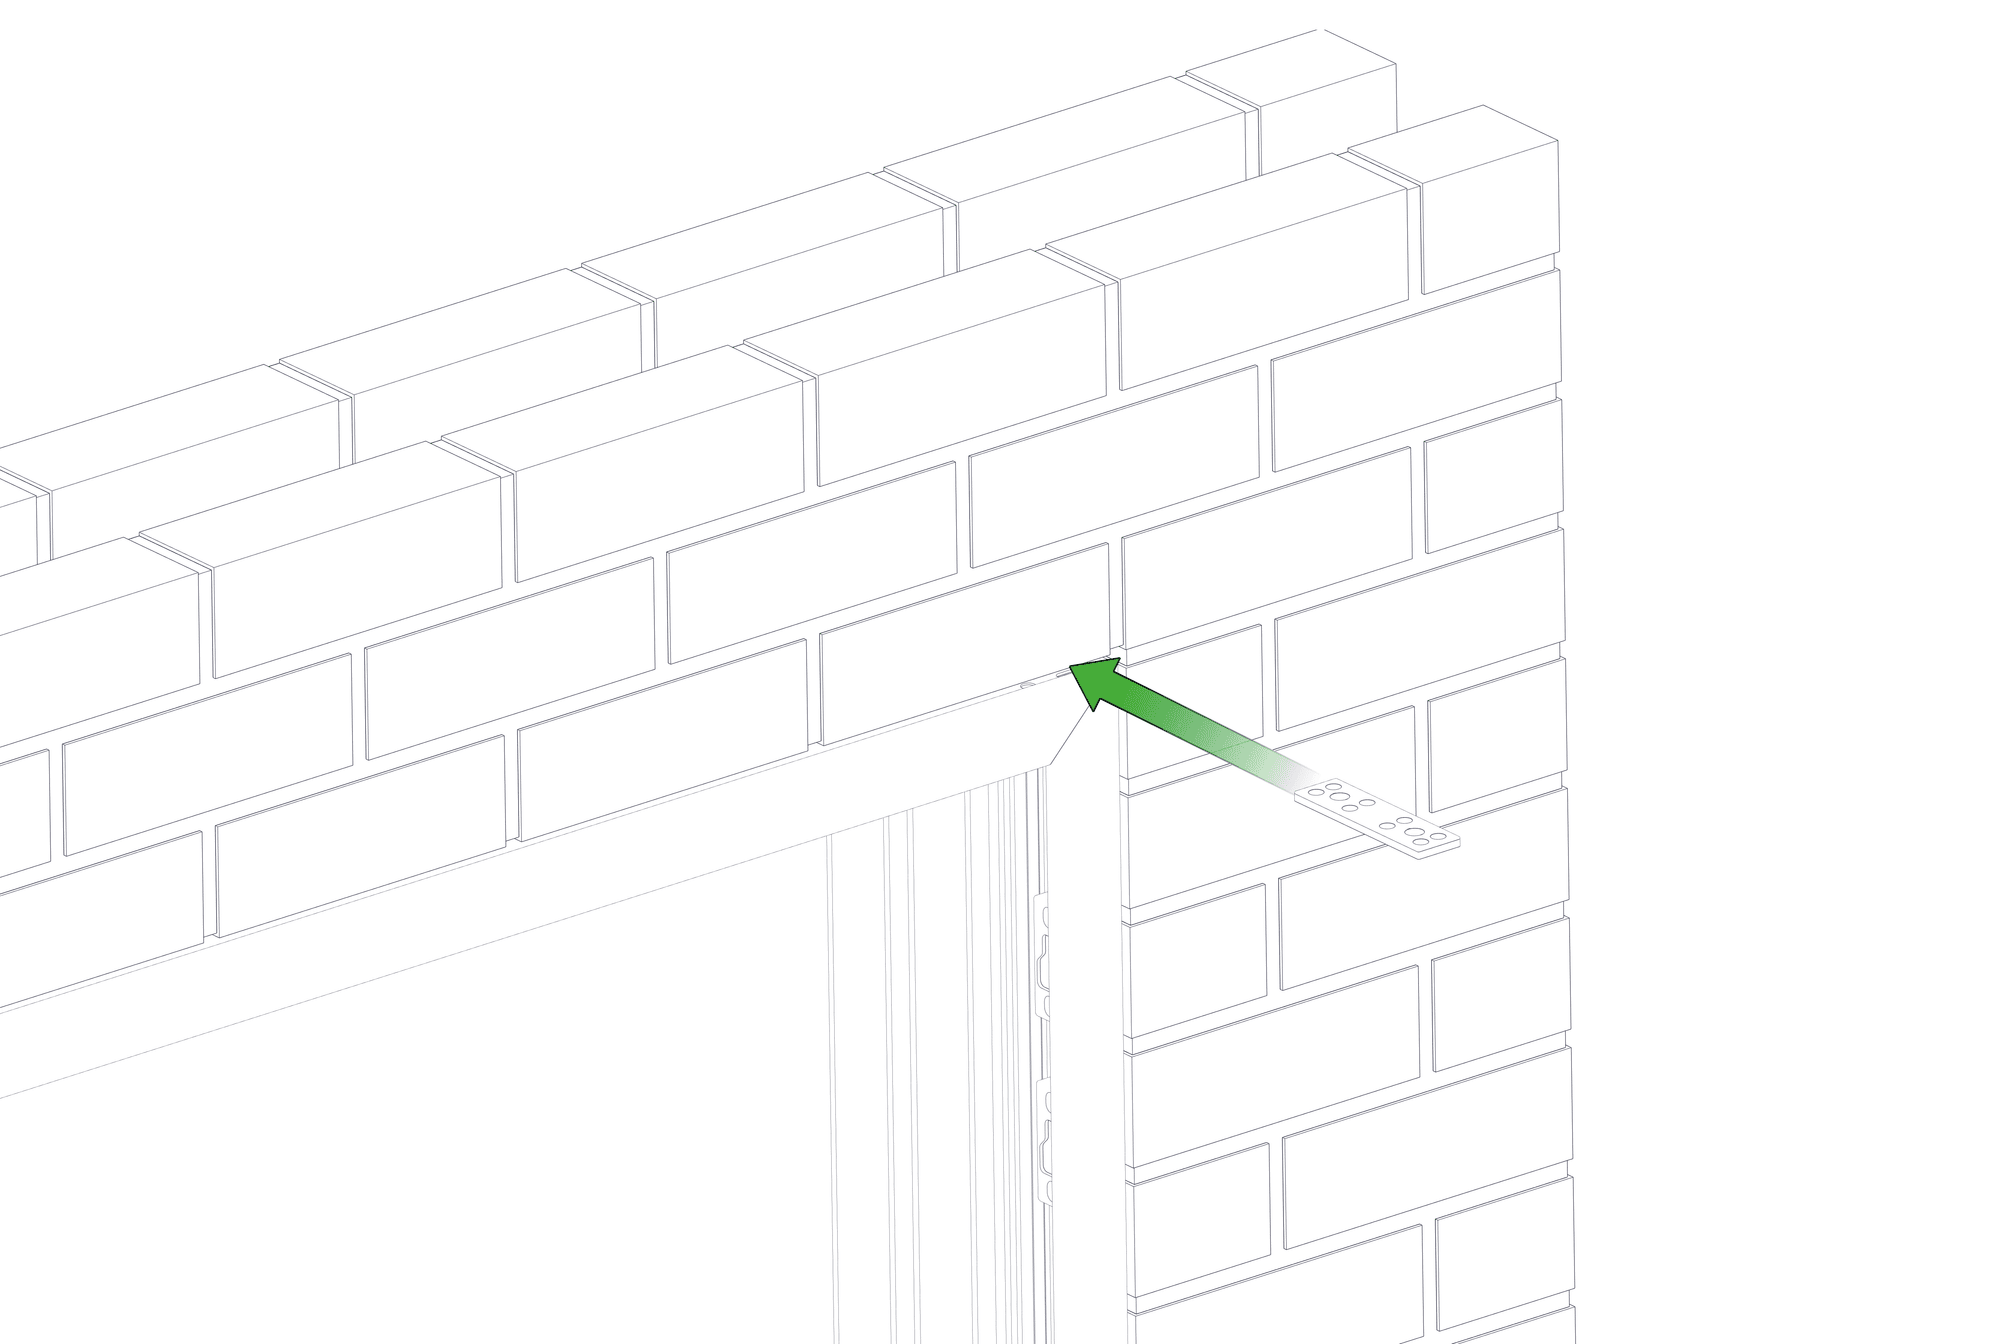
3.9 Offer the frame into the opening, and pack down above the top 2 corners to hold the frame in place - check bottom track and Jambs for level and make adjustments if necessary (FIG 3G & 3H)
3.10 Jambs must be plumb and straight – pack as necessary when fixing to avoid bowing or twisting (FIG 3I)
3.11 The top track can now be fully secured - care should be taken to ensure it is not bowed or twisted and is level along the entire length (FIG 3J)
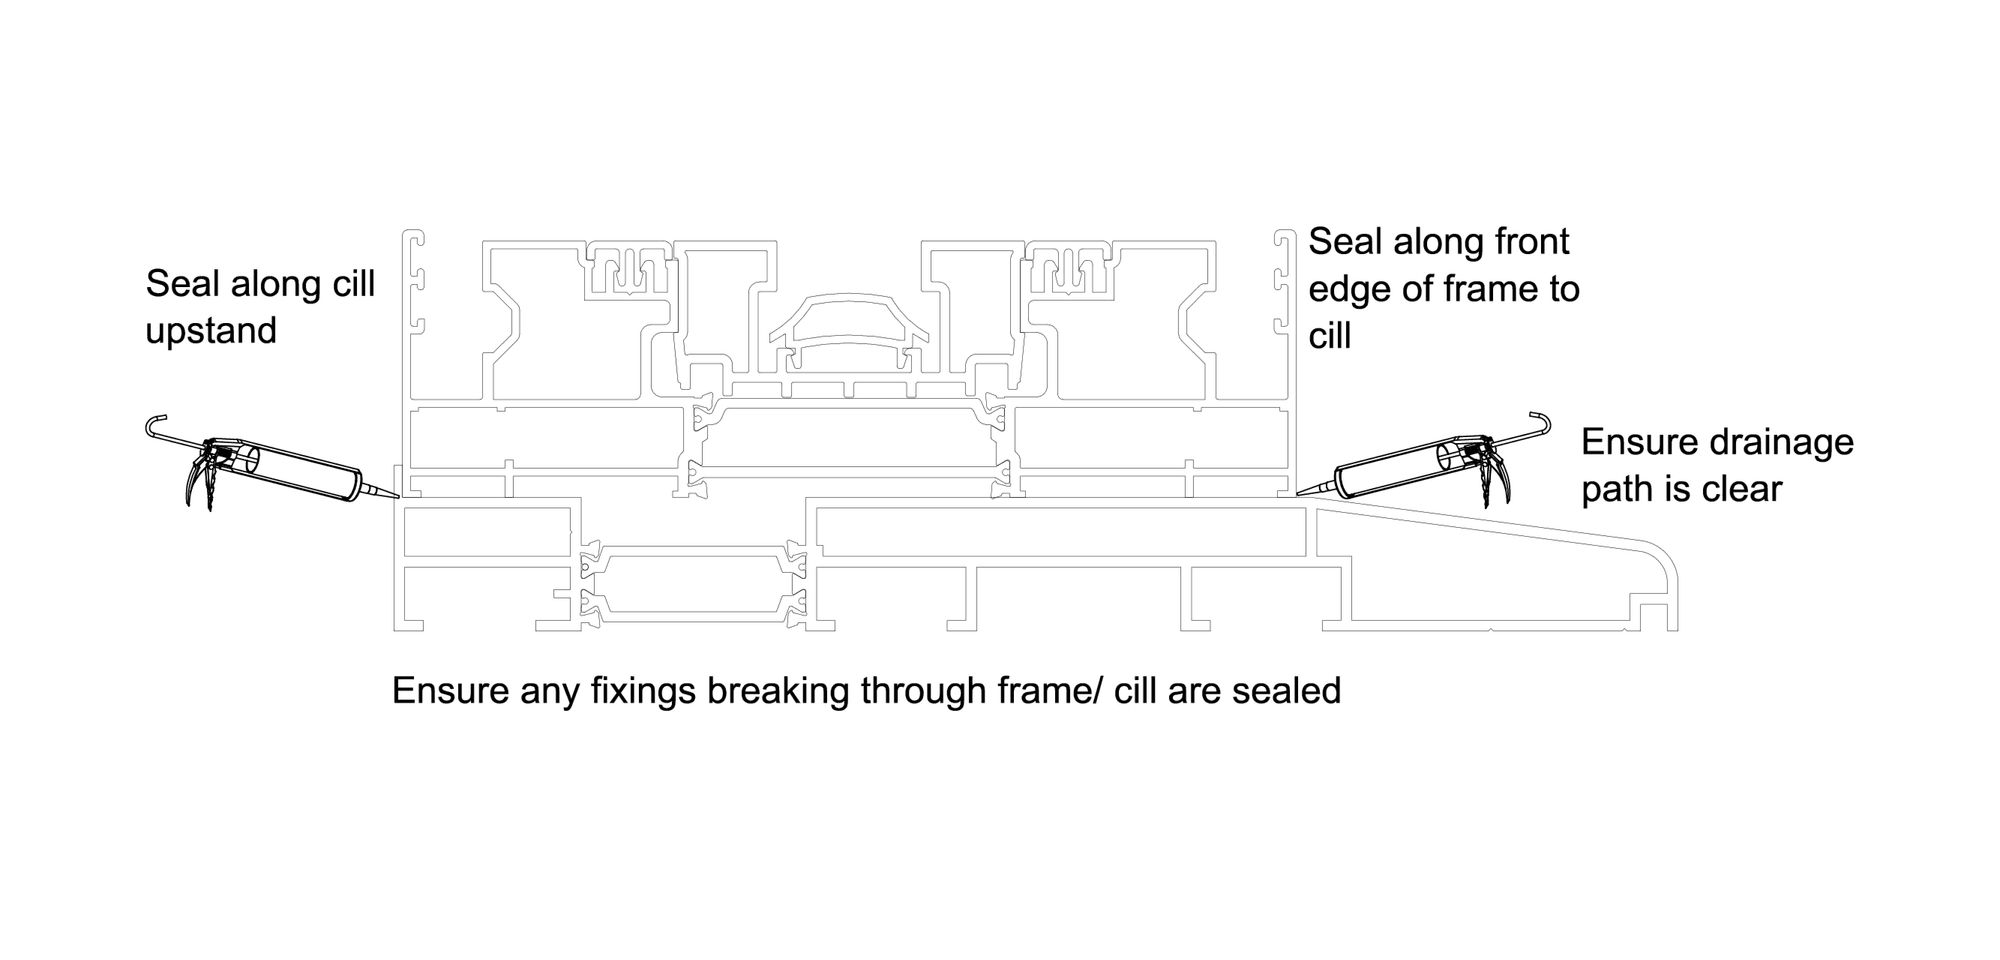
3.12 All fixings in the bottom of the track need to be sealed without compromising the drainage, ideally on the back part of the track (FIG 3K)