Glazing & Gaskets
5.1 Start with the external sash and work inwards
5.2 Check your glass units for size and depth, and that they are free from any damage
5.3 Place a 1mm or 2mm glazing packer on the bridging packers in the base of the sash
5.4 Lift the glass into place
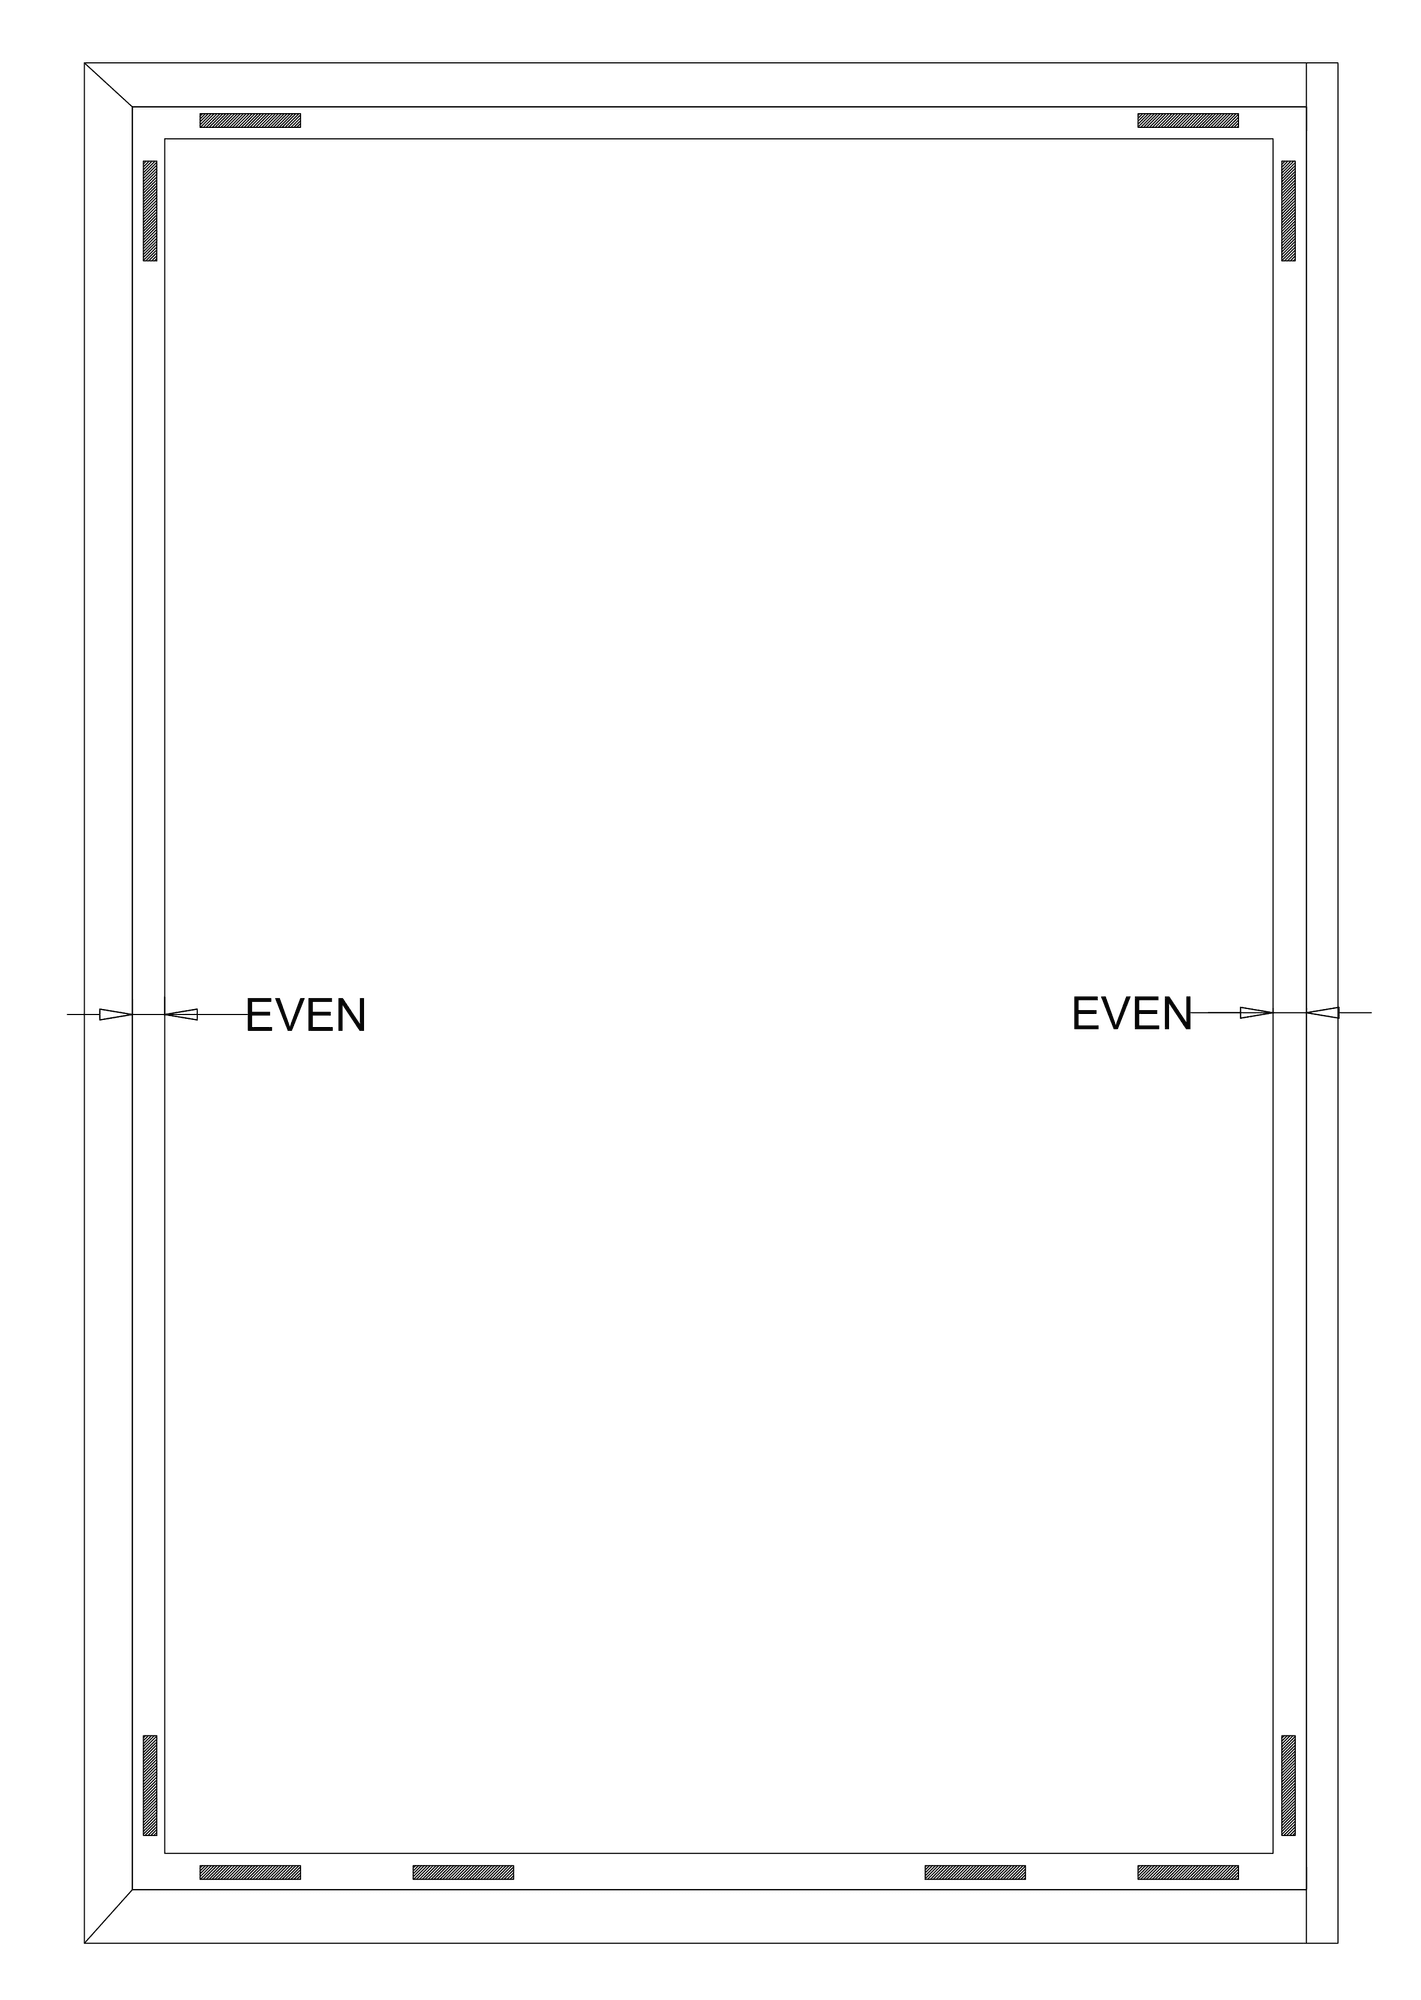
5.5 Pack the glass to centralise the glass unit (FIG 5A)
NOTE: Do not pack the glass on the bottom between the sash and glass, all packing should be placed on the bridge packers at the base of the sash.
5.6 Install the glazing beads and gaskets, except where the interlocks are present
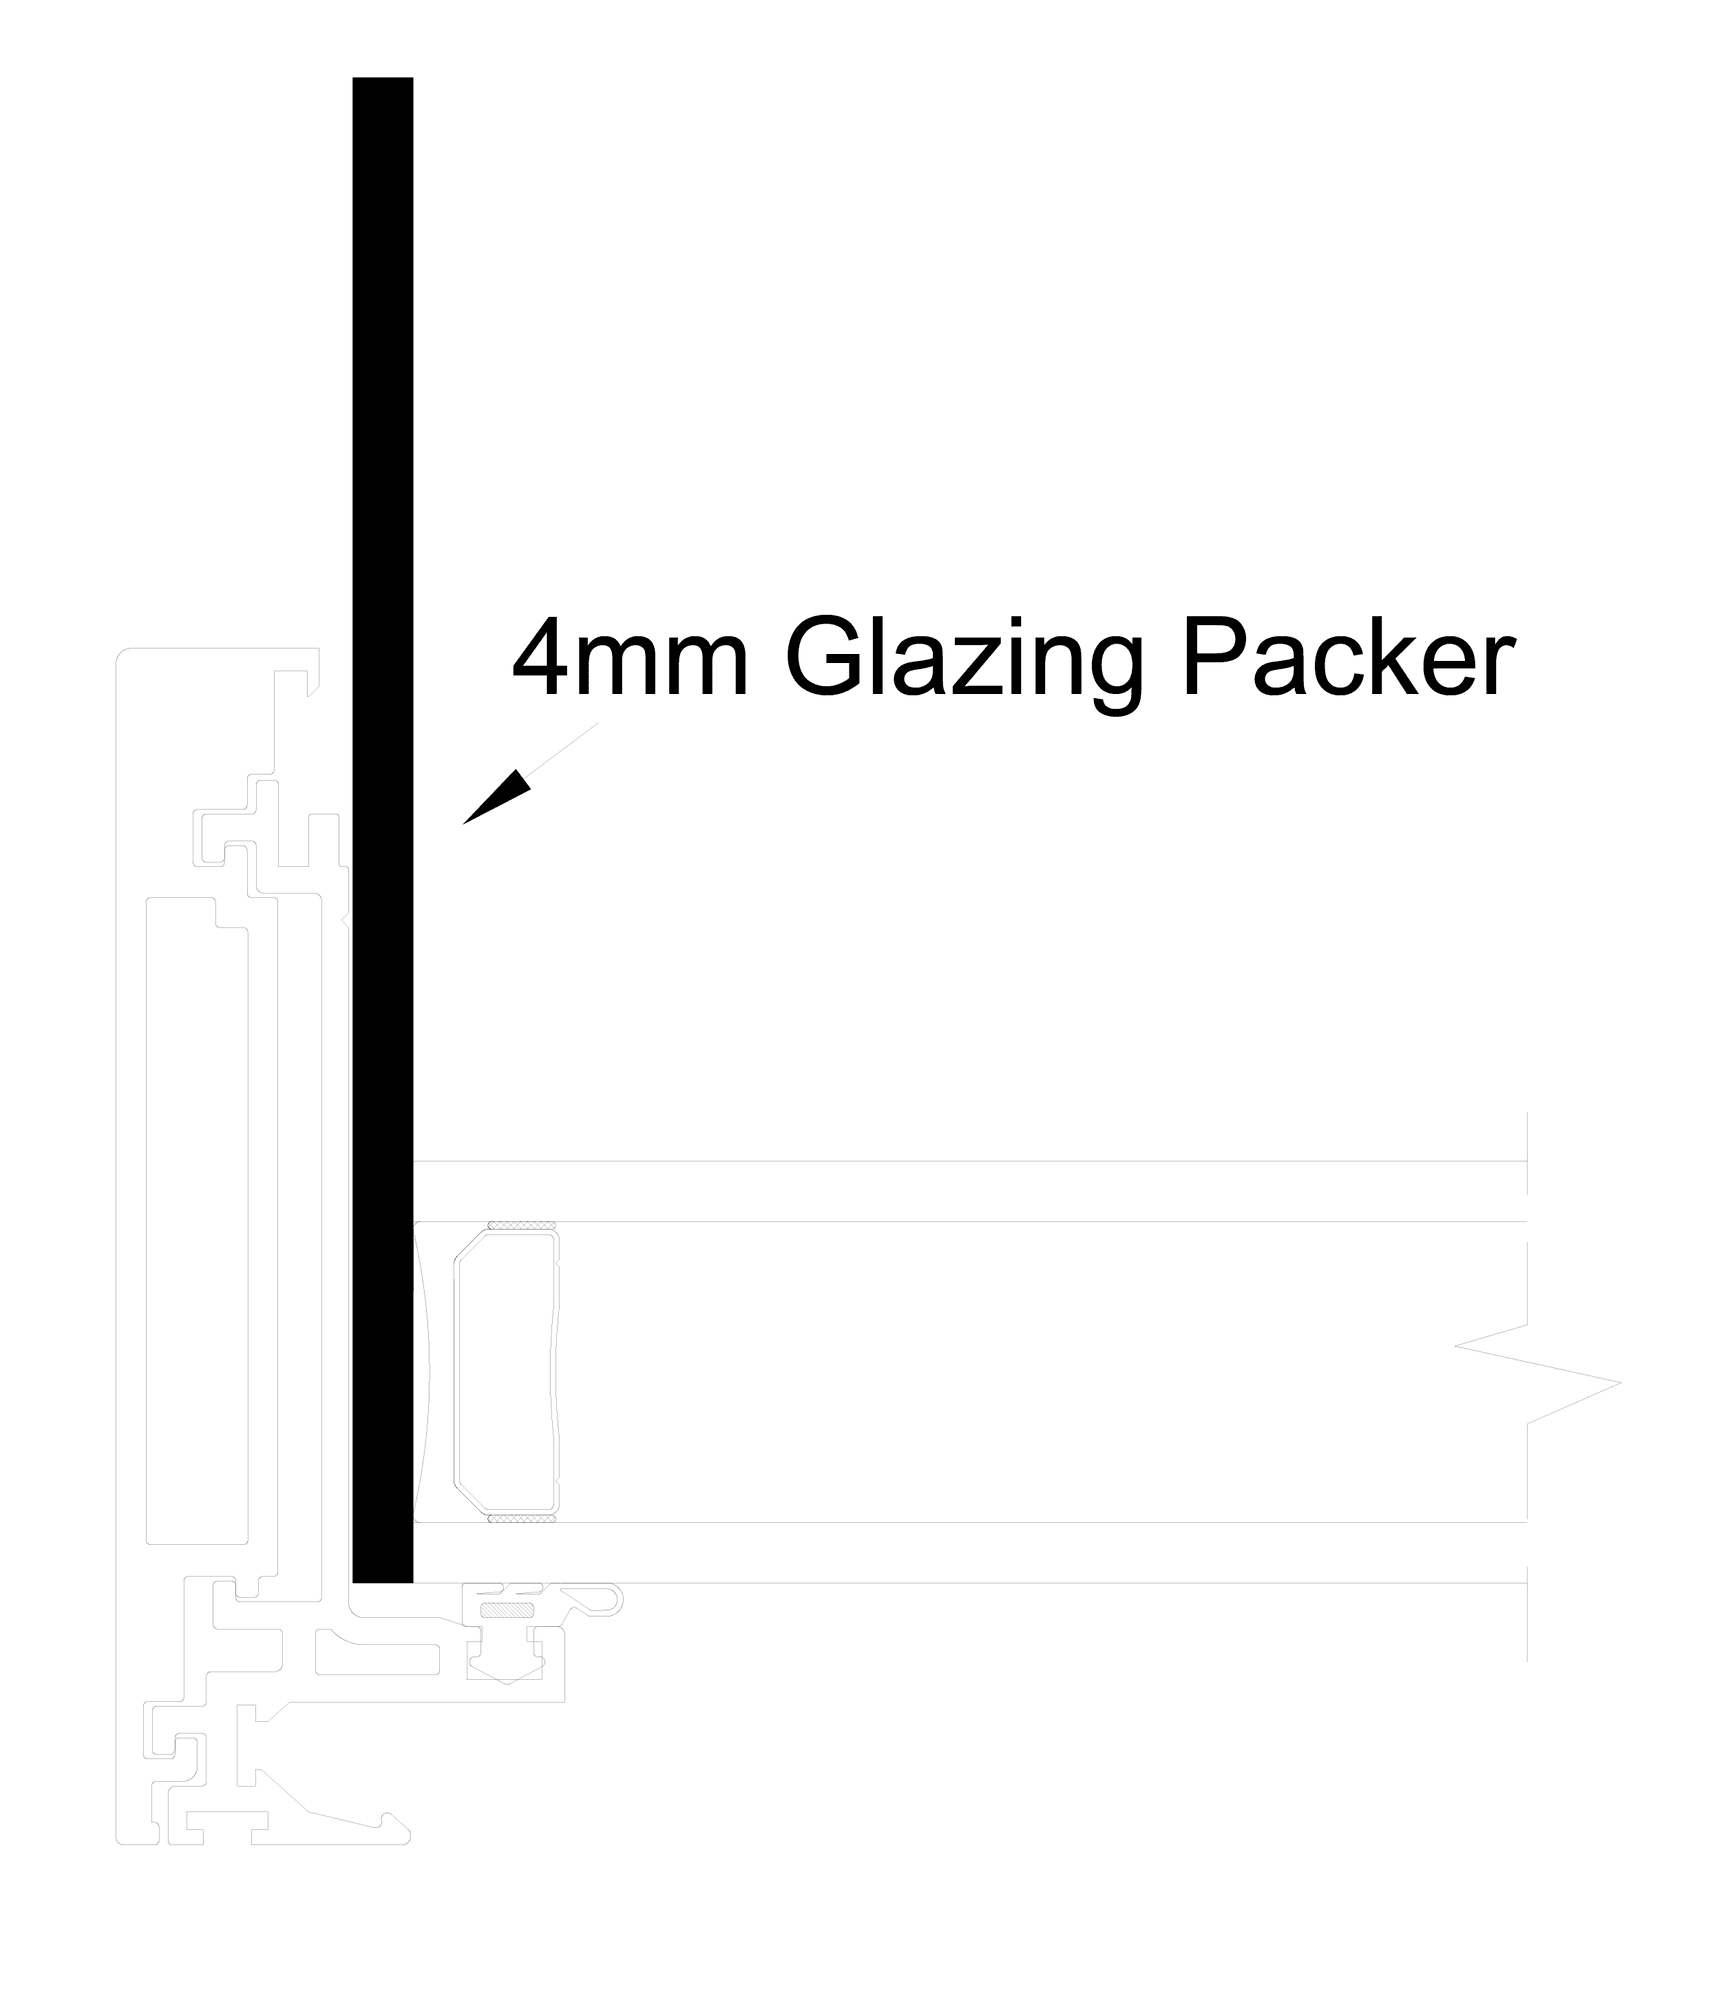
5.7 Using a glazing wedge pry the interlock away from the glazing unit placing 4mm glazing packers between the glass and the plastic interlock, to create a larger gap for the glazing silcone (FIG 5B)
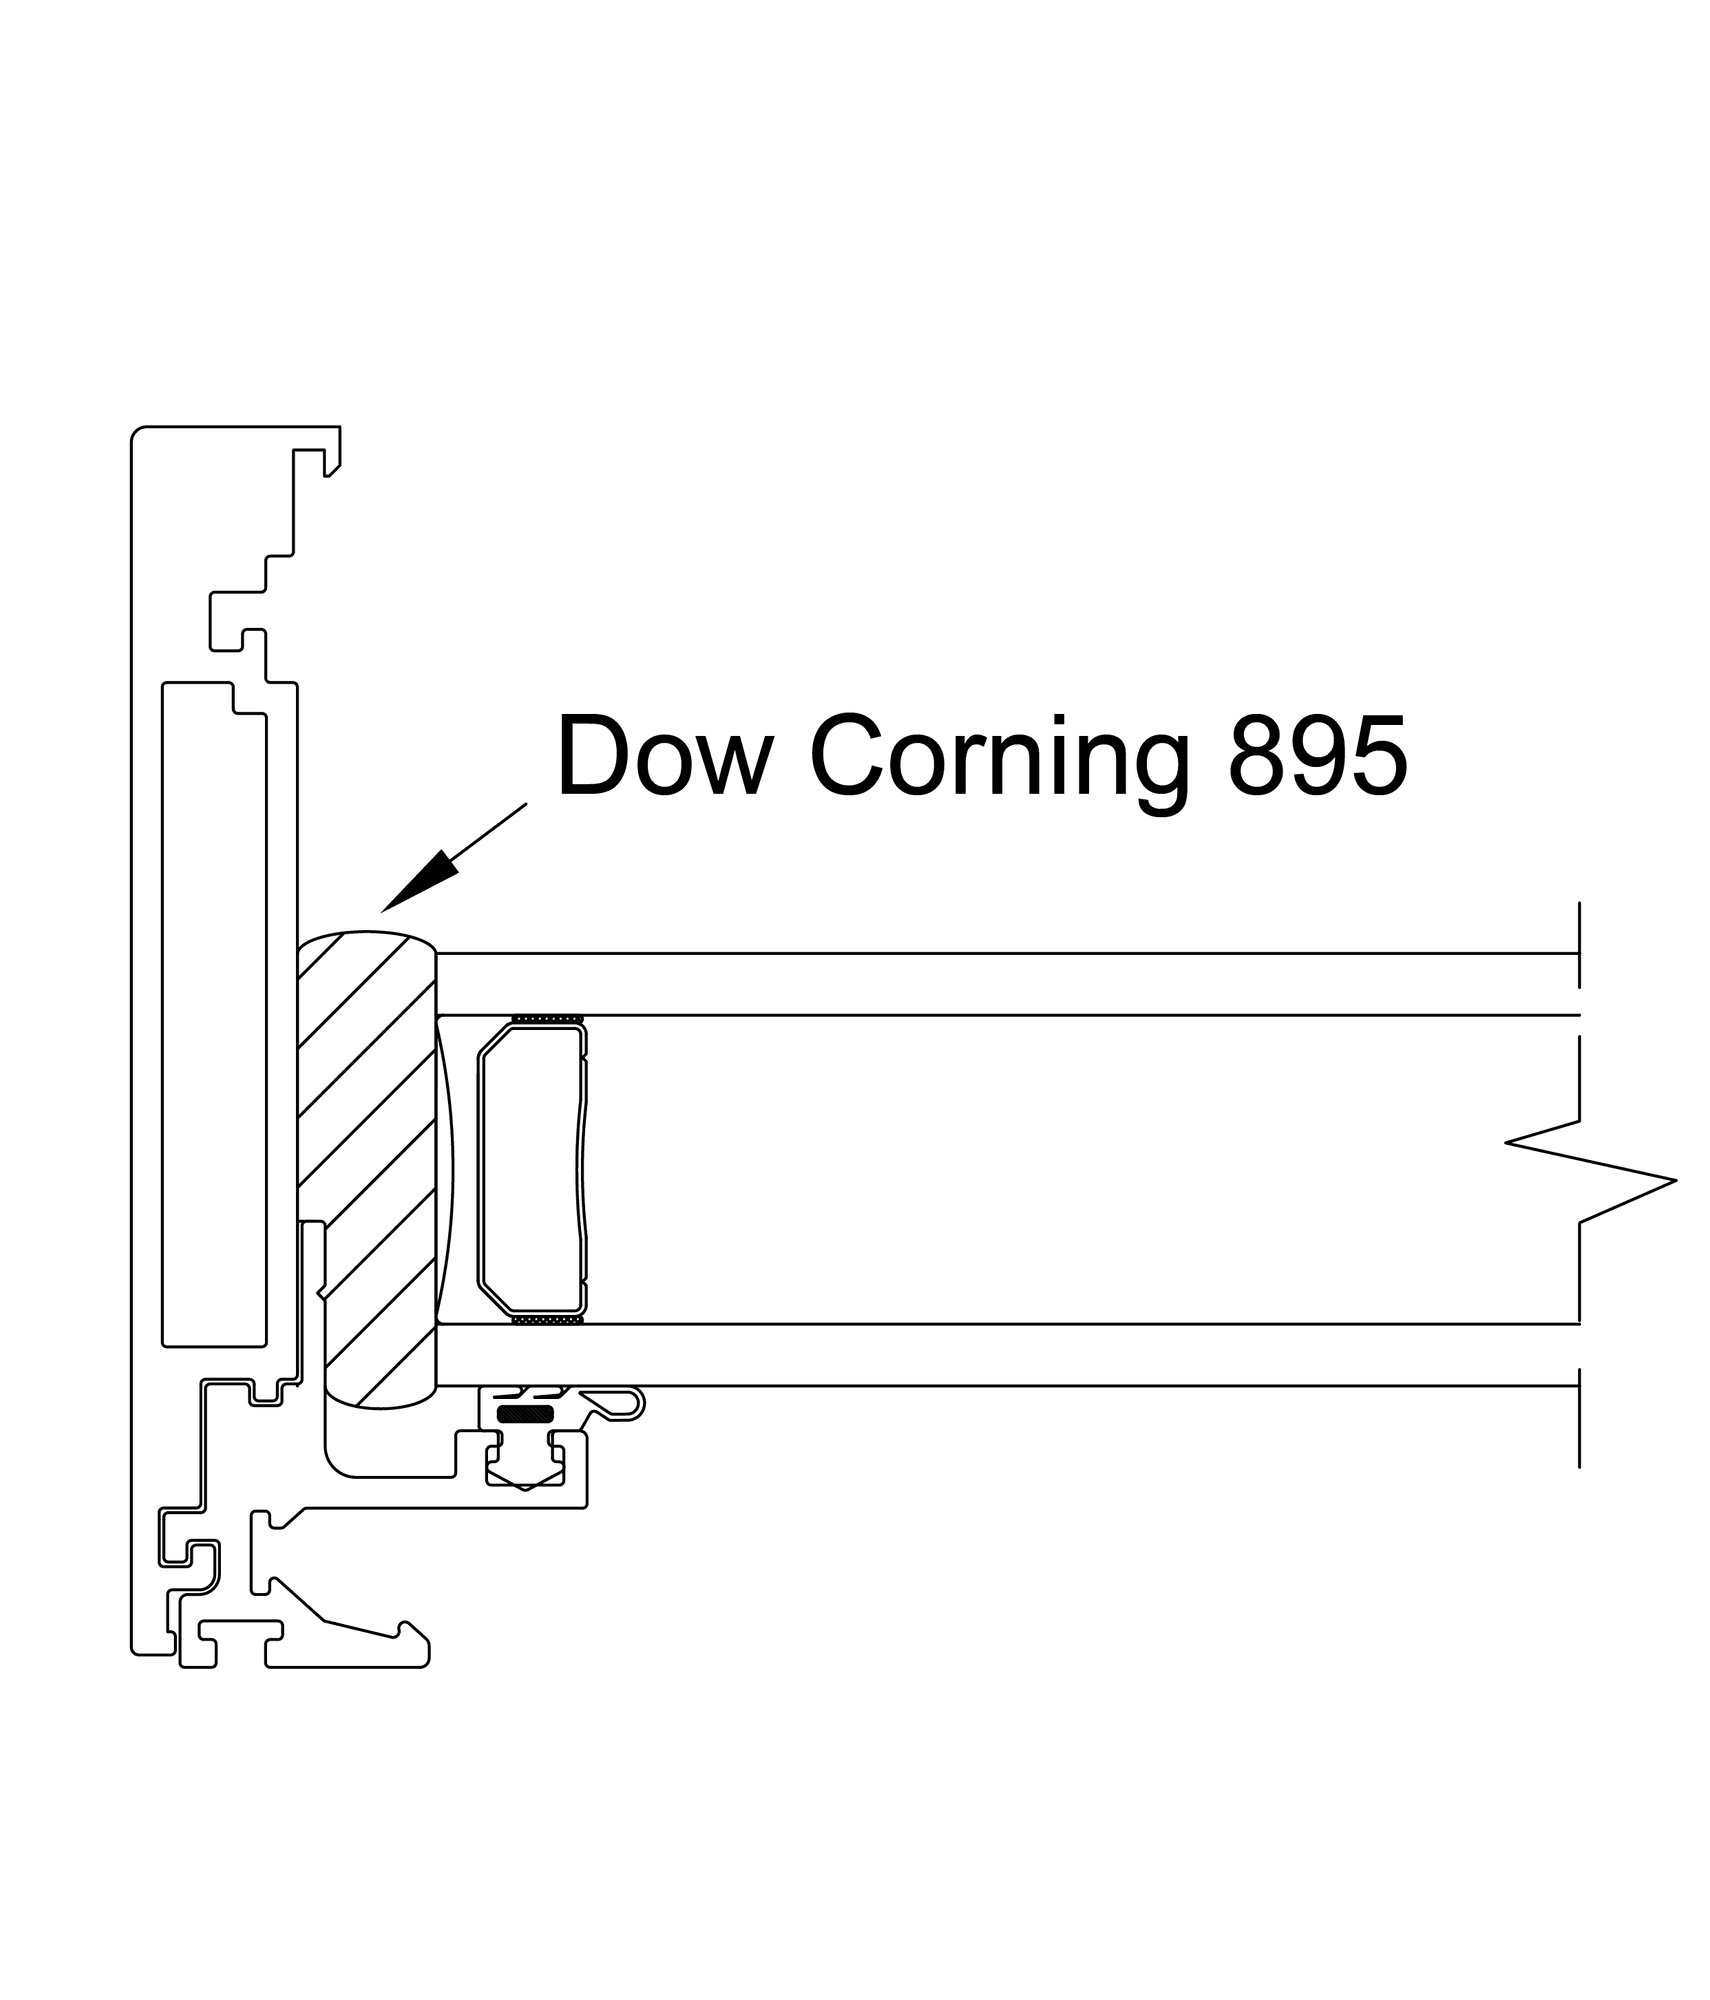
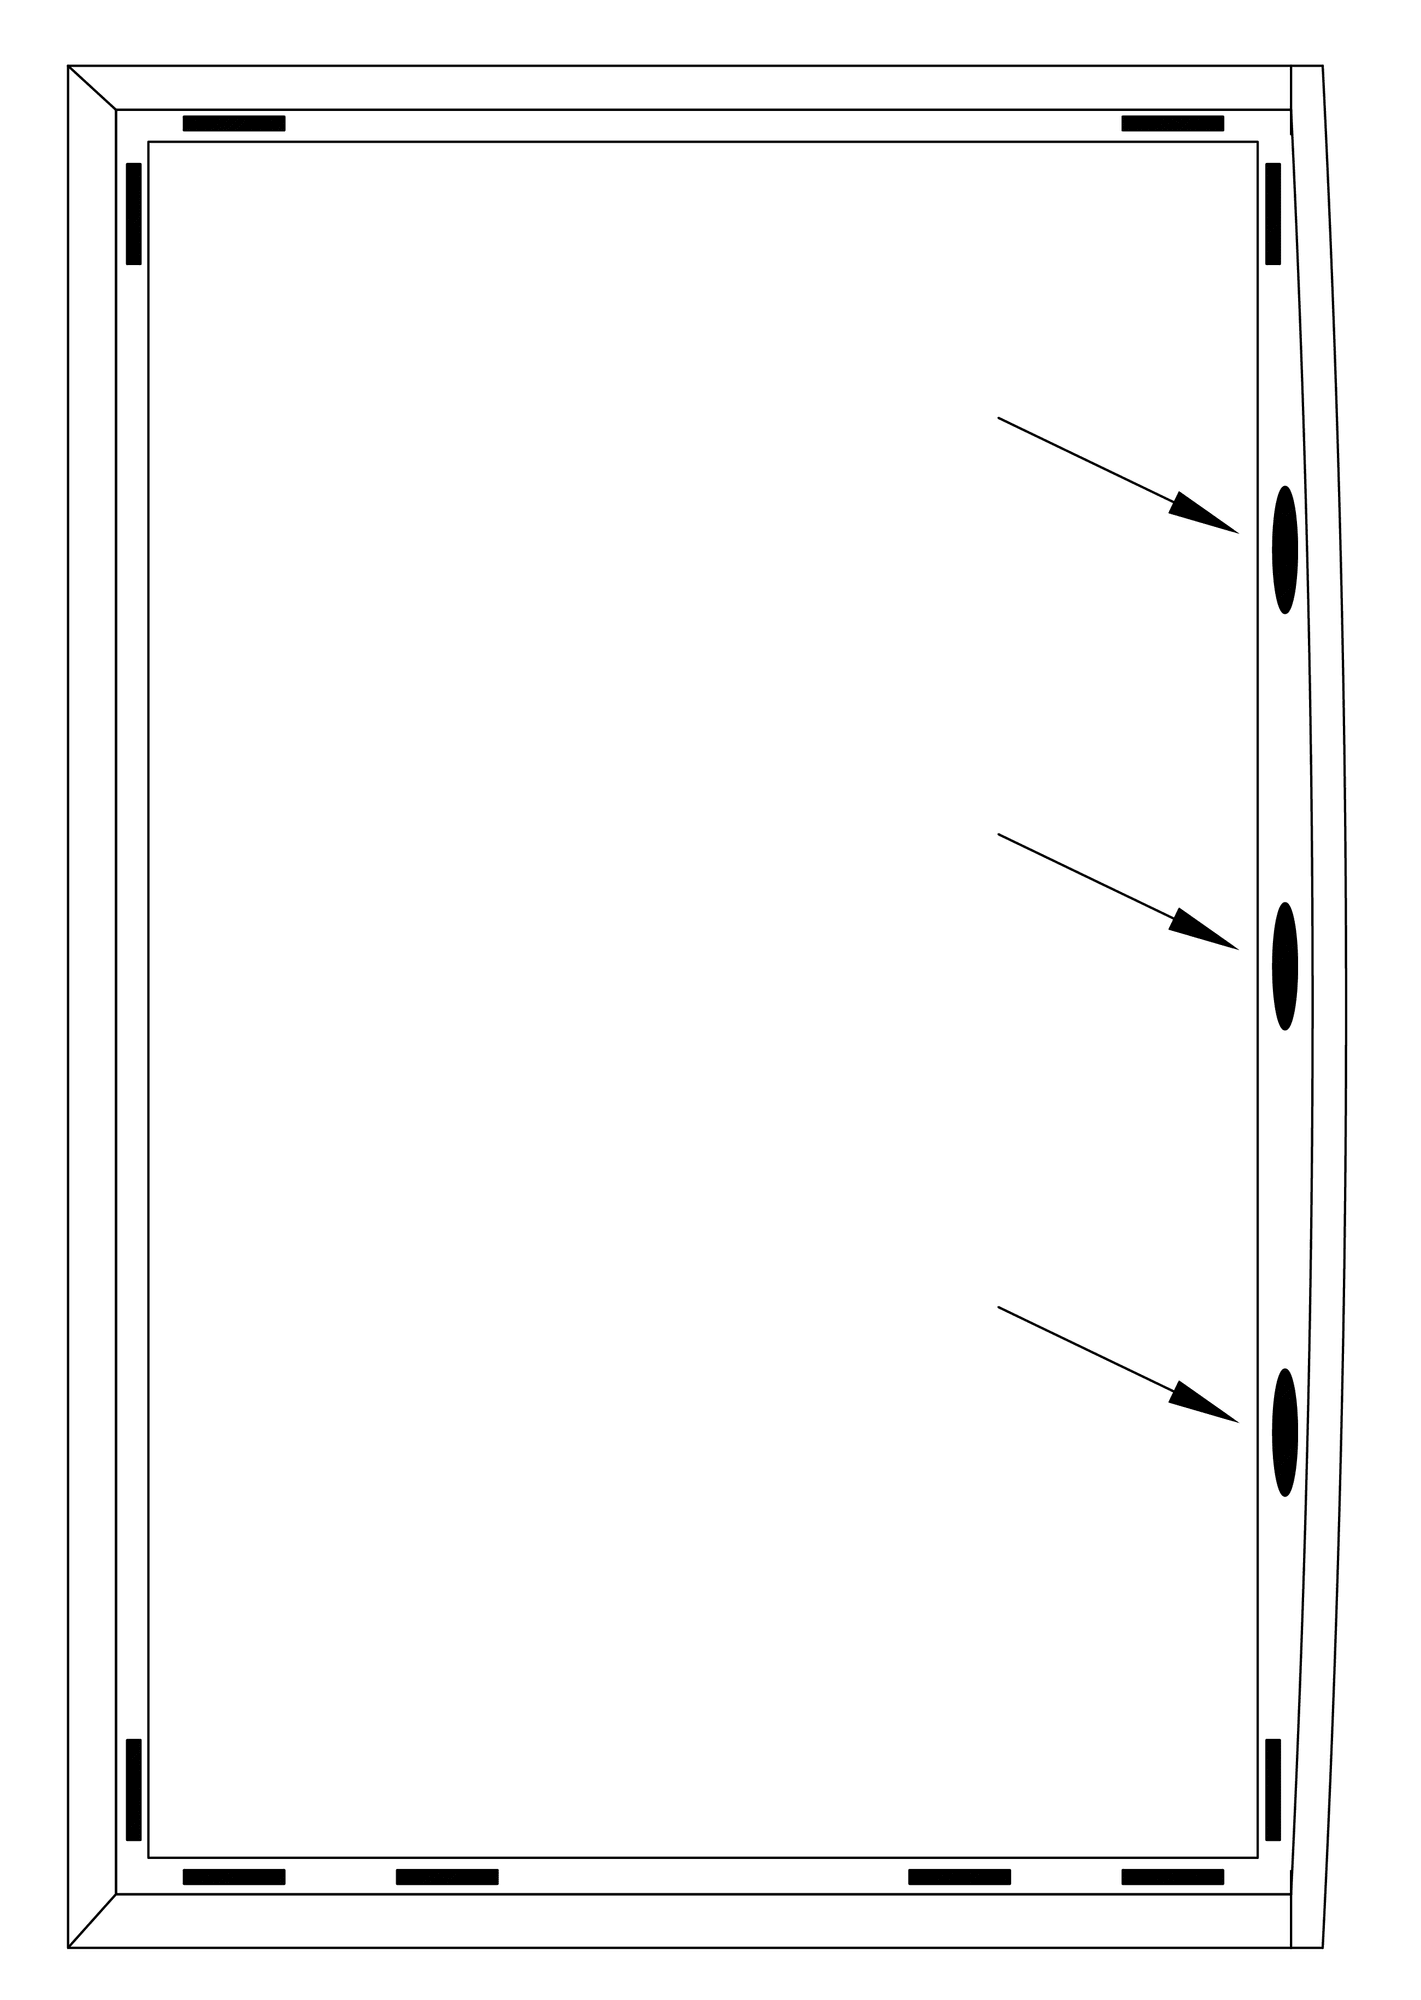
5.8 Apply 895 Dow Corning to the aluminium of the interlock (gaps between the plastic) filling the void (FIG 5C & 5D)
5.9 Remove the glazing packers and install glazing bead and wedge gasket
5.10 Using an appropriate tool (e.g soft hammer and a wooden/nylon block) tap the interlock straight and square at the points where the silicone was applied - repeat for remaining sashes.
5.12 Close sashes and check interlocks with a straight edge. If interlocks are not square tap gently where the silicone was placed. If the interlocks do not move then the silicone has started to cure, its is recommended the silicon is removed immediately from the effected area and re applied as opposed to allowing the silicone to cure fully and removal becoming more difficult - do not operate the doors for 48 hours, until the silicone is fully cured